Maple Tapping 101

Would you like to learn one of the simplest skills that fills your shelves with pure maple syrup? We promise your family will enjoy this winter hobby! If you can run a drill, boil water, and read a candy thermometer, you have the knowledge to get started. And after a few weeks, you’ll have a year’s supply of syrup and the skills you need to do this every year.

And with all the great resources here at Maple Tapper, you’ll always have support! We’re tapping, too, and we’re on call during the whole season plus we’ve shared all that we know in this blog, in our books (included in most kits), and in our new video course (here).

Are you ready to do this? Here’s three simple preseason steps you can do right now:

Step #1 (time required: approximately 15 minutes): Assemble your tools (most of which you probably have in the garage and kitchen already). Here’s what you’ll need:

  • Well-charged cordless drill (or manual hand brace) with a 5/16” wood-boring drill bit marked at 1 ½” (with marker or masking tape) from the tip
  • A small hammer
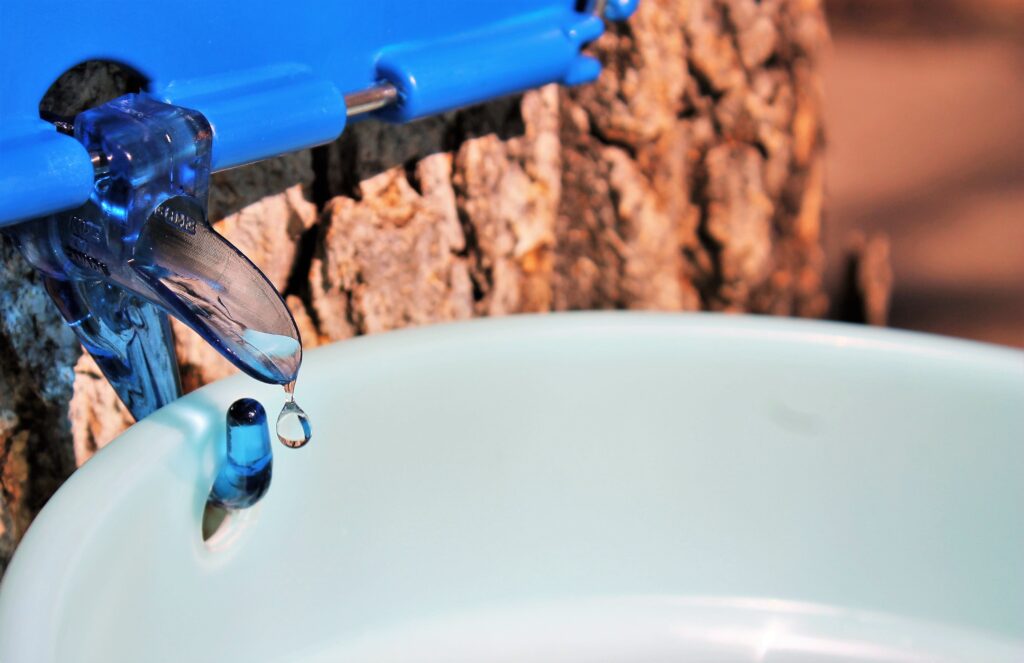
  • Spiles (the technical term for tap!) and either tubing or an all-in-one bucket system. The tubes are nice because they store flat but it’s totally your choice. (Shop gear here)
  • Collection containers such as buckets or gallon jugs with lids. Avoid containers that have held milk, pickle juice, or oily substances and do not wash with dish soap – these all can impart weird flavors to your sap.
  • Syrup making filters – try our one-quart, DIY filters (here)
  • Kitchen utensils; pots for cooking; a way to boil your sap (more on that at this article: “Maple Sap DIY Cooking Methods”; and jars with sealable lids (Mason jars with lids/rings work well)..

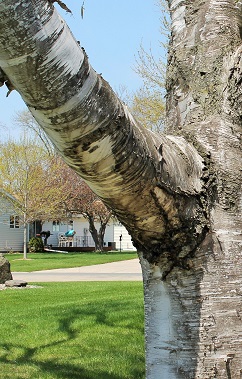
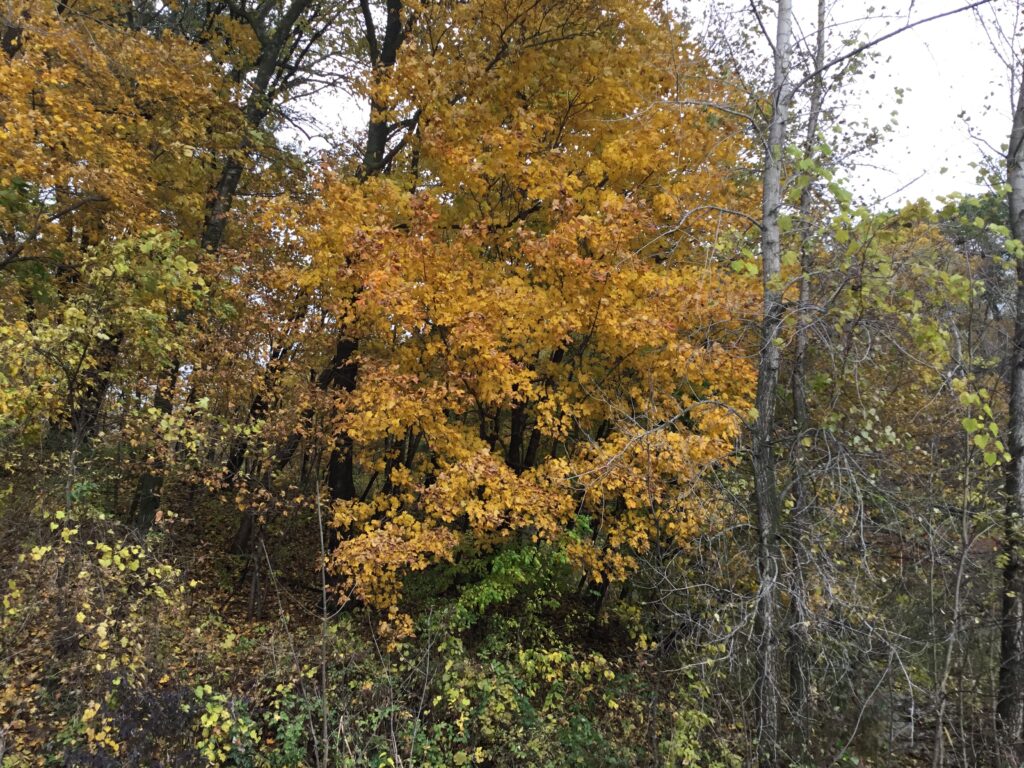
Step #2 (time required 5 minutes or less): Find a tree or two. The best choice for the sweetest syrup is to tap a sugar (or hard) maple tree but you can also try silver maple, box elder, or even birch (much more info on that in our book.). The best way to identify a sugar maple is to go out in the fall and a) look at the leaf color – sugar maples typically have the most colorful red, orange, or yellow leaves or b) look for the seeds (those little “helicopter” seeds we played with as kids). Hard maples drop seeds in the late summer or early fall and soft maples drop seeds in spring and early summer.

Over the entire season, you can expect approximately 10- to 12-gallons of sap per taphole which will boil down to about one quart of syrup. Trees can handle more than one tap but make sure you can handle more than 10 gallons! You do not have to own a plot of land in the country to find maple trees. Town syrup is just as sweet as country syrup – in fact, recent research has shown that “boulevard” grown trees actually produce more sap than forest-grown trees because they have more space to grow. The one note here: don’t tap trees that live in areas treated with chemicals such as pesticides or herbicides used on lawns.

Step #3 (time required 30 seconds per day): Watch the weather. Now comes the waiting and watching portion of this hobby (we know, this is kind of like other parts of winter.) What you’re looking for is a forecast that includes a pattern of cold nights but warming days. Sap starts to run when nighttime temps fall below freezing but daytime temps get into the 40°Fs. This usually happens around January or February and once you see this pattern forecasted for the next week or so, it’s time to get out there and tap your trees. Don’t try to get a head start by tapping before this weather pattern emerges – that could cause your spile to freeze inside the taphole which could damage the tree. Tapping is so quick you don’t need to do it ahead of time!

Step #4 (a few weeks, hopefully): Once the sap runs, you’ll go out every day and collect it at the tree. Depending on how you’re cooking, you’ll spend a few hours boiling (this is literally just boiling water so all you need to do is keep an eye on it and keep the heat on). The full boiling, filtering, and bottling process is covered in this article: “How to Make Maple Syrup”.

How to Measure Sugar Content in Pure Maple Syrup.

Pure maple syrup should be between 66 and 68 Brix when tested with a refractometer or hydrometer . . . whoa, is that too many technical terms for you? Don’t worry, this article will explain it all and show you how easy it is to use these tools and produce the best quality syrup you’ve ever had. Most professional sugarmakers (and many home hobbyists) use two tools to measure sugar content — hydrometers and refractometers. Keep reading for more info on each.

Hydrometers

The more dense the liquid, the more sugar it contains — the hydrometer measures this relative density. Most hydrometers use a common scale of degrees Brix (shown as °Bx) which shows the sugar percentage of the liquid. One °Bx equals 1% sugar content. For pure maple syrup, the target density range is between 66% and 68% sugar content (shown on the hydrometer as 66° Brix or 35.6° Baume). Many states have a required Brix scale for folks selling maple syrup so if you’re going to market you must test your syrup.

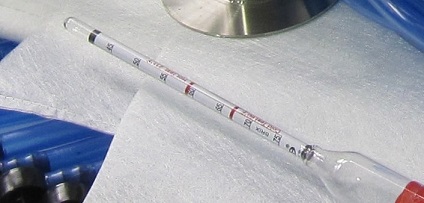
This tool is fairly inexpensive and consists of a tall metal cup and the marked hydrometer tool which looks sort of like an old fashioned thermometer but much bigger. Be sure you buy the type of hydrometer calibrated for syrup making as they’re also sold for beer and wine. It’s also another one of those tools that will last for many seasons if you take good care of it. Typically these hydrometers are calibrated to measure cold syrup (at 60°F) or hot syrup (at least 211°F) and will be marked with a cold test and hot test line.

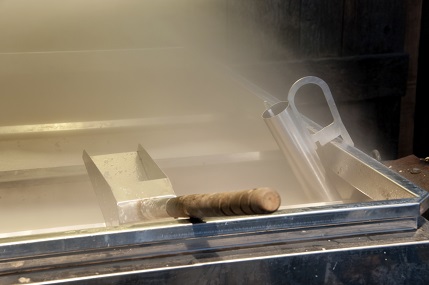
metal hydrometer tube hanging on the side of a steaming maple syrup evaporator pan
A hydrometer hangs on the side of a maple syrup evaporator as steam rises from the evaporator. The operator uses the hydrometer to test whether the syrup is done.

To use the hydrometer, first place the cup in a level pan with a lip as syrup will splash over the sides (or hang over the side of evaporator pan as shown here). Fill the cup with syrup to within ½” or so of the rim. Immerse your thermometer and make sure it reads at least 211°F if testing hot. Then carefully lower in the hydrometer – do not drop it in! It will float and the red line should be even with the surface which indicates the Brix reading. If in the proper range, return this syrup to the pan and continue with filtering and bottling.

hydrometer measurement

If you find the red line floats below the surface, syrup must be boiled longer and tested again. If the red line floats above the surface, syrup is “heavy” and too sugary or dense and you’ll need to add partially-boiled sap, cook a bit longer, and retest. While extra-sugary syrup sounds yummy, it will be more like maple sugar once it cools. After you’re done testing, be sure to rinse the hydrometer in hot water so no syrup accumulates on the device. Be careful, it is fragile!

Refractometers

Simpler to use but quite a bit more expensive, a refractometer (either manual or digital) determines sugar concentrations by measuring how light is refracted through a sugary solution. Typically a drop of sap or syrup is placed in a little cup at the end of the device and it’s held up to light (or with digital devices, just push a button). As light passes through the syrup, it’s refracted and the tool is designed to pick this up and measure it on the Brix scale. Refractometers, though, come with different scales – a low scale to measure sap and a higher scale to measure syrup.

See it in action

You know how much we love the folks at our country’s Extension offices! They provide such an incredible wealth of knowledge for all things outside and are generally pretty nice people who love to help. And they did not disappoint us here – we found this great video from the University of Maine Extension services that shows each of these tools in action and does a great job explaining how they all work.

If you’d like to learn more about other steps of the sugarmaking process, click here to look through our library of How To articles.

How to Tap Maple Trees

Making maple syrup is an age-old activity, the sugarmaking process is not complicated, and you can easily learn everything you need to know in one season. Once you have the tools assembled, it really takes less than 5 minutes to tap a tree. This section will first give you step-by-step tapping instructions and then answer a few common questions people have about sugarmaking. Much more detailed information can be found in our book, Guide to Maple Tapping, which is included in every kit and also available electronically. Additionally, our video and article library includes how-to videos and instructions on selecting a tree, drilling the hole, and using each of our systems. Please check back often as we’re updating all of these resources with new material.

Step One: Identify and Mark Your Trees

Hard maples, also called sugar maple, black maple, or rock maple, have the highest sugar content and produce the best tasting syrup. You can also tap the red or silver maple but the sugar content is lower so you’ll have lower syrup yields and longer boil times. Folks also tap the box elder tree and the finished product has a heavy, sorghum-like flavor.  

The best time to identify a maple tree is in the summer or fall when it is in full leaf. Maple trees all have the same characteristics with slight and subtle variations between each subspecies of tree. Consult an illustrated tree reference guide for more details. Common but distinctive features of maple trees include:

  • Helicopter seeds (technically called samaras) with two v-shaped wings that flutter down and away from the tree. Hard maples drop seeds in the late summer or early fall and soft maples drop seeds in spring and early summer.
  • Separately lobed leaves – typically five lobes prominent valley between each lobe. Hard maples typically have a “U” shaped valley and soft maples have a more “V” shaped valley.
  • Hard maples have darker green leaves with smoother points and the most vivid orange, red, and yellow fall colors. Soft maples have a lighter yellow-green color, much pointier leaves, a white or silver underside, and mostly yellow fall colors.
  • Hard maples have light to dark gray bark with narrow, deep furrows while soft maples have a more layered, flaky bark.
  • Hard maples are most prevalent in southern Canada, the Upper Midwest, the Northeastern states, and down the eastern seaboard of the United States. Sugar maples can be grown outside these areas but require climates with a freeze/thaw cycle to produce tasty sap.

Once you’ve identified the tree, choose a tree at least 12” in diameter with a full canopy of strong healthy branches. Tie weather-resistant marking tape around your tree so you can easily find it in the spring.

Step Two: When to Tap

The tapping season varies from region to region but generally starts in early March and lasts until mid-April. When the sap starts and stops running depends greatly on day and nighttime temperature fluctuations. Watch the weather forecast – sap starts flowing when the temperatures are below freezing at night but climb to the 40°F and above range during the day. If this freeze/thaw pattern is predicted, get out and tap your trees! Don’t be tempted to do it early, though, as this could cause the sap to freeze in your spiles which could damage your equipment and the tree. Remove your taps when you have enough sap or when the tree buds out as that can lead to an off or “buddy” flavor in the finished syrup.

Step Three: Drilling the Taphole

No matter what system you choose, the drilling procedure is the same. The only variation is the size of drill bit needed – most of our kits use a 5/16” spile so that is the size drill bit you’d need. Select a wood-boring drill bit and mark it with tape or a marker at 1½” from the end. This mark will show you where to stop drilling so you only go into the sapwood. Pick a spot on the tree trunk approximately four-feet off the ground below a large branch or above a large root. If using a bucket or jug that will sit on the ground, be sure your tubing will reach the bucket even after the snow melts underneath it.

Drill at a slightly upwards angle into the tree and do not go deeper than 1 ½”. Shavings that come out of the hole should be creamy or light yellow and sap will most likely start running immediately.

Step Four: Inserting the Spile

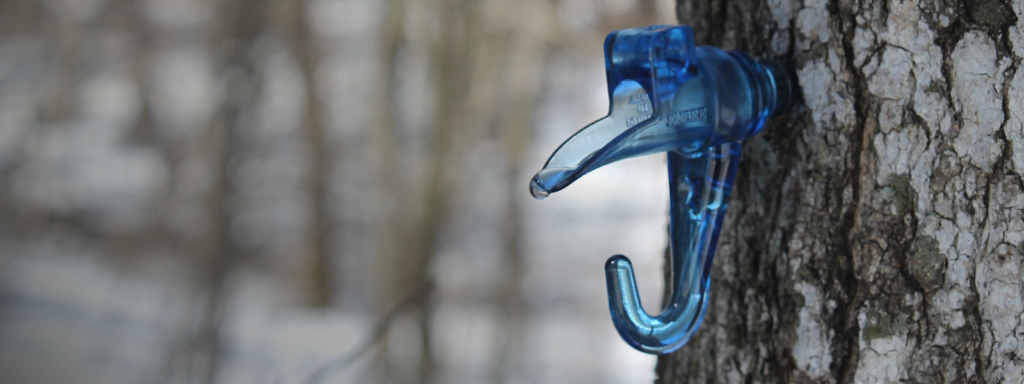
Once the hole is drilled, you simply insert the spile, gently tap it in with a hammer until it feels snug, and attach your bucket, jug, or bag to collect sap. This tap will stay in the tree for the entire season.

Step Five: Collecting Sap

Each day, you will come back to the woods to collect your sap. Sap left sitting in buckets can grow bacteria – this is not harmful as the sap will be boiled but the bacteria will eat away at your sugars which will affect the syrup’s taste. If you can’t boil your sap every day, it can be chilled for a few days until you’ve collected enough to cook. Normally, a single taphole produces between one quart to one gallon of sap per flow-period (which can last a few hours or more than a day.) Please refer to the section “How to Make Maple Syrup” for more information on filtering and boiling down your sap.

Step 6: End of Season Chores

Once you’ve collected enough sap or the trees bud out, simply pry the spiles from the tree with a small claw hammer. The taphole will heal over the summer and the same tree can be tapped year-to-year, although you cannot reuse the same taphole. Thoroughly rinse all of your equipment – do not use detergents – let air dry and store away for next season.

A Few Common Questions

Do I need special tools for tapping?

Yes: you will need spiles or taps, something to collect your sap in, and a method of attaching it to the spile. Two of the kits we have available are all-in-one systems where the spile, hook, and bag or bucket all fit together right on the tree. We also sell a tubing kit which comes with the taps inserted into the lengths of tubing which you then can direct into a bucket or use as droplines connected to a common line that leads into a bucket. 

You will also need to take a few extra tools with you to the sugarbush – most of which you probably already own. A few necessities include: a drill with a wood-boring drill bit (5/16” or 7/16” depending on the spile you’re using); a marker; a small hammer; and a few five-gallon, food-grade buckets to transfer your collected sap. Depending on which type of kit you buy, you might also need jugs or buckets for collecting at each tree. Our deluxe kits include many of these extra tools.

What’s the difference between a 7/16” and a 5/16” spile?

Previous generations of sugarmakers used a 7/16” spile but research in the last decade has shown that a 5/16” spile (sometimes called the “health spile” or “tree saver spile”) causes less damage to the tree, allows for faster taphole healing, and does not reduce the sap yield when used with gravity systems such as tubing or buckets. Whenever possible, Maple Tapper uses the 5/16” spile in our kits.

How much sap or syrup will I get from each taphole?

The amount of sap each taphole yields varies greatly depending on the tree, the time of year, environmental conditions such as the weather and soil conditions, and even at what point you are in the tapping season. In a normal season, a single taphole produces approximately 10- to 12-gallons of sap. Your finished yield of syrup will depend on the sugar content of your sap. Generally, assume a 40-to-1 conversion – so 12 gallons of sap will boil down to 1 quart of syrup. With this ratio in mind, you’d need four tapholes to produce one gallon of syrup for the season. 

What parts of the country produce maple sap?

Because the sap “run” is triggered by the freeze-thaw cycle, maple syrup is only produced in the Upper Midwest, the Northeastern U.S., and Canada.

Does tapping hurt the tree?

If the tree is healthy when tapped and proper tapping procedures are followed, the taphole will start healing within weeks of the spile’s removal. Many maple tree farms have been tapping the same trees for over 100 years. Each taphole, however, must be placed in a different spot on the tree from the previous year. One thing to note: the bottom 4- to 6-foot “tapping zone” will result in trees that are less valuable if cut down for lumber.

What makes sap into syrup?

Sap becomes syrup as the water is removed through evaporation and the sugars become concentrated. The flavor of your finished syrup is created by the caramelization of the sugars during the boiling process – the longer the sap is boiled in the pan, the darker and stronger the flavors become. Flavor can also be affected by the tree’s qualities and genetics; by the time of year and method through which sap is collected; and by the cleanliness of the boiling room and storage containers. Please refer to the section “How to Make Maple Syrup” for more details on the syrup making process.

Do I need special tools for boiling?

You will need an outside method of boiling down your sap. Most people use a shallow evaporator pan over a wood fire for the first stage of boiling and then a stainless steel pot on a propane burner or outside stove for the finishing stage. You will also need a candy-type thermometer with a readable, one-degree scale; food-grade, syrup-specific filters; glass jars with sealable lids; and general kitchen tools such as funnels, towels, and wooden spoons. The boiling process is covered in full detail in our book, Guide to Maple Tapping.

How long does it take to boil down the sap?

The rate at which your water will evaporate depends on numerous factors such as: pan size and construction; type of heat source; and even the temperature of sap being added to the evaporator. If using a shallow, rectangular pan with lots of surface area, it takes between 9 and 18 hours to produce one gallon of syrup. With a deep, circular pan, it can take as little as 28 hours and as long as 56 hours.

Can I use maple syrup instead of sugar in my cooking?

It is a good substitute but will impart a maple flavor to your dish. Generally, one cup of pure maple syrup equals one cup of sugar and can be swapped out in most recipes. For cookies and cakes that also use liquid ingredients, just reduce the liquids by three tablespoons for each cup of maple syrup used.

How should I store my finished syrup?

Properly bottled and sealed pure maple syrup should be stored in a cool, dry, dark place and will keep for up to one year. Maple syrup can also be frozen indefinitely – it will not harden, though, due to the high sugar content. Once opened, syrup should be stored in the refrigerator and used within six months of opening. If you notice any mold or discoloration, discard the contents as it may not be safe to eat. Also, do not store your syrup in plastic containers as the syrup may absorb odd flavors or odors from the plastic.
When to Tap Maple Trees

The maple sugaring season varies by region but generally starts in late January and can last until mid-April. When the tree sap starts and stops running, though, depends greatly on day and nighttime temperature fluctuations: if temperatures fall below freezing at night but climb to the 40°F+ range during the day, the sap will begin to flow and it’s time to get out there and tap your maple trees! Watch the weather forecast for this upcoming freeze/thaw pattern but don’t tap your trees too early as it can cause the spiles to freeze in the taphole which may damage the tree. Remove your spiles when you have enough sap or when the tree buds out as that can lead to an off or “buddy” flavor in the finished syrup.

If you’re adventurous and trying other tree varieties, their seasons are slightly different from sugar maple.The freeze/thaw cycle does affect how well sap flows but in more temperate regions such as the Western United States, trees can be tapped all winter as long as they’re dormant. In all cases, sap will not produce good-tasting syrup if the tree is in bud or growing leaves. Here’s a quick rundown of the most popular non-maple trees that folks tap for syrup:

Birch: The sap run usually begins later in the year in late March or early April, often at the end of the maple sugaring season. Daytime temperatures need to get into high 40°s and low 50°s with cold nights to get the sap flowing. Because of this late-season harvest and warmer weather, the sap spoils more quickly if left sitting all day in the buckets so birch sugarmakers often must collect sap twice per day. The season, too, is shorter and typically lasts for only two to three weeks.

Black Walnut or Butternut: As with sugar maple,the sap flow depends on the same freeze/thaw cycle and the season begins at the same time. The length of the season, though, is sometimes a bit longer as these trees are often the last to bud out. You will notice that the color of the sap will darken over the season and the darker it gets, the more robust the finished syrup will taste.

Sycamore: The tapping season and sugarmaking process are identical to maple trees and the sap-to-syrup ratio is similar. The flavor, though, is not the greatest and many considered this a “syrup of last resort” due to its almost-scorched taste. It can, though, be blended with other saps and will add a bit of butterscotch flavor when mixed with maple or other syrups.

Now that you know when to tap, click here to learn more about how to taplook here for how to make it into maple syrup. Of course, all this info (and more!) is in our book included with every kit!

Don’t forget, during the tapping season we put out a weekly newsletter with lots of great info. Sign up here if you’d like to get the Tapping Times and you’ll also get a FREE Quick Guide to Maple Tapping ebook.

Common Maple Tapping Questions

Turning maple sap into pure maple syrup is a centuries-old pastime that requires minimal tools but lots of patience! Good things come to those who wait, though, and you will be rewarded with one of nature’s sweetest treats. Pure maple syrup is 100% organic with absolutely nothing added. It’s filled with antioxidants and is just plain fun to make. The process is not complicated and you can easily learn everything you need to know in one season. This section will answer the most common questions people have about tapping trees and making syrup. Additionally, our other Q & A sections: “How to Tap Trees” and “How to Make Maple Syrup,” give a little more detail on each process. For complete instructions with photos and handy tips, refer to our book, Guide to Maple Tapping.

What kind of trees can I tap?

Hard maples, also called sugar maple, black maple, or rock maple, have the highest sugar content and produce the best tasting syrup. You can also tap the red or silver maple but the sugar content is lower so you’ll have lower syrup yields and longer boil times. Folks also tap the box elder tree and the finished product has a heavy, sorghum-like flavor. Refer to an illustrated tree guide for identification tips or look in our book, Guide to Maple Tapping, for more information.

What parts of the country produce maple sap?

Because the sap “run” is triggered by the freeze-thaw cycle, maple syrup is only produced in the Upper Midwest, the Northeastern U.S., and Canada.

When should I tap trees?

The tapping season varies from region to region but generally starts in early March and lasts until mid-April. When the sap starts and stops running depends greatly on day and nighttime temperature fluctuations. Watch the weather forecast – sap starts flowing when the temperatures are below freezing at night but climb to the 40°F and above range during the day. If this freeze/thaw pattern is predicted, get out and tap your trees! Remove your taps when you have enough sap or when the tree buds out as that can lead to an off or “buddy” flavor in the finished syrup.

Does tapping hurt the tree?

If the tree is healthy when tapped and proper tapping procedures are followed, the taphole will start healing within weeks of the spile’s removal. Many maple tree farms have been tapping the same trees for over 100 years. Each taphole, however, must be placed in a different spot on the tree from the previous year. One thing to note: the bottom 4- to 6-foot “tapping zone” will result in trees that are less valuable if cut down for lumber.

Do I need special tools for tapping?

Yes: you will need spiles or taps, something to collect your sap in, and a method of attaching it to the spile. Two of the kits we have available are all-in-one systems where the spile, hook, and bag or bucket all fit together right on the tree. We also sell a tubing kit which comes with the taps inserted into the lengths of tubing which you then can direct into a bucket or use as droplines connected to a common line that leads into a bucket. 

You will also need to take a few extra tools with you to the sugarbush – most of which you probably already own. A few necessities include: a drill with a wood-boring drill bit (5/16” or 7/16” depending on the spile you’re using); a marker; a small hammer; and a few five-gallon, food-grade buckets to transfer your collected sap. Depending on which type of kit you buy, you might also need jugs or buckets for collecting at each tree. Our deluxe kits include many of these extra tools.

What’s the difference between a 7/16” and a 5/16” spile?

Previous generations of sugarmakers used a 7/16” spile but research in the last decade has shown that a 5/16” spile (sometimes called the “health spile” or “tree saver spile”) causes less damage to the tree, allows for faster taphole healing, and does not reduce the sap yield when used with gravity systems such as tubing or buckets. Whenever possible, Maple Tapper uses the 5/16” spile in our kits.

How much sap or syrup will I get from each taphole?

The amount of sap each taphole yields varies greatly depending on the tree, the time of year, environmental conditions such as the weather and soil conditions, and even at what point you are in the tapping season. In a normal season, a single taphole produces approximately 10- to 12-gallons of sap. Your finished yield of syrup will depend on the sugar content of your sap. Generally, assume a 40-to-1 conversion – so 12 gallons of sap will boil down to 1 quart of syrup. With this ratio in mind, you’d need four tapholes to produce one gallon of syrup for the season. 

What makes sap into syrup?

Sap becomes syrup as the water is removed through evaporation and the sugars become concentrated. The flavor of your finished syrup is created by the caramelization of the sugars during the boiling process – the longer the sap is boiled in the pan, the darker and stronger the flavors become. Flavor can also be affected by the tree’s qualities and genetics; by the time of year and method through which sap is collected; and by the cleanliness of the boiling room and storage containers. Please refer to the section “How to Make Maple Syrup” for more details on the syrup making process.

Do I need special tools for boiling?

You will need an outside method of boiling down your sap. Most people use a shallow evaporator pan over a wood fire for the first stage of boiling and then a stainless steel pot on a propane burner or outside stove for the finishing stage. You will also need a candy-type thermometer with a readable, one-degree scale; food-grade, syrup-specific filters; glass jars with sealable lids; and general kitchen tools such as funnels, towels, and wooden spoons. The boiling process is covered in full detail in our book, Guide to Maple Tapping.

How long does it take to boil down the sap?

The rate at which your water will evaporate depends on numerous factors such as: pan size and construction; type of heat source; and even the temperature of sap being added to the evaporator. If using a shallow, rectangular pan with lots of surface area, it takes between 9 and 18 hours to produce one gallon of syrup. With a deep, circular pan, it can take as little as 28 hours and as long as 56 hours.

Why is my syrup cloudy or crystallized?

This sugar sand, or niter, is sometimes left if your syrup was not filtered enough. It can also be created by boiling the sap too far past the finishing point. In either case, it does not affect the quality of your syrup and will usually sink to the bottom during storage. You can reheat your syrup and put it through another filtering to remove the sugar sand.

Can I use maple syrup instead of sugar in my cooking?

It is a good substitute but will impart a maple flavor to your dish. Generally, one cup of pure maple syrup equals one cup of sugar and can be swapped out in most recipes. For cookies and cakes that also use liquid ingredients, just reduce the liquids by three tablespoons for each cup of maple syrup used.

How should I store my finished syrup?

Properly bottled and sealed pure maple syrup should be stored in a cool, dry, dark place and will keep for up to one year. Maple syrup can also be frozen indefinitely – it will not harden, though, due to the high sugar content. Once opened, syrup should be stored in the refrigerator and used within six months of opening. If you notice any mold or discoloration, discard the contents as it may not be safe to eat. Also, do not store your syrup in plastic containers as the syrup may absorb odd flavors or odors

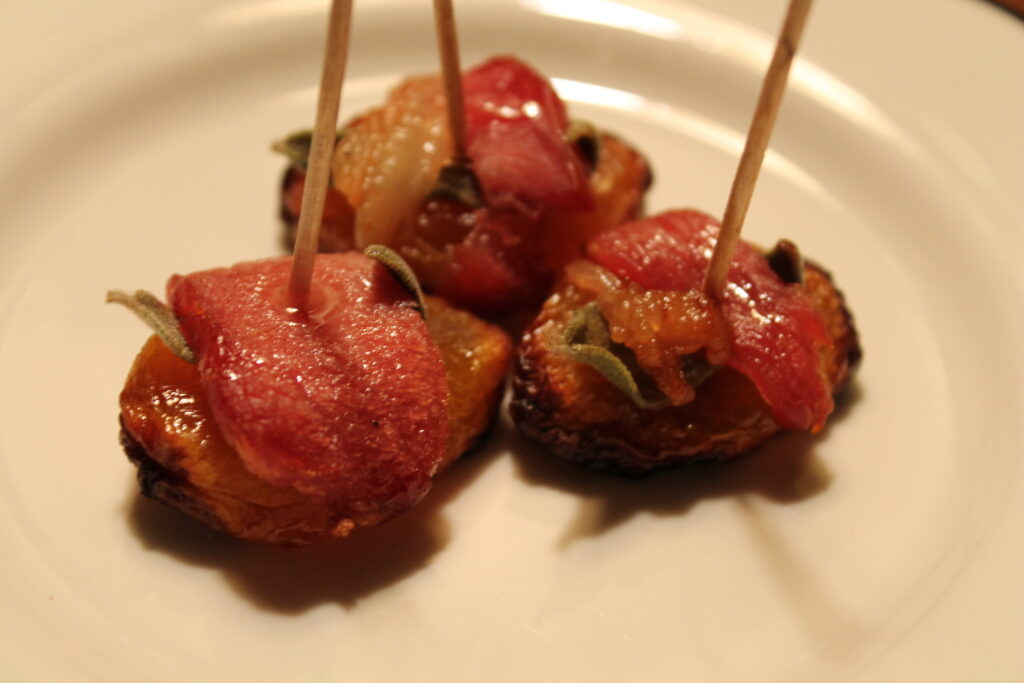
Maple Glazed Bacon Wrapped Sage Apricots

maple glazed apricots wrapped in bacon

This super quick appetizer is perfect for a cocktail party or just a sweet and salty snack.

Maple Glazed Bacon Wrapped Sage Apricots

Ingredients
  

  • 24  fresh whole sage leaves
  • 24 large dried apricots
  • 8 pieces Applewood smoked bacon, cut into thirds
  • 3 tbsp pure maple syrup
  • wooden toothpicks

Instructions
 

  • Preheat oven to 375º F. Place a sage leaf on each apricot and wrap with a piece of bacon with seam on bottom. Secure with a toothpick and place on baking sheet.
  • Bake until bacon has started to crisp, approximately 10 to 12 minutes.
  • Remove from oven and drizzle with pure maple syrup. Serve warm.

Whole Wheat Pancake Recipe

Whole Wheat Pancake Recipe

Ingredients
  

  • 1⅓ cup whole wheat flour
  • tsp baking powder
  • ¼ tsp salt
  • ¼ tsp baking soda
  • 1 egg, large
  • 1 tbsp brown sugar
  • 1⅓ cups buttermilk
  • 1 tbsp vegetable oil

Instructions
 

  • Measure flour, baking powder, salt, and baking soda into a large mixing bowl.
  • In a separate bowl, combine egg, buttermilk, brown sugar, and oil.
  • Pour wet ingredients into dry ingredients and stir just until moistened. Batter should be slightly lumpy. Let batter rest while you heat the pan.
  • Lightly spray or oil your griddle and preheat over medium heat. Pour ¼ cup of batter for each pancake onto hot griddle.
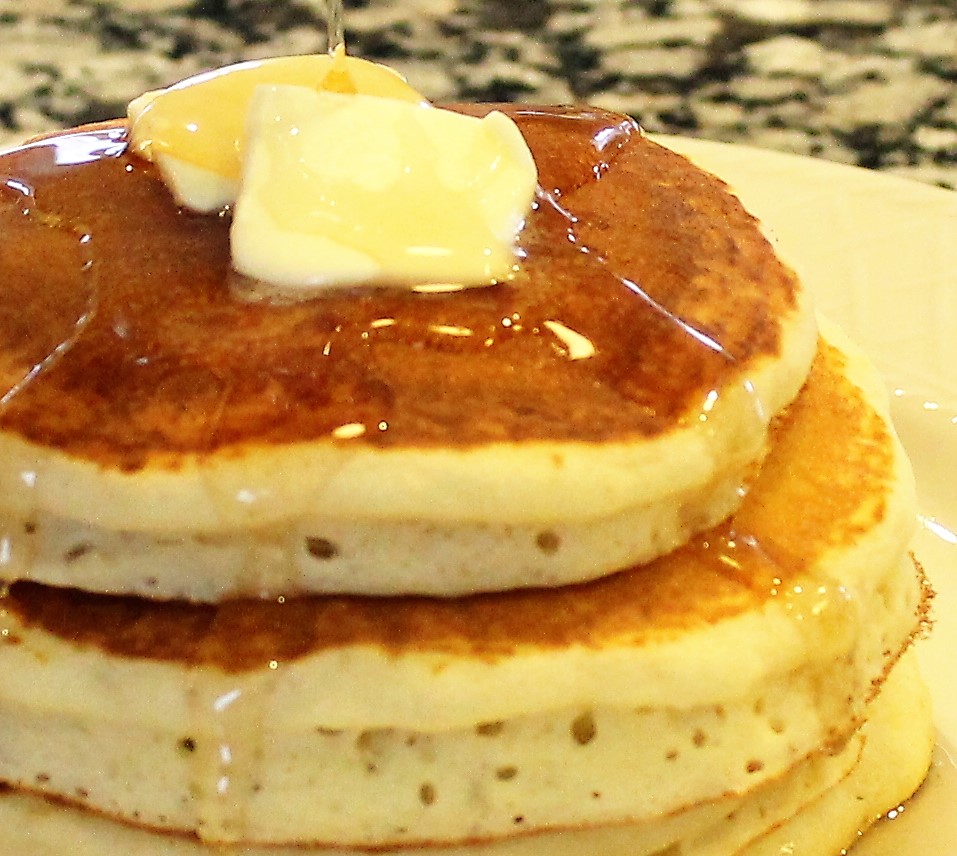
  • Flip the pancake when bubbles start to appear on the surface. Serve with warmed pure maple syrup.

How to Make Fun Pancake Shapes

Add 1 TB of milk or water to approximately 1/3 cup of batter and pour into a squirt bottle (a clean reused ketchup bottle works great). On a preheated skillet, draw the outline of the shape you’d like and let cook for about 20 seconds. Then fill in this outline with regular pancake batter and cook as usual.

Even easier: Use a large cookie cutter and cut out the middle of the pancake after it’s already cooked.

Would you like to make your own pure maple syrup? It’s much easier than you think! Click here for our How-To Library with everything you need to know.

Would you like to get new maple syrup recipes each week during tapping season? Click here to sign up for our newsletter and you’ll also get a FREE Quick Guide to Maple Tapping” ebook.

Maple Caramel Sauce

Maple Caramel Sauce

This recipe was served at President Obama’s 2013 Inaugural Luncheon. Recipe courtesy of www.inaugural.senate.gov/luncheon/recipe

Ingredients
  

  • 4 oz butter
  • 1 cup light brown sugar, packed
  • pinch salt
  • ½ cup pure maple syrup

Instructions
 

  • In a small saucepan over medium-high heat, melt butter. Add sugar and salt.
  • Cook, stirring constantly, until sugar is completely dissolved, then adjust heat to medium and boil 2 minutes longer.
  • Add maple syrup and boil, stirring frequently, until sauce is thick, smooth, and coats a spoon, 2 to 4 minutes longer.
  • Remove from heat and hold warm for serving. Pour over ice cream, pound cake, oatmeal, or fruit crisps or use as dipping sauce for fresh fruit.

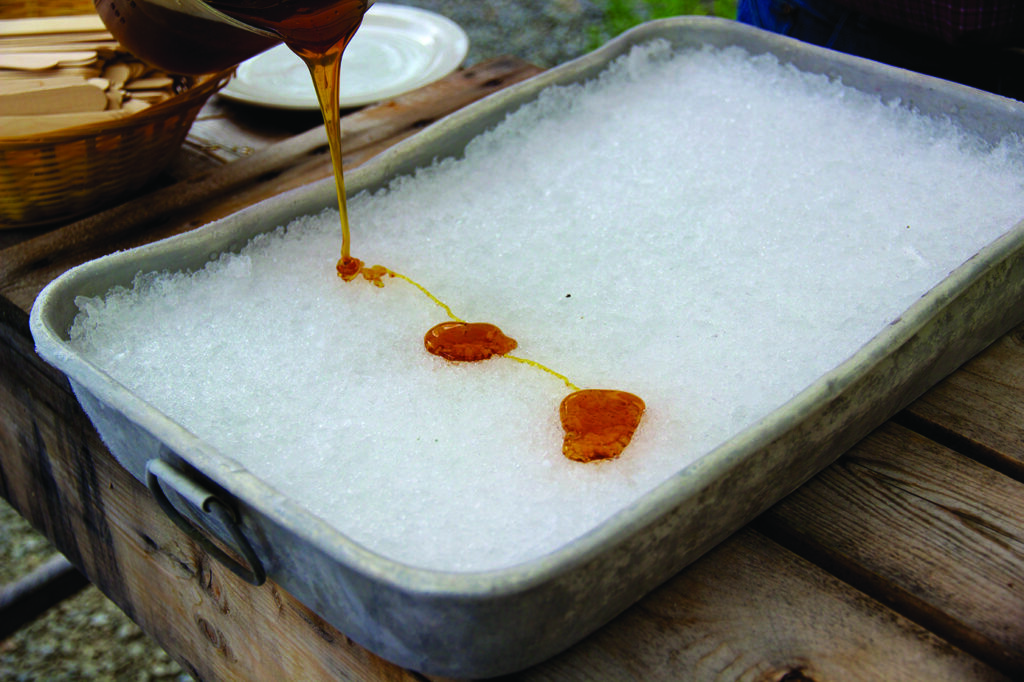
Jack Wax on Snow

This classic maple syrup candy has been made by every generation of sugarmaker and is a kid favorite! Use your own pure maple syrup or heat up a store bought bottle. 

Jack Wax or Maple-on-Snow

Materials

  • pure maple syrup
  • clean snow or shaved ice

Instructions

  • Fill a pan with clean snow or shaved ice and keep frozen. Note: syrup needs to be boiled to a higher temperature than regular syrup boiling. Use prebottled and reheated syrup or just continue to the desired temperature with initial boil. For taffy consistency, boil syrup to 230°F and for more brittle, glass-like candy, boil to 252°F. Consistency changes within this temperature range. Once syrup has reached preferred temperature, immediately pour in ribbons on the snow or ice. It will instantly harden and should be eaten right away.

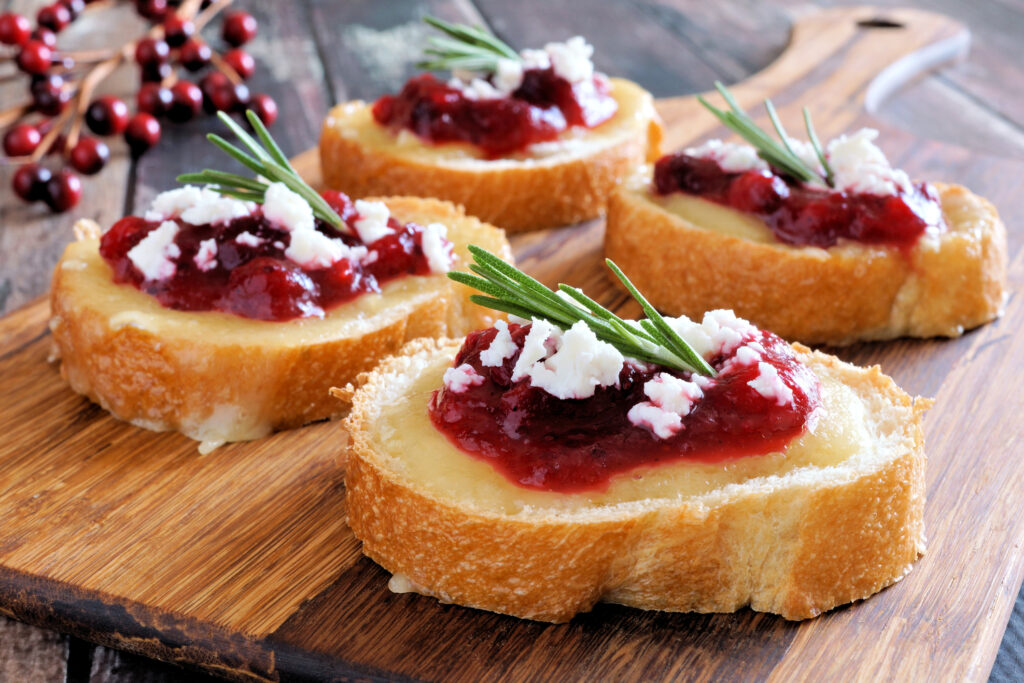
Apple Cranberry Crostini with Maple Syrup Glaze

Holiday crostini appetizers with cranberry sauce, brie, feta and rosemary on a wooden server

Apple Cranberry Crostini with Maple Syrup Glaze

Ingredients
  

  • 2 large tart-variety apples, peeled and diced in small cubes
  • 1 cup dried cranberries
  • 1 tbsp butter
  • ½ tsp cinnamon
  • ½ cup pure maple syrup (reserve approx. 2 tbsp for drizzle)
  • ½ tsp balsamic vinegar
  • 1 round brie cheese, rind removes sliced into thin rounds
  • olive oil
  • 1/2 cup feta or goat cheese crumble
  • rosemary sprigs for garnish
  • baguette, thinly sliced

Instructions
 

  • Assemble first six ingredients for topping and preheat oven to 375°F.
  • Slice baguette and lightly brush slices on both sides with olive oil and arrange on baking sheet. Bake for approximately 3 minutes, flip and bake another 2 minutes until bread is lightly toasted.
  • While bread is toasting, melt butter in sauté pan and add apples and cook until tender. Add cinnamon, syrup, and cranberries and cook for another 2 minutes. Finally add balsamic vinegar and warm through.
  • Keep topping warm until toasts are ready. When bread is done, remove from oven, put on slice of brie, scoop on topping, sprinkle with feta crumbles, garnish with sprig of rosemary, and drizzle with extra syrup. Serve warm.

Notes

To make ahead: pretoast bread and make topping. Right before serving, keep cheese at room temp and reheat the topping before assembling.