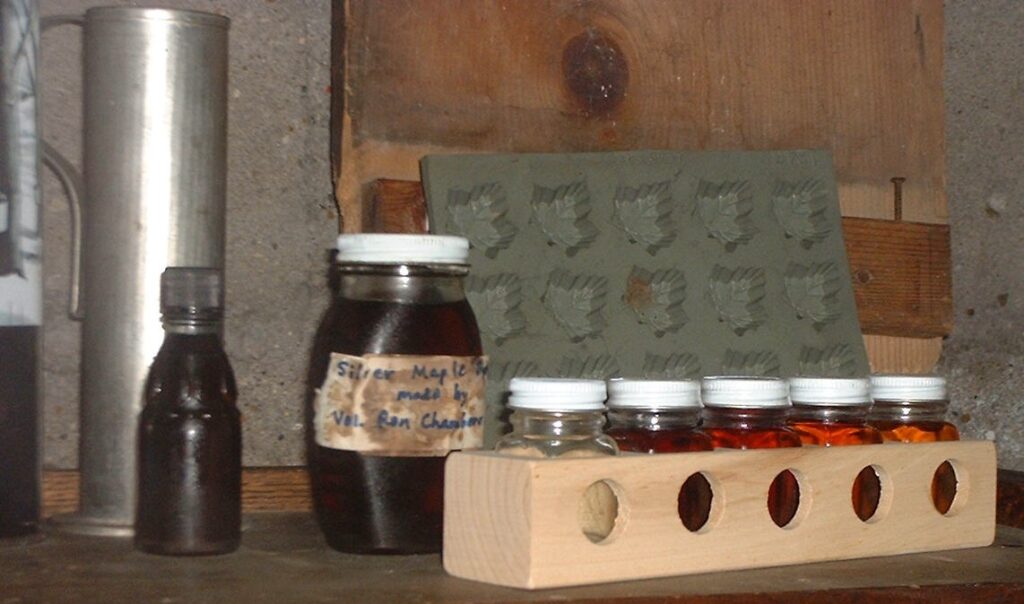
Since sugar shacks opened, pure maple syrup was graded by color and sugar content and each region kind of did its own thing. Yes, it was always sweet and delicious but the consistency across the country (or internationally) was just not there. So in 2014, the International Maple Syrup Institute proposed a change to the grading system which has been adopted both by the USDA and the CFIA (the Canadian equivalent).
Syrup is still graded in four categories but now by color. This handy chart from the Wisconsin Maple Syrup Producer’s Association compares the old grades to the new ones. So if you’re looking for what used to be called Grade B, you’d choose Grade A: Dark. The darker the syrup, the more concentrated the sugar and the more robust the flavor.
How to Cook with Each Grade
Because the darker the color, the more intense the flavor, choose the syrup that best matches what you’re cooking:
Grade A: Golden Color. Has a light, delicate flavor perfect for replacing refined white sugar but also delicious on oatmeal or yogurt.
Grade A: Amber Color. A bit more hardy flavored and probably the most commonly used, this is your gold standard and perfect on its own over waffles, mixed into marinades, or used as a delicious cocktail base.
Grade A: Dark Color. Not for the faint of heart, this is the syrup for more adventurous chefs. A little bit goes a long ways but perfect for thick spicy sauces (such as BBQ); baked beans, or marinades. Also the choice for Paleo dieters.
Grade A: Very Dark Color. The strongest tasting of all, this grade was formerly reserved for commercial use only.
So what makes syrup a certain grade? Many factors affect the color, taste, and even smell of pure maple syrup. Everything from the soil around the tree to the weather at time of tapping to the time of year adds to creating syrup’s unique appearance and taste. In the beginning weeks of the season, the color and the flavor are lighter and as the season warms, the maple syrup turns darker and the flavor becomes more robust. Grade only matters if you’re selling syrup so check with your local Extension Office for more information on accepted grading techniques.
From the Paleo Diet to Sugarbusters to the South Beach Diet – every diet craze that’s swept the country has had one thing in common: avoiding refined sugars. But what to do when your sweet tooth doesn’t agree? Try pure maple syrup! This all-natural organic sweetener is completely unrefined (other than boiling off the water) and if you make it yourself, it’s really inexpensive!
Of course, maple syrup is still a sugar so enjoy in moderation especially if you’re on a low-sugar diet. The good news? Unlike refined white sugar, pure maple syrup has a lower glycemic index, is much more nutrient-dense and rich in antioxidants. The antioxidant levels are comparable to a banana and one tablespoon of pure maple syrup contains:
1% Daily Value of Calcium, Iron, Magnesium, Potassium, and Copper.
6% Daily Value of Zinc.
33% Daily Value of Manganese.
Pure maple syrup can be easily substituted for white sugar in most recipes but it will naturally give the dish a slight maple flavor. If the recipe calls for 1 cup of white sugar, use approximately 3/4 cup of pure maple syrup. It will also add a bit more moisture to your recipe compared to refined sugar. Adjust recipes by reducing liquids by 3 Tablespoons for every cup of maple syrup.
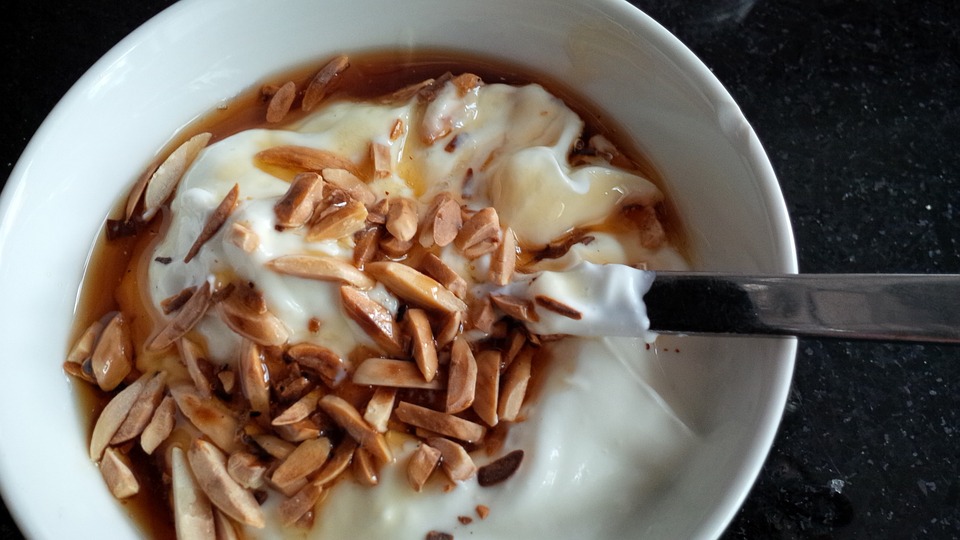
Naturally improve your morning yogurt! Greek yogurt is such a healthy choice for your family but it’s usually filled with sugar (and more expensive because of it!). Instead of buying the pre-flavored yogurt cups, sweeten plain Greek yogurt with pure maple syrup and liven it up with these delicious and nutritious additions. Kids will love it and the high-protein will really power them up for the day.
1 cup plain Greek Yogurt
½ cup mixed nuts or seed, dried fruit, or granola (unsweetened)
¼ teaspoon each: turmeric, ginger, cinnamon, and cardamom
1 tablespoon pure maple syrup
Mix and serve. For smoothies, swap out the nuts for frozen bananas or chunked up fruit or berries.
A few years ago many areas of the United States saw a very early sap run so some folks started collecting sap in mid-January, At first they had a good run but eventually saw decreased output and some tapholes dried up completely.
It was unusual and so many sugarmakers we’re asking us, we went to the experts at our favorite extension services. Many thanks to University of Vermont, Ohio State University, University of Minnesota, and Cornell University for patiently answering our questions and offering some helpful suggestions. Here’s what they think happened and what you can do to keep on tapping after your lines seem to clog up.
For starters, this all assumes the tree has not budded out – if that’s the case, the season is done because the syrup will taste bad.
Two reasons for an early shutdown of your taps:
No. 1: Your area has stayed above freezing for too long. Without the freeze/thaw cycle, the sap flow stops or is greatly decreased. Freezing is required to produce the negative stem pressure needed to draw more ground moisture into the stem and crown of the tree. If below freezing nights and above freezing days return to your sugarbush, the sap may resume its flow so leave your spiles in and see what happens.
Author’s Note: My own experience bears this out. During that 2017 season in Minnesota we tapped on 2/18 when the 10-day forecast looked sappy. Right away, we had a good sap run but by 2/20 the temperatures were staying in the high 50s and even into the 60s. That’s right, Minnesota in February! I left the spiles in but we had no sap during these warm days. Then more normal weather moved in and about a day afterwards, sap started flowing again. It wasn’t back to the previous amount but it was steady.
No. 2: Your area got really warm (in the 60s or higher) and the sap hole is probably plugged (some call it “dried up” which is not technically accurate). When the temperature is this warm, bacteria grows and thrives in a sugary substance like sap. It will travel into your spile (especially if you’re using a bucket for tapping) get into the tree and plug the xylem vessels. (Imagine large straws extending up and down the tree – this is what you tap into to extract the sap). Don’t worry, this is the natural mechanism through which trees heal themselves. Great for the tree but not so good for the sugarmaker. Once this happens, that taphole is done.
Redrilling it or reaming it out would only further damage the tree so that is not recommended and it would not remove the “plug” that’s above and below the taphole. If you suspect this is the case, leave your spiles in until another freeze/thaw cycle and see if the sap will run. If not, remove them and hope for better weather next season.
One Extension Office pointed out that having snow pack around your tree will help keep the temperature down a bit which will inhibit bacteria growth. They also mentioned that using a closed tapping system such as taps and tubes, shop here gives bacteria less opportunity to enter the system.
Tapping More Holes?
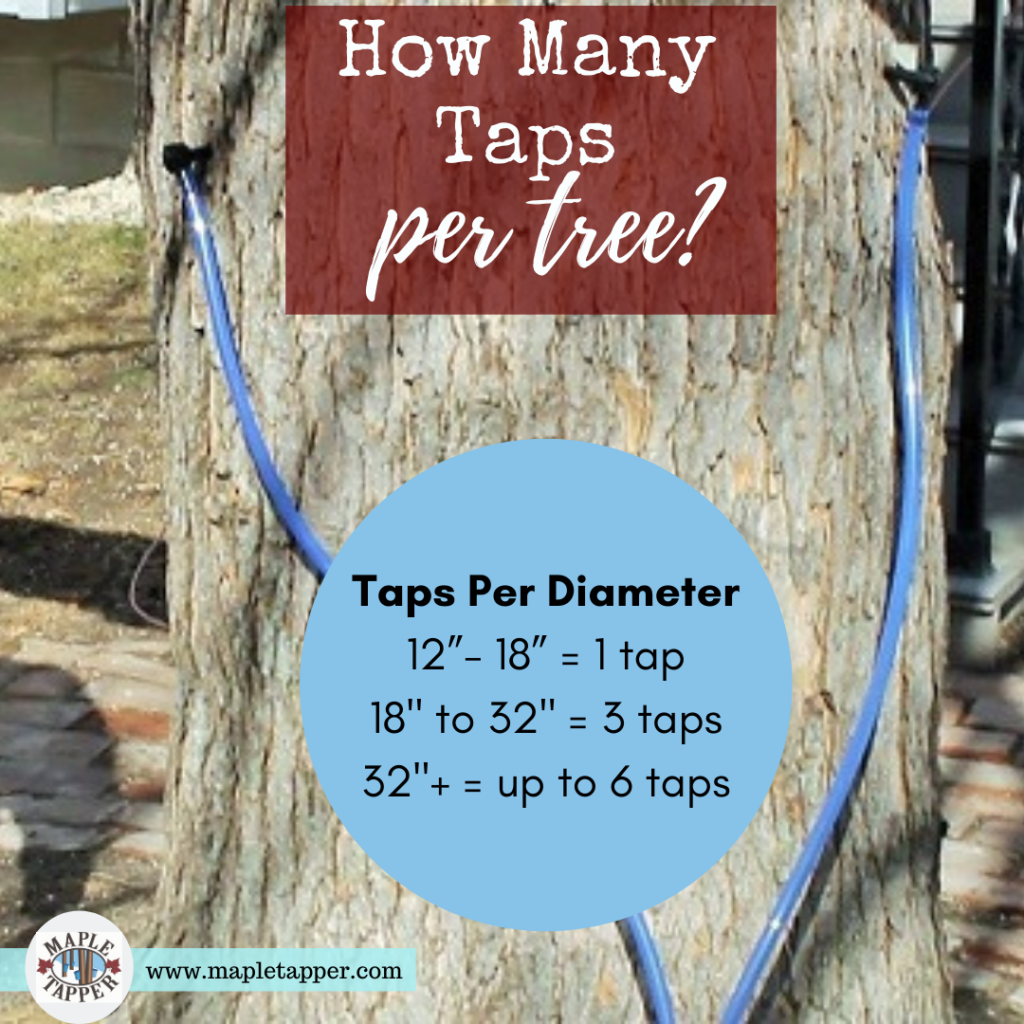
So, if you’ve determined your taphole is a goner, can you drill another hole? This is a maybe and it depends on how many tapholes you already have in that tree (see the chart below) and if you can find a new spot at least 6” away from the existing tapholes. If you can meet the necessary criteria, you can try drilling another taphole but make sure the weather forecast is favorable.
Taps per Diameter Guide
12”- 18” diameter = 1 tap
18” – 32” diameter = up to 3 taps
32” or more diameter = up to 6 taps
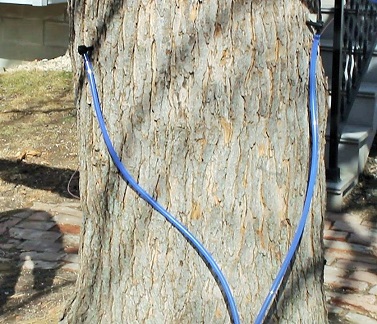
One interesting suggestion I heard was to tap your trees in sequence to account for weird weather patterns. For instance, if you normally tap 20 trees, tap ten during the first warm spell and tap the remainder during the normal tapping season in March (depending, of course, on the temperature forecast and before the tree has bloomed). This does add more work to the cooking but we have seen that it’s possible to freeze sap without much loss.
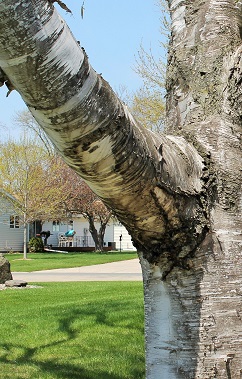
Multiple maple sap taps on a large silver maple tree.
For those of you who’ve made it through one season, the natural second season question is: how can I get more syrup? Well, as you’ve probably already guessed, you can only get more syrup by collecting more sap. So, now what? Before you run out and buy 40 acres, here’s a few suggestions that you might be able to put into use this year:
#1. Put more taps in each tree. Most mature trees can handle more than one tap – see the chart below for size needs – measure the diameter at about 4 ½’ above ground level to determine how many taps to use but never use more than 6 taps per tree. Using tubing is a great time saver as you can thread more than one tube into each bucket. (Our Deluxe Kit comes with 20 taps and tubes which should help out with this step! Order here, shipping is free!)
#2. Try other non-sugar maple trees. Every tree has some “sugar” in its sap but not all of this sap is as delicious or as high in sugar content as maple sap. Favorites include birch, black walnut, sycamore, and other maple family trees such as box elder, silver maple, or red maple. Because the sugar content is lower, it takes a lot more sap to make equivalent syrup amounts (for instance, with birch you can expect a nearly 100 to 1 sap-to-syrup yield).
Non-sugar maple syrup can be an acquired taste with descriptions ranging from wild-tasting to bitter to earthy, expect something different if you decide to try making syrup from one of these trees. Of course if it tastes good to you and you’re willing to put in the time, then it’s a worthwhile endeavor! Each variety will have a different flavor, color, and sweetness; the seasons are generally the same; and the process of tapping, collecting, filtering, and syrup making is similar to maple tapping. Our book included with every kit thoroughly explains the intricacies of each tree (or you can order the book separately through our website).
#3 Pool your efforts with other sugarmakers. This may not net you a lot more syrup but we firmly believe that many hands make light work especially when it comes to boiling sap. Maybe you have a great evaporator set up with lots of fuel but not as many trees as you’d like and your neighbor has tons of trees but no cooker. If you pool your resources you’ll save time cooking and probably end up with a little more syrup than if you worked alone. Plus it’s just fun to have a partner in crime!
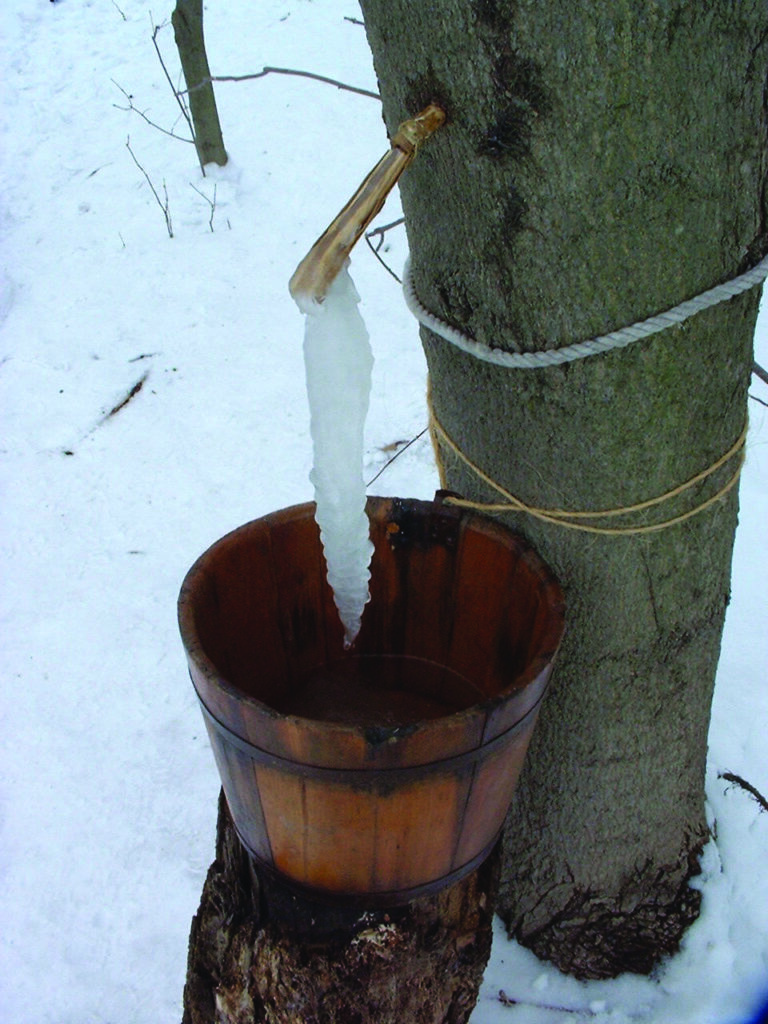
Have you been wondering if it would be faster to freeze the water in your sap instead of boiling it down? We’ve all found our sap buckets with chunks of ice after a really cold night and we know that ice is mostly water, so why not just toss it out and save time evaporating it during boiling? Early sugarmakers did just that mostly because they didn’t have access to heavy-duty tools that would stand up to high heat. Large modern day sugarmakers are using freeze concentration in their operations to save time. If you’d like to try it out this season, this article will highlight the hows and whys of freezing sap and we’ll begin with this author’s unscientific freeze experiment.
Because necessity is the mother of invention . . .
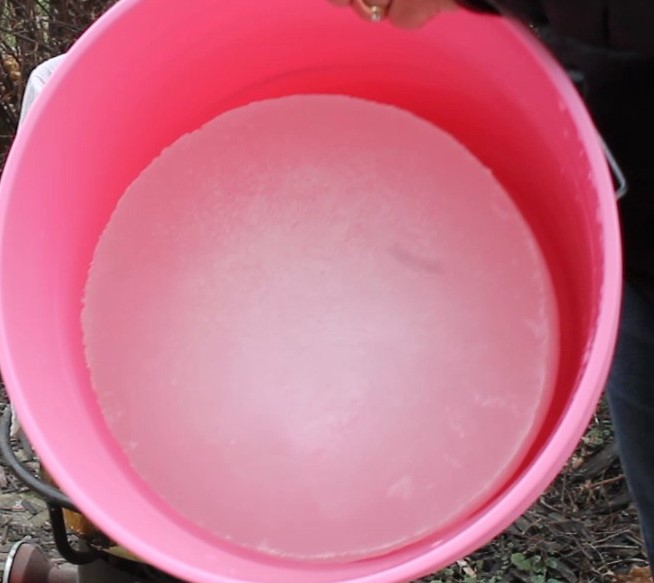
I tried my very own freeze experiment in 2015 mostly because it was an abysmal sap year and I wanted to boil all my sap at once at the end of the season. I only gathered about 20 gallons of sap in 2015 so as I collected it, I filtered it, and froze it in five-gallon-buckets. It was cold enough outside that we just put the buckets in the shade and banked them with snow. Sure enough a big block of ice formed in each bucket. When I was ready to cook, I let the buckets thaw a bit and poured the liquid into my pot. As you can see from these pictures this left a lot of ice in the bucket. I boiled my syrup as usual and ended up with the standard yield of about 40-to-1.
But while I was boiling my first batch of sap, those big chunks of ice melted. I just couldn’t help myself so I boiled these former ice chunks down and do you know what? I ended up with more syrup but it was probably closer to a 50-to-1 yield. So in my unscientific judgment, freezing did work somewhat to concentrate the sap but if I would have thrown out that ice, I would have lost about a half-quart of syrup!
Now I’m not saying it doesn’t have merit and if you can freeze your sap outside, you would use zero energy for at least part of your concentrating steps. One way to try this would be to use a multi-stage freeze/thaw method where you let the ice chunks melt, then pour off the liquid to boil, and then start the freeze/thaw/cook method over again.
One thing everyone agrees on, though, is you still must boil your sap to achieve the caramelized color and flavor we all love. Besides it has to be heated up for bottling anyway and there’s no way around that!
A more proven freeze method.
Beyond this backyard trial and error, the professionals have been working out a way to freeze the water in sap as it flows through the lines into the sugar shack. The upfront cost and set up of these systems is not really feasible for the hobbyist but it’s interesting to take a look at the method. Typically at the end of the mainline but before the storage tank, the sap is run through a refrigerated pipe. The water freezes, concentrating the sap which continues to flow through into the storage tank for boiling. The ice is melted and drained off.
There are three simple ways to tell when the oh-so-short maple tapping season is done.
Sign #1: You Have Enough Maple Syrup!
We sincerely hope you reach your personal goal of maple syrup production before the season officially ends. This is usually indicated when your shelves are overflowing with maple syrup and your family is begging you to stop boiling sap and go get some groceries already because they are tired of pancakes!
But we all know you really can never have enough pure maple syrup so most of us rely on the next signs to know when to stop.
Sign #2: Weather Warms Up and Sap Slows Down
The forecast says it all . . . as nighttime temperatures warm up past freezing (and stay there), sap runs to the top branches which causes the tree to bloom or bud out. Also, the warmer the weather, the more energy the tree has to heal the taphole you’ve drilled which cuts off the sap flow from that spile (this is sometimes referred to as “drying out” but it really is just sealed over). Anyway, once you see buds, you’ve moved onto Sign #3.
Sign #3: Buds Open Up
As the warm weather and Spring Fever grips us with dreams of gardening, it also encourages the tree to open up its little buds and start growing leaves. But once those buds open up, the sap takes on an off-flavor and makes for odd-tasting syrup and the sugaring season has come to its end.
When You’re Done: Pulling the Taps
Once you’ve decided to stop collecting sap, gently pry your spiles from the trees. Just leave the taphole as is and it will naturally heal over the summer. Thoroughly rinse your equipment in hot water but do not use dish soap. Some folks use a mild bleach and water solution (especially for tubing) but you must thoroughly rinse all equipment so no traces of bleach remain. After everything is dried, pack it away for next year.
If you’re really adventurous, you can find a way to extend your season by tapping other varieties of trees such as birch or black walnut. Their seasons last a bit longer than sugar maples, read more on our blog here . . .
Every tree has some “sugar” in its sap but not all of this sap is as delicious or as concentrated as sugar maple sap. Many regions, though, without abundant sugar maples tap other trees to collect sap water, boil into syrup, and further cook into candy or sugar. Each variety of tree sap will have a different flavor, color, and even sweetness but this non-sugar maple syrup can be an acquired taste!
Editor’s Note: Please forgive this long article but I wanted to cover this topic in full! If you’d like to skip ahead, sections include: Maple Family Trees (i.e. soft maples); Birch trees (and their unique cooking needs); and other trees such as Black Walnut. This article has been excerpted from our newly updated Guide to Maple Tapping which is included with each kit and available separately for print or ebook here.
As with sugar maples, always select healthy trees, empty your buckets often, and remove taps as soon as buds appear. You can generally use the same equipment for all types of sap but some differences are needed in filtering and cooking equipment and those are mentioned in the following sections. Time and effort needed will be the biggest difference you notice with non-sugar maple sap. Because the sugar content is usually lower, you’ll need much more sap and longer boil times to produce the same quantity of finished syrup. For example, birch trees typically have a 100-to-1 sap to syrup yield so 100 gallons of sap yields one gallon of syrup. This is nearly three times that of sugar maple sap which usually falls in the 30- to 40-to-1 range. That difference makes for more work in the field in tapping trees and hauling sap and more fuel and time required for boiling.
The season for sugaring is generally the same – some trees start later such as birch and some last longer such as walnut. The freeze/thaw cycle does affect how well sap flows but in more temperate regions such as the Western United States, trees can be tapped all winter as long as they’re dormant. In all cases, sap will not produce good-tasting syrup if the tree is in bud or growing leaves.
Maple Family Trees
While most focus on sugar maples, there are many other trees within the maple family and many such as silver maple yield a sweet sap with relatively high sugar content. Here’s a quick list of trees to try:
Black Maple (Acer nigrum): This variety most closely resembles a sugar maple and the two are often confused. Black Maple trees have a more limited range but its sap is nearly as sweet and abundant as a sugar maple.
Red Maple (Acer rubrum): Widely spread throughout North America, Red Maple is recognized as America’s most common variety of tree and is known for its beautiful fall colors.This tree is also very suitable for tapping but the sap has a lower sugar content and the buds pop out sooner than sugar maple.
Silver Maple (Acer saccharinum):This fast-growing soft maple is also widely spread throughout North America. It, too, has lower sugar content (approximately 1.7% versus 2% of sugar maples) and the tree buds out earlier making for a shorter season. Finished syrup has a more earthy taste and will be lighter-colored and thinner.
Box Elder, also called Ash-Leaved Maple or Manitoba Maple (Acer negundo): Another hardy and fast-growing but short-lived maple variety, Box Elder sap has lower sugar content and syrup has a more sorghum-like flavor.
Norway Maple (Acer platanoides): Another tree similar to the sugar maple, the Norway Maple’s sap is less sweet. This tree tolerates poor growing conditions but and is now considered invasive in many part of the United States.
Canyon Maple, also known as Big Tooth Maple (Acer grandidentatum):This tree is closely related to the sugar maple and is native to interior western North America. Its range extends from Western Montana to northern Mexico. Sugar content is higher than most maples but sap yield is much lower than sugar maples.
Bigleaf Maple (Acer macrophyllum): Another western native, Bigleaf Maples grow mostly along the Pacific coast from Alaska all the way to southern California. Sap has lower sugar content and less sap yield compared to sugar maples.
Rocky Mountain Maple (Acer glabrum): Also native to western North America, Rocky Mountain Maple sap has been used for centuries by Native Americans as a medicinal treatment for swelling and other general ailments.
Birch Trees
Likely the most common non-maple tree used for syrup, birch is tapped in regions such as Alaska where maple trees are not abundant. The Alaskans really ramped up birch syrup production in response to World War I sugar shortages and they now have a thriving cottage industry, making everything from birch syrup to beer to wine to vinegar to soft drinks. Birch sap straight out of the tree is valued by many as a sweet spring tonic (much like mineral water) or as base for tea and coffee. It’s also bottled and sold commercially in Europe, China, Korea, Finland, and Russia. Finished birch syrup tastes more savory than sweet with rich body and hints of caramel, sorghum, honey, and even balsamic. These flavors may not pair well with pancakes but are great for marinades, dressings, meats, and veggies.
Birch sugarmaking differs in a few ways from maple sugaring. The sap run usually begins later in the year in early April, often at the end of the maple sugaring season. Daytime temperatures need to get into high 40°s and low 50°s with cold nights to get the sap flowing. Because of this late-season harvest and warmer weather, the sap spoils more quickly if left sitting all day in the buckets so birch sugarmakers often must collect sap twice per day. The season, too, is shorter and typically lasts for only two to three weeks. You can only use one tap per tree no matter what size the tree but choose a tree at least 10” in diameter. The sap itself is more acidic which can eat away at metal containers, leaving behind an unpleasant taste. So, you should only use plastic, nylon, stainless steel, or glass during tapping, collecting, cooking, and storage.
Cooking Birch Sap is a Bit Different
The predominant sugar in birch sap is fructose (as opposed to sucrose in maple sap) which gives it the lowest glycemic index of all sugars. The fructose, though, also means birch syrup scorches more easily and will darken more with boiling. For this reason, the cooking process is a bit more labor intensive than maple syrup cooking. Almost the exact opposite of how we make maple syrup, the birch sugarmaker has to go by sight to tell when the syrup is close to done. The thermometer does still matter – only because your goal is to keep the temperature under 200°F. Anything above that and your batch will burn and that’s the end of it!
Because it’s so finicky, most commercial producers use reverse osmosis for the majority of processing and only boil it at the end for flavor. You can cook it at home with your evaporator but it needs to cook at a lower temperature and at a much less aggressive boil. Most birch sugarmakers cook birch sap using a three step process:
1. Boil in a traditional evaporator until volume is reduced by half. Do not add sap to the batch as it cooks, though, as it can cause scorching of already-boiling sap.
2. Transfer this reduced sap to a smaller pan and cook at a low simmer. Keep the temperature below 200°F and do not let it boil. If it starts turning dark brown, remove from heat immediately. Continue this simmer until sap is reduced to about 25% of the original volume.
3. Transfer this sap to a crockpot and set temperature on low but leave the lid off so water can continue evaporation. This can also be done in a double boiler. Again, make sure the temperature does not go above 200°F. Continue cooking until syrup starts to thicken and turn golden amber. Finished birch syrup will not be as thick as pure maple syrup but should read between 66 and 67 on the Brix scale. Be sure to filter it as you would with maple syrup and seal while hot in glass jars.
Any tree in the Betula family will produce birch sap but most prefer Paper Birch:
White Birch, also called Paper Birch or Canoe Birch (Betula papyrifera): The provincial tree of Saskatchewan and the state tree of New Hampshire, the white birch has half the sugar content of sugar maple sap but is considered the sweetest sap of all birches.
Yellow Birch (Betula alleghaniensis): The sap from this variety of birch has been found to have higher mineral composition and higher antioxidant value than sugar maple. Sap from the yellow birch is much lower in sugar content and the tree buds out sooner making for a shorter season. Finished syrup has a caramel-like flavor.
Black Birch, sometimes called Sweet Birch (Betula lenta): This tree is native to eastern North America and grows from Ontario to Georgia. The sap is most commonly used to make birch beer.
Other Trees to Try
Call it desperation or ingenuity, the sugarmaking community is filled with tales of surprisingly tasty syrup made from unusual sources. Trees, such as Black Walnut, have been overshadowed by Maple but are now getting serious study as another valuable source of sap and syrup. Researchers are finding promise not only in a tasty end product but in another avenue for small agricultural markets. Because so little research exists, tapping these non-traditional trees is still somewhat of a trial-and-error experience. As a home hobbyist, it’s an opportunity to be adventurous and try something new. Follow the same tapping and boiling process as you would with maple syrup. Note: anyone with nut allergies should avoid syrup made from nut-producing trees such as walnut or butternut.
Black Walnut (Juglans nigra) or Butternut (Juglans cinerea): Most commonly found in the Midwest and northeastern U.S., walnut and butternut tree syrup is darker than maple syrup with a more earthy, nutty flavor. The sap flow depends on the same freeze/thaw cycle and the season begins at the same time. The length of the season, though, is sometimes a bit longer as these trees are often the last to bud out. You will notice that the color of the sap will darken over the season and the darker it gets, the more robust the finished syrup will taste.
Sugar content is similar to maple trees and you can expect a 40-to-1 sap to syrup yield. However, the amount of sap produced by the tree is typically about one-third less than sugar maple. The sap also contains more pectin than maple sap – the same type used to make jams and jellies so the sap is thicker and harder to filter and traditional thick, wool filters will not work. Try cheesecloth or a clean thin cotton dish towel. Walnut trees also have thicker bark which can be harder to drill through but trees can be tapped at a smaller diameter (8” versus 12”). The cooking process is exactly the same as maple syrup.
Sycamore (Platanus occidentalis): Found in southern Ontario and much of northern and eastern America, Sycamore tree sap has long been collected as drinking water and for syrup making. The tapping season and sugarmaking process are identical to maple trees and the sap-to-syrup ratio is similar. The flavor, though, is not the greatest and many considered this a “syrup of last resort” due to its almost-scorched taste. It can, though, be blended with other saps and will add a bit of butterscotch flavor when mixed with maple or other syrups.
Hickory (Carya genus): The Pecan tree is also part of this family and old-timers have tapped both types for their sap which is cooked down just like maple syrup. However, most “Hickory Syrups” sold today are not made from tree sap but instead from an extract taken from the bark and nut shells which is then combined with sugar and water to make syrup.
Good luck and let us know how you’re sugarmaking goes with these non-traditional trees!
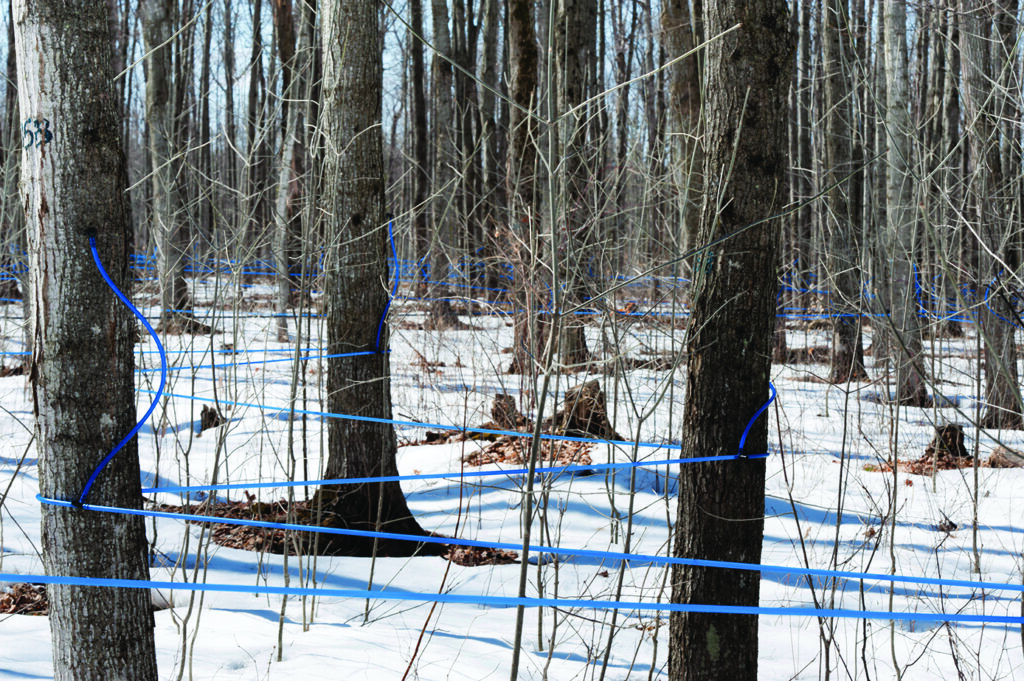
After a few seasons of sloshing buckets around the woods, every sugarmaker starts to think about connecting all these lines into one main bucket. Wouldn’t that be a huge timesaver? That’s why tubing systems are becoming the first choice of most expert sugarmakers and this article will give you a mini-guide on using droplines, mainlines, and large storage tanks (also called an Aerial Tubing System). If you’re serious about implementing one of these systems, we highly recommend visiting one of the helpful Extension Service sites listed at the end of this article. These really smart folks have done the research and offer detailed instructions for setting up, maintaining, and getting the most out an aerial tubing system. Don’t forget to check with your local Extension Service, too, or stop by another sugarmaker in your area and ask questions. Most folks love to show off their operation!
Order 50′ and 500′ coils of BPA-free, food-grade tubinghere. Easily connects to our regular tubes.
Typical Maple Tapping Dropline System Parts
(You can create a smaller version with three or four trees that would use droplines connected to a larger line that ends at a central bucket.)
Standard spiles (to go in the tree)
Droplines – tubing that connects to the spiles and runs to the lateral lines
Laterals tubing – this part of the system connects multiple trees to the mainline (Penn State recommends no more than 10 trees per lateral). The laterals are stretched from tree to tree to create a tight structure and then connected to each dropline through a special tee connector.
Mainline (often called conduit) – typically larger than the tubing because it will carry sap from multiple trees. Laterals feed sap into the mainline which runs through the sugarbush to the storage tank.
Large storage tank – placed at the end of the mainlines to collect all the sap. Preferably this tank is near your sugar shack where it can be further run into your filtering and cooking areas.
Most Important Rule of Using a Multiple Line System: The overall flow of these systems must be downhill because you are creating a gravity system to pull the sap through long stretches of tubing. If parts of the tubing sag or dip, sap flow will decrease. Sags in the line also can cause bacterial growth if sap is left sitting in the tubing. Many large scale producers also incorporate a vacuum system to keep sap flowing.
After you’ve set up your system, don’t be afraid to tweak it. Maybe a line needs to be shortened a bit or maybe you need to set up a collection bucket midway through your planned route. As with all sugarmaking, trial and error creates the best product!
It’s also important to use food-grade tubing and containers at all points in collection. This ensures the taste and quality of your finished syrup. And, yes, you can freeze maple sap!
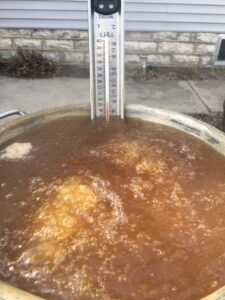
Because the syrup-making process relies so heavily on an accurate temperature reading, it’s best to calibrate your thermometer before each day’s boiling session. Readings can be affected by barometric pressure, by altitude, by mishandling of the thermometer (yes, we’ve all dropped ours!), or even if you’re using a brand new thermometer.
The purpose of calibrating it is to find the temperature at which water begins to boil — normally this is at 212°F for most maple tapping altitudes. (If you live at higher altitudes check online for your normal water boiling temperature.) Once you know your thermometer’s reading, you can then add 7° to determine your syrup’s finish point of 219°F. For instance, if your thermometer shows a temperature of 213°F when water boils, you’ll know it is off by +1°F, so you’ll know to boil the sap to 220°F (as shown on your thermometer). Don’t worry, you’ll figure it out!
How to calibrate a thermometer:
1. Place your thermometer in a pan of distilled water making sure to have 2-inches of room on all sides and up from the bottom of the pan. Make sure you start with enough water to keep your thermometer’s bulb or reading tip submerged for five minutes even as water evaporates.
2. Heat distilled water to a rolling boil. Leave thermometer in boiling water for five minutes, remove from water, and hold at eye level to read temperature.
3. Take note of temperature in relation to baseline: If it is +/- 212°F, add or subtract this range to your finish boil target temperature as described above.
If you get wildly different readings each time you calibrate your thermometer, you can safely assume this thermometer is no longer reliable you should buy a new one.
Our Ultimate Tapping Kit (order here) includes a thermometer like the one shown here — you can also use a digital one or a standard glass thermometer. Just make sure it has marking or readings to one-degrees.
If you’ve ever seen sediment, cloudiness, or even chunks of sugar in your pure maple syrup, you know what sugar sand (aka niter) is! This is a perfectly edible (and natural) component of syrup but it can easily be removed with filtering. Most sugarmakers filter sap and syrup three times and this article and video describes that quick and easy process. Be sure to use professional filters designed for syrup making (not coffee filters, cheesecloth, or dish towels).
Filters are inexpensive and reusable so it’s a one-time purchase as you get started. We use one-quart filters which are a more manageable size for the home sugarmaker. They fit perfectly into a standard sieve stand and have small slits in each side so you can thread a dowel through and easily balance on the sieve stand so you have both hands free for pouring hot syrup.
Filters are included with many of our kits but you can also buy them separately here.
Note: If you’re making black walnut syrup, don’t use the Orlon or a similarly thick filter. Walnut sap contains more pectin than maple sap so it’s too thick to run through this type of filter. Try cheesecloth or a thin strip of clean muslin.
This short video shows the entire process:
Filter #1: This step is done each day as you collect sap to remove debris that may have fallen into your sap bucket (one more reason to use a closed lid system!). Suspend the thinner prefilter over a clean bucket and slowly pour the sap through to seine out debris. When done, rinse this filter with plain hot water, air dry, and save for later. Refrigerate or freeze the sap until ready to boil.
Filter #2: This step occurs midway in the boiling process as sap reaches a temperature in the 215°F range. At this point, concentrated sap is moved from the larger pan or evaporator and poured through a thin prefilter into the finishing pot. This removes the majority of sugar sand which can make syrup cloudy.
Filter #3: The third and final filter is done after the sap has reached its finished temperature and is poured into bottles. For this filtering, put the thinner prefilter inside the thicker Orlon filter. Slowly pour the finished sap through these filters and into clean, hot bottles or jars. Syrup is now done!
Cleaning Filters. As mentioned earlier, these filters are reusable and should last for years if cared for properly. Never wash with detergent or dish soap as this can affect the flavor of finished syrup. After use, simply rinse well in hot water and hang to dry. Do not wring or twist the filters as this can tear them or alter their shape.
If you’d like to learn more about entire boiling process, click over to this helpful article, “How to Make Maple Syrup.”