Maple Sap DIY Cooking Methods

Maple sap cooking methods range from super simple to full-blown sugar shacks with high level equipment. So where do you start as a home sugarmaker just wanting to boil a few gallons of sap into pure maple syrup? This article will walk you through the most common DIY, proven, at-home cooking methods so you can get ready for the season.

Steamy kettle of maple sap over wood fire.

Start with Safety

Before we get any further into the boiling, let’s talk safety. During this process, you will be working with fire or flammable gases and handling large quantities of boiling hot, sticky syrup. Please be careful, especially if children are helping you. Wear long sleeves, pants, and gloves to protect from splatters. Don’t try to pour sap from large pans without help. Make sure you have a first aid kid and a bucket of water or hose nearby for emergencies.

Why Do We Boil Sap?

Maple sap is approximately 95% water and your job is to remove the water and concentrate the sugar into pure maple syrup. The flavor of your finished syrup is created by the caramelization of the sugars during the boiling process. The longer the sap is boiled in the pan, the darker and stronger the flavors become. Along with the tree qualities and storage/collection issues, flavor can also be affected by the cleanliness of your cooking and storage systems. Stainless steel is the best choice for boiling and glass jars or bottles are the best.

Indoors or Outdoors

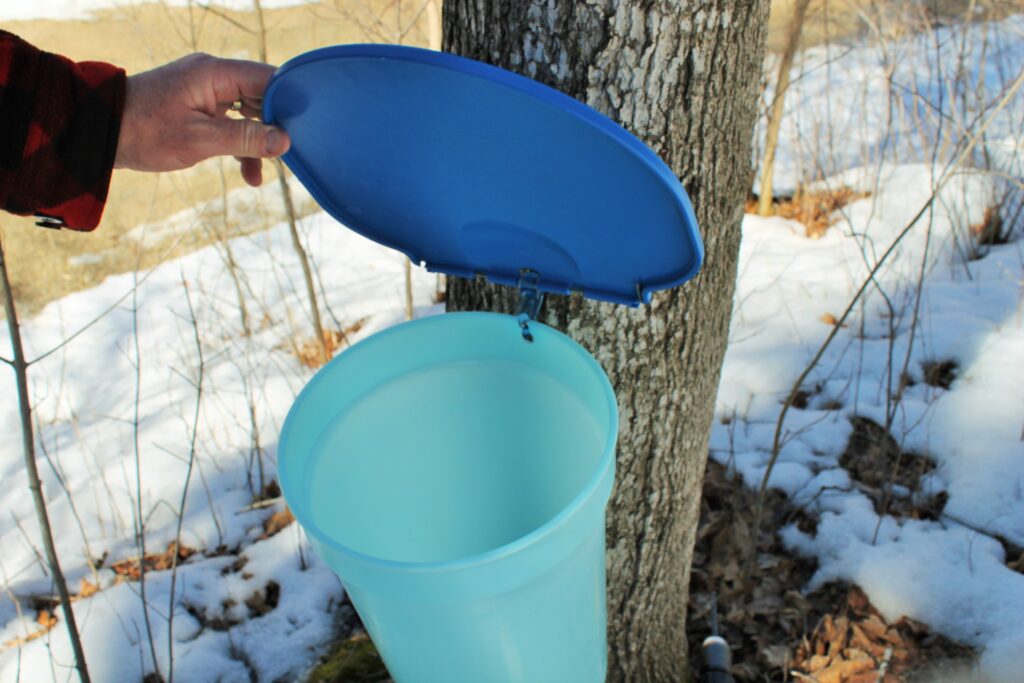
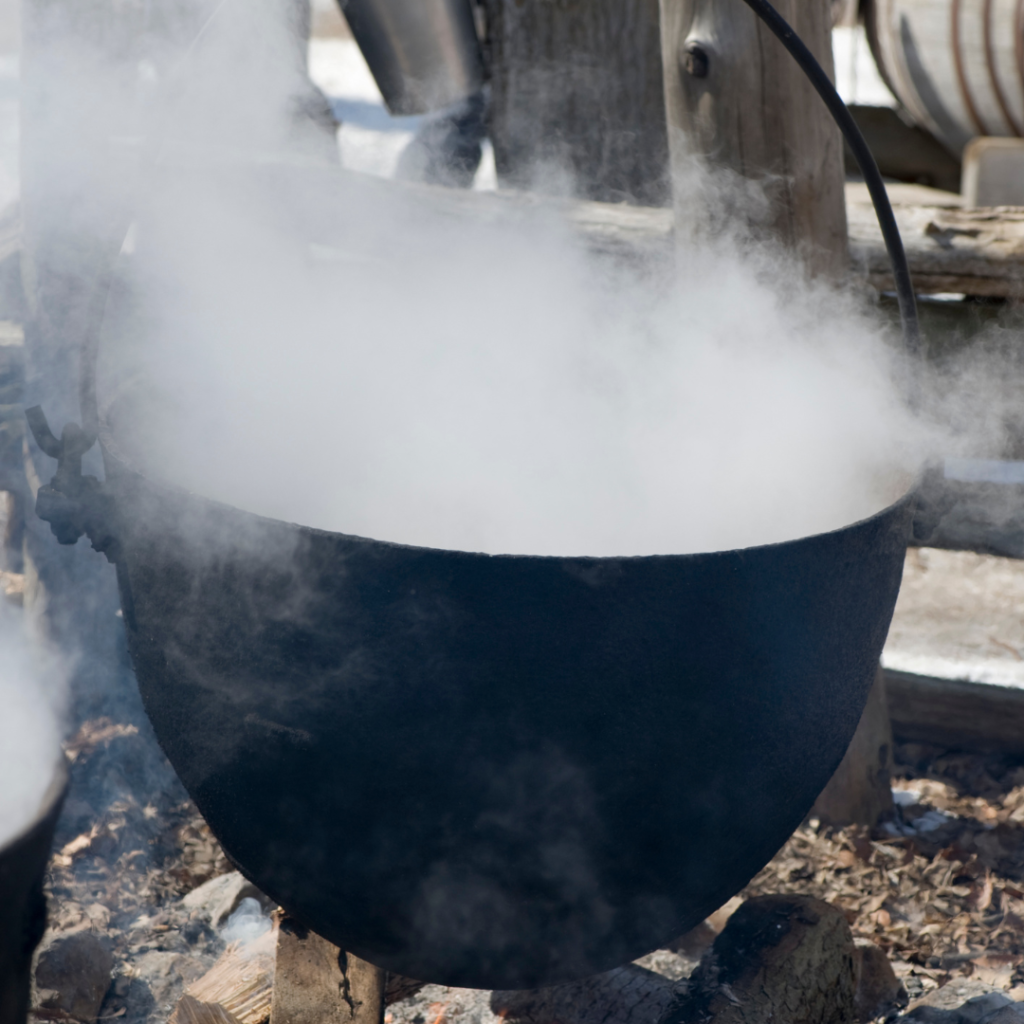
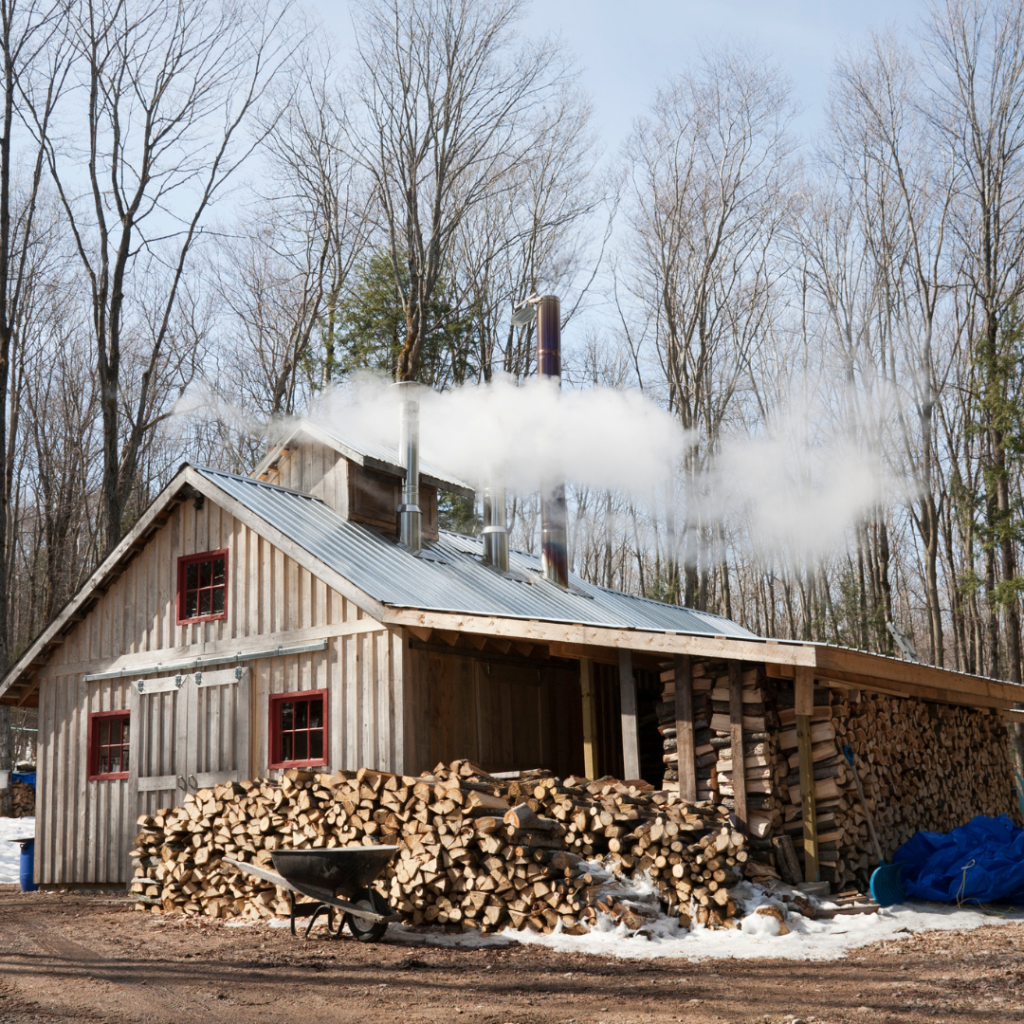
You will be tempted to boil your sap down on the kitchen stove – be warned that everything around the pot will be sticky! Even the steam coming off your pot contains tiny bits of sugar which will cling to every surface. Instead of dealing with a sticky mess, make a space for yourself outside. You’ll need overhead shelter in case it starts to rain or snow or the weather turns cold while you’re boiling. This is why many build a “sugar shack” but a temporary outdoor space with a tarp ready to cover overhead works just fine. For small batches you can finish your syrup inside on the kitchen stove.

Maple Sugar Shack with steam coming out the chimney.

What Type of Cooker or Fuel Source

The boiling down process will take many, many hours and greatly depends on how much sap you’re starting with. The choice really depends on your access to wood or propane, how much space you have, and how much syrup you plan to make.

The key is surface area – the more surface area in the pan, the faster water will evaporate. This is why most people choose an oblong flat pan to boil in.

Small batches (10 gallons sap per year) can be cooked on a single-burner propane cooker (such as an outdoor fryer/turkey cooker). Larger batches require longer boils and bigger pans and most upgrade to a multi-burner propane cooker or a wood-fired evaporator. You can buy complete evaporator set-ups online or make your own. The DIY options are endless as long as you have time, space, and are a little handy with basic tools.

Outdoor boiling pan of almost-done pure maple syrup.

Building your own wood “stove” is fairly simple and does not require any special skills. Look online for “cement block evaporator plans” and you will find hundreds of ideas. Better yet, visit with another tapper and see how they’ve built their cooker. One of the tappers consulted for in our research used his brother’s metal working skills to build a cooker out of an old 55-gallon drum and an evaporator pan to fit the stove. The only requirement for your cooker is that it can sufficiently hold your pan 18- to 24-inches above the wood fire.

Along with your chosen cooking methods, you’ll need abundant fuel close to your cooking station – enough to last the many hours of boiling. Additionally, you’ll need sufficient lighting in case boiling or bottling goes past dark.

Evaporator and Boiling Pans

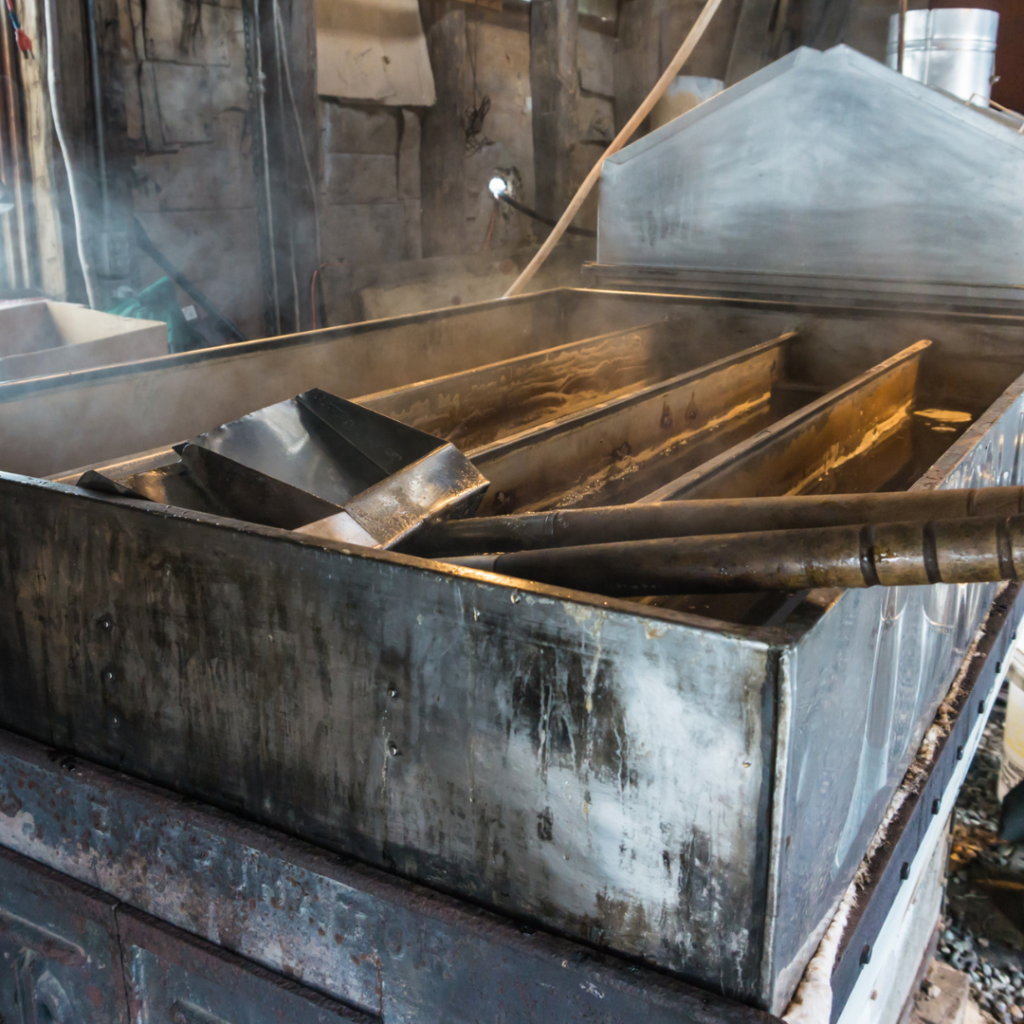
For a small-batch hobbyist the boiling process is less complex than for the commercial cooker. Large operations typically use a continuous-feed evaporator which continuously heats the sap, feeds it into another constantly-boiling evaporator pan, and then pours it off for finishing. This is necessary because adding cold sap to a boiling evaporator pan will cause the whole batch’s temperature to drop which will lengthen the boiling time. Most hobbyist tappers use multiple pots and pans to re-create this four-step process:

  1. The first batch of sap for the day is poured into the large evaporator pan, leaving at least 6” to 8” of headroom to prevent boiling over. If all the sap you have fits in your pan, you do not need to do Step 2.

2. Once the sap in the evaporator pan starts to boil and condense, you can start warming extra sap in your other smaller pans.

3. After this extra sap is heated to boiling, pour it into the larger pan remembering to leave headroom to prevent boil over. Continue this process until all your sap is in the large evaporator pan and boil the entire batch to the finishing point.

4. Finally, as the sap nears the 216°F mark in the large evaporator pan, it’s filtered and poured into large kettle (usually the same kettle you used to prewarm it) and then put on a smaller heat source to finish it. This last step keeps the syrup from becoming too shallow in the pan which can lead to overheating or burning.

The rate at which your water evaporates depends on numerous factors such as: pan size and construction; type of heat source; and even the temperature of sap being added to the evaporator. If using a shallow, rectangular pan with lots of surface area, it takes between 9 and 18 hours to produce one gallon of syrup. With a deep, circular pan, it will take much longer.

DIY Evaporator Pan on three-burner propane cooker.

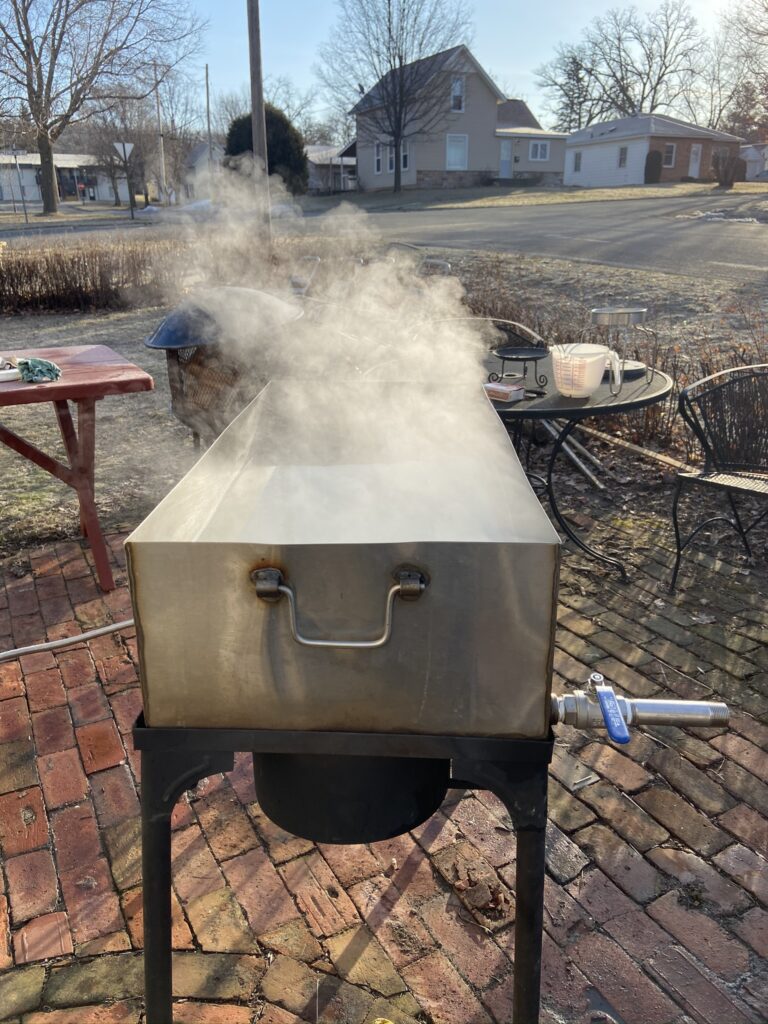
Pre-made hobbyist sized evaporators can be bought online. The advantage of these are they have a draw-off spout which reduces spills and potential burns from trying to pour the boiling sap or syrup out. When buying a pan, choose a heavy-duty pan that can withstand prolonged heat – preferably a large, flat pan with sides at least 6- to 8-inches high to prevent boiling over. Many commercial kitchen supply stores sell large, flat roasting pans which will work for the first stage of boiling but are not thick enough to finish syrup in without burning. A high-quality stock pot works best for the final boiling stage.

You can also find older enamelware or stainless steel pans at auctions, yard sales, or online trading sites – just be sure they are spotless and not corroded or rusty. Keep in mind, though, that whatever system you invent, you will be pouring or moving boiling hot sugary substances out of it! If the pan is too unwieldy or large to move, you could risk serious burns or at least end up spilling your almost-finished syrup.

Large, multi-channeled sap evaporator pan with hydrometer ladle.

Make it Portable or Make it Decorative

Many wood-fired cookers look similar to backyard brick pizza ovens and you could easily adapt that design to fit your pan. Then after the season, you can still use it! If you don’t want to look at your cooker all year, consider building it out of material you can easily disassemble it or move it once the season is over.

Community Syrup Making

Consider joining forces with friends and neighbors to build a community cooker where everyone brings their sap and shares the process. This is a fun way to build time with family and friends; grow an outdoor-centered hobby; and boil more sap than you can do on your own. Join up with your local online groups to find other sugarmakers in your area. You might be surprised by how many folks are out there doing this same thing!

Maple Tapping 101

Would you like to learn one of the simplest skills that fills your shelves with pure maple syrup? We promise your family will enjoy this winter hobby! If you can run a drill, boil water, and read a candy thermometer, you have the knowledge to get started. And after a few weeks, you’ll have a year’s supply of syrup and the skills you need to do this every year.

And with all the great resources here at Maple Tapper, you’ll always have support! We’re tapping, too, and we’re on call during the whole season plus we’ve shared all that we know in this blog, in our books (included in most kits), and in our new video course (here).

Are you ready to do this? Here’s three simple preseason steps you can do right now:

Step #1 (time required: approximately 15 minutes): Assemble your tools (most of which you probably have in the garage and kitchen already). Here’s what you’ll need:

  • Well-charged cordless drill (or manual hand brace) with a 5/16” wood-boring drill bit marked at 1 ½” (with marker or masking tape) from the tip
  • A small hammer
  • Spiles (the technical term for tap!) and either tubing or an all-in-one bucket system. The tubes are nice because they store flat but it’s totally your choice. (Shop gear here)
  • Collection containers such as buckets or gallon jugs with lids. Avoid containers that have held milk, pickle juice, or oily substances and do not wash with dish soap – these all can impart weird flavors to your sap.
  • Syrup making filters – try our one-quart, DIY filters (here)
  • Kitchen utensils; pots for cooking; a way to boil your sap (more on that at this article: “Maple Sap DIY Cooking Methods”; and jars with sealable lids (Mason jars with lids/rings work well)..

Step #2 (time required 5 minutes or less): Find a tree or two. The best choice for the sweetest syrup is to tap a sugar (or hard) maple tree but you can also try silver maple, box elder, or even birch (much more info on that in our book.). The best way to identify a sugar maple is to go out in the fall and a) look at the leaf color – sugar maples typically have the most colorful red, orange, or yellow leaves or b) look for the seeds (those little “helicopter” seeds we played with as kids). Hard maples drop seeds in the late summer or early fall and soft maples drop seeds in spring and early summer.

Over the entire season, you can expect approximately 10- to 12-gallons of sap per taphole which will boil down to about one quart of syrup. Trees can handle more than one tap but make sure you can handle more than 10 gallons! You do not have to own a plot of land in the country to find maple trees. Town syrup is just as sweet as country syrup – in fact, recent research has shown that “boulevard” grown trees actually produce more sap than forest-grown trees because they have more space to grow. The one note here: don’t tap trees that live in areas treated with chemicals such as pesticides or herbicides used on lawns.

Step #3 (time required 30 seconds per day): Watch the weather. Now comes the waiting and watching portion of this hobby (we know, this is kind of like other parts of winter.) What you’re looking for is a forecast that includes a pattern of cold nights but warming days. Sap starts to run when nighttime temps fall below freezing but daytime temps get into the 40°Fs. This usually happens around January or February and once you see this pattern forecasted for the next week or so, it’s time to get out there and tap your trees. Don’t try to get a head start by tapping before this weather pattern emerges – that could cause your spile to freeze inside the taphole which could damage the tree. Tapping is so quick you don’t need to do it ahead of time!

Step #4 (a few weeks, hopefully): Once the sap runs, you’ll go out every day and collect it at the tree. Depending on how you’re cooking, you’ll spend a few hours boiling (this is literally just boiling water so all you need to do is keep an eye on it and keep the heat on). The full boiling, filtering, and bottling process is covered in this article: “How to Make Maple Syrup”.

Marking Maple Trees for Easy Identification

orange surveyor's ribbon wrapped around maple tree trunks in leafy forest.

For first time tappers (and sometimes, even seasoned sugarmakers), finding your sugar maples in the woods can be much harder than you expect! You think you’ll remember where they are but when everything is gray, brown, and white, the trees start to look the same! And with no leaves (or even trails) to point you in the right direction, you’re standing in the cold trying to identify trees by the bark.

Make your life easier – and have a good excuse to visit the woods in the summer or fall – and go out and mark your trees while they’re in full leaf. The quickest method we’ve found is tying bright surveyor’s ribbon tape around the trees we plan to tap. This can be found at most hardware and home improvement stores or online and comes in a variety of colors. It’s weatherproof and slightly stretchy so it won’t constrict the tree. And it gives you a reason to go out and hug your trees (you know you want to)! For more advanced sugarbush keepers, this ribbon tape is also a good way to identify non-maple trees to be trimmed for easier access or trailmaking.

While you can tap soft maples, walnut, and birch (details on tapping those varieties here), sugarmakers choose hard maples because the sap has the highest sugar content (so, much shorter boiling time) and the sweetest, most robust maple flavor. If you’re still learning how to identify a sugar or hard maple, look first at the leaves and the seeds (aka spinners or helicopters). These will quickly give you the info you need to find the hard maples:

Hard maples have more rounded leaf lobes; more brightly colored autumn colors (especially reds and oranges), and drop seeds in the fall).

green silver or soft maple leaf

Soft maples have more “toothed” or pointed leaf lobes, typically more yellow colors in the fall, and drop seeds in the spring.

Lots more identification tips can be found at this University of Maine Extension office article.

Maple Syrup Grades and What They Mean

Since sugar shacks opened, pure maple syrup was graded by color and sugar content and each region kind of did its own thing. Yes, it was always sweet and delicious but the consistency across the country (or internationally) was just not there. So in 2014, the International Maple Syrup Institute proposed a change to the grading system which has been adopted both by the USDA and the CFIA (the Canadian equivalent).

Syrup is still graded in four categories but now by color. This handy chart from the Wisconsin Maple Syrup Producer’s Association compares the old grades to the new ones. So if you’re looking for what used to be called Grade B, you’d choose Grade A: Dark. The darker the syrup, the more concentrated the sugar and the more robust the flavor.

How to Cook with Each Grade

Because the darker the color, the more intense the flavor, choose the syrup that best matches what you’re cooking:

Grade A: Golden Color. Has a light, delicate flavor perfect for replacing refined white sugar but also delicious on oatmeal or yogurt.

Grade A: Amber Color. A bit more hardy flavored and probably the most commonly used, this is your gold standard and perfect on its own over waffles, mixed into marinades, or used as a delicious cocktail base.

Grade A: Dark Color. Not for the faint of heart, this is the syrup for more adventurous chefs. A little bit goes a long ways but perfect for thick spicy sauces (such as BBQ); baked beans, or marinades. Also the choice for Paleo dieters.

Grade A: Very Dark Color. The strongest tasting of all, this grade was formerly reserved for commercial use only.

So what makes syrup a certain grade? Many factors affect the color, taste, and even smell of pure maple syrup. Everything from the soil around the tree to the weather at time of tapping to the time of year adds to creating syrup’s unique appearance and taste. In the beginning weeks of the season, the color and the flavor are lighter and as the season warms, the maple syrup turns darker and the flavor becomes more robust. Grade only matters if you’re selling syrup so check with your local Extension Office for more information on accepted grading techniques.

Want to try your hand at making maple syrup? Start here with our Beginner’s Tapping Kit.

Pure Maple Syrup as a Sugar Replacement?

From the Paleo Diet to Sugarbusters to the South Beach Diet – every diet craze that’s swept the country has had one thing in common: avoiding refined sugars. But what to do when your sweet tooth doesn’t agree? Try pure maple syrup! This all-natural organic sweetener is completely unrefined (other than boiling off the water) and if you make it yourself, it’s really inexpensive!

Of course, maple syrup is still a sugar so enjoy in moderation especially if you’re on a low-sugar diet. The good news? Unlike refined white sugar, pure maple syrup has a lower glycemic index, is much more nutrient-dense and rich in antioxidants. The antioxidant levels are comparable to a banana and one tablespoon of pure maple syrup contains:

1% Daily Value of Calcium, Iron, Magnesium, Potassium, and Copper.

6% Daily Value of Zinc.

33% Daily Value of Manganese.

Pure maple syrup can be easily substituted for white sugar in most recipes but it will naturally give the dish a slight maple flavor. If the recipe calls for 1 cup of white sugar, use approximately 3/4 cup of pure maple syrup. It will also add a bit more moisture to your recipe compared to refined sugar. Adjust recipes by reducing liquids by 3 Tablespoons for every cup of maple syrup.

greek yogurt with almonds and maple syrup

Naturally improve your morning yogurt! Greek yogurt is such a healthy choice for your family but it’s usually filled with sugar (and more expensive because of it!). Instead of buying the pre-flavored yogurt cups, sweeten plain Greek yogurt with pure maple syrup and liven it up with these delicious and nutritious additions. Kids will love it and the high-protein will really power them up for the day.

1 cup plain Greek Yogurt

½ cup mixed nuts or seed, dried fruit, or granola (unsweetened)

¼ teaspoon each: turmeric, ginger, cinnamon, and cardamom

1 tablespoon pure maple syrup

Mix and serve. For smoothies, swap out the nuts for frozen bananas or chunked up fruit or berries.

Has Your Maple Sap Stopped Running?

A few years ago many areas of the United States saw a very early sap run so some folks started collecting sap in mid-January, At first they had a good run but eventually saw decreased output and some tapholes dried up completely.

It was unusual and so many sugarmakers we’re asking us, we went to the experts at our favorite extension services. Many thanks to University of Vermont, Ohio State University, University of Minnesota, and Cornell University for patiently answering our questions and offering some helpful suggestions. Here’s what they think happened and what you can do to keep on tapping after your lines seem to clog up.

For starters, this all assumes the tree has not budded out – if that’s the case, the season is done because the syrup will taste bad.

Two reasons for an early shutdown of your taps:

No. 1: Your area has stayed above freezing for too long. Without the freeze/thaw cycle, the sap flow stops or is greatly decreased. Freezing is required to produce the negative stem pressure needed to draw more ground moisture into the stem and crown of the tree. If below freezing nights and above freezing days return to your sugarbush, the sap may resume its flow so leave your spiles in and see what happens.

Author’s Note: My own experience bears this out. During that 2017 season in Minnesota we tapped on 2/18 when the 10-day forecast looked sappy. Right away, we had a good sap run but by 2/20 the temperatures were staying in the high 50s and even into the 60s. That’s right, Minnesota in February! I left the spiles in but we had no sap during these warm days. Then more normal weather moved in and about a day afterwards, sap started flowing again. It wasn’t back to the previous amount but it was steady.

No. 2: Your area got really warm (in the 60s or higher) and the sap hole is probably plugged (some call it “dried up” which is not technically accurate). When the temperature is this warm, bacteria grows and thrives in a sugary substance like sap. It will travel into your spile (especially if you’re using a bucket for tapping) get into the tree and plug the xylem vessels. (Imagine large straws extending up and down the tree – this is what you tap into to extract the sap). Don’t worry, this is the natural mechanism through which trees heal themselves. Great for the tree but not so good for the sugarmaker. Once this happens, that taphole is done.

Redrilling it or reaming it out would only further damage the tree so that is not recommended and it would not remove the “plug” that’s above and below the taphole. If you suspect this is the case, leave your spiles in until another freeze/thaw cycle and see if the sap will run. If not, remove them and hope for better weather next season.

One Extension Office pointed out that having snow pack around your tree will help keep the temperature down a bit which will inhibit bacteria growth. They also mentioned that using a closed tapping system such as taps and tubes, shop here gives bacteria less opportunity to enter the system.

Tapping More Holes?

So, if you’ve determined your taphole is a goner, can you drill another hole? This is a maybe and it depends on how many tapholes you already have in that tree (see the chart below) and if you can find a new spot at least 6” away from the existing tapholes. If you can meet the necessary criteria, you can try drilling another taphole but make sure the weather forecast is favorable.

Taps per Diameter Guide
12”- 18” diameter = 1 tap
18” – 32” diameter = up to 3 taps
32” or more diameter = up to 6 taps

One interesting suggestion I heard was to tap your trees in sequence to account for weird weather patterns. For instance, if you normally tap 20 trees, tap ten during the first warm spell and tap the remainder during the normal tapping season in March (depending, of course, on the temperature forecast and before the tree has bloomed). This does add more work to the cooking but we have seen that it’s possible to freeze sap without much loss.

How To Increase Your Syrup Production

Two blue dropline tubes attached to spiles in maple tree for collecting maple sap.
Multiple maple sap taps on a large silver maple tree.

For those of you who’ve made it through one season, the natural second season question is: how can I get more syrup? Well, as you’ve probably already guessed, you can only get more syrup by collecting more sap. So, now what? Before you run out and buy 40 acres, here’s a few suggestions that you might be able to put into use this year:

#1. Put more taps in each tree. Most mature trees can handle more than one tap – see the chart below for size needs – measure the diameter at about 4 ½’ above ground level to determine how many taps to use but never use more than 6 taps per tree. Using tubing is a great time saver as you can thread more than one tube into each bucket. (Our Deluxe Kit comes with 20 taps and tubes which should help out with this step! Order here, shipping is free!)

guide to amount of taps per tree by diameter

#2. Try other non-sugar maple trees. Every tree has some “sugar” in its sap but not all of this sap is as delicious or as high in sugar content as maple sap. Favorites include birch, black walnut, sycamore, and other maple family trees such as box elder, silver maple, or red maple. Because the sugar content is lower, it takes a lot more sap to make equivalent syrup amounts (for instance, with birch you can expect a nearly 100 to 1 sap-to-syrup yield).

Non-sugar maple syrup can be an acquired taste with descriptions ranging from wild-tasting to bitter to earthy, expect something different if you decide to try making syrup from one of these trees. Of course if it tastes good to you and you’re willing to put in the time, then it’s a worthwhile endeavor! Each variety will have a different flavor, color, and sweetness; the seasons are generally the same; and the process of tapping, collecting, filtering, and syrup making is similar to maple tapping. Our book included with every kit thoroughly explains the intricacies of each tree (or you can order the book separately through our website).

birch tree

#3 Pool your efforts with other sugarmakers. This may not net you a lot more syrup but we firmly believe that many hands make light work especially when it comes to boiling sap. Maybe you have a great evaporator set up with lots of fuel but not as many trees as you’d like and your neighbor has tons of trees but no cooker. If you pool your resources you’ll save time cooking and probably end up with a little more syrup than if you worked alone. Plus it’s just fun to have a partner in crime!

Tapping Trees with Buckets & Spiles

maple tapping bucket with attached spile for collecting sap

This is one great all-in-one kit that holds a lot of sap, is very lightweight, and is easy to handle. Plus the blue color really shows up well in the woods. Once you’ve drilled your taphole, putting this bucket in place is as easy as 1-2-3.

Step One: Insert the blue spile and gently tap on the upper knob. Do not tap on the spout end as it may crack.

tapping a maple trees by hammering in 5/16" blue plastic spile

Step Two: Thread the metal rod through the hole in the spile, making sure it goes through brackets in the bucket lid. Once in place turn the bent end so the rod is locked in place.

maple tapping bucket with integrated spile and lid

Step Three: Hang the bucket on the hook and close lid. For extra stability, bungee cord or tie the bucket loosely to the tree.

Now you just need to let nature take its course! Most likely the sap will already be running by the time you get the bucket hung up – just come back each day to empty your buckets. Again, this is quite simple. It’s best to bring a few food-grade “transfer” buckets with you to collect your sap. Carry this bucket to each tree – hopefully you’re using a sled attached to an ATV or snowmobile. Empty the full bucket into the transfer bucket. Don’t worry about bugs or debris as they’ll be filtered out when you get home. Replace your buckets and take your bounty home!

Once you’re done tapping for the season, inspect your equipment for damage. This system should last for many seasons but can suffer damage from normal wear and tear. Wash your buckets, spiles, and lids with warm water. Do not use dish soap as it may leave residue which can be absorbed by the sap and eventually make for bad-tasting syrup. Once thoroughly rinsed, let all your equipment air dry and store away for next season.

For more detailed info on collecting, cooking, and using maple sap and syrup, check out our downloadable ebook and other blogs.