After a few seasons of sloshing buckets around the woods, every sugarmaker starts to think about connecting all these lines into one main bucket. Wouldn’t that be a huge timesaver? That’s why tubing systems are becoming the first choice of most expert sugarmakers and this article will give you a mini-guide on using droplines, mainlines, and large storage tanks (also called an Aerial Tubing System). If you’re serious about implementing one of these systems, we highly recommend visiting one of the helpful Extension Service sites listed at the end of this article. These really smart folks have done the research and offer detailed instructions for setting up, maintaining, and getting the most out an aerial tubing system. Don’t forget to check with your local Extension Service, too, or stop by another sugarmaker in your area and ask questions. Most folks love to show off their operation!
Order 50′ and 500′ coils of BPA-free, food-grade tubinghere. Easily connects to our regular tubes.
Typical Maple Tapping Dropline System Parts
(You can create a smaller version with three or four trees that would use droplines connected to a larger line that ends at a central bucket.)
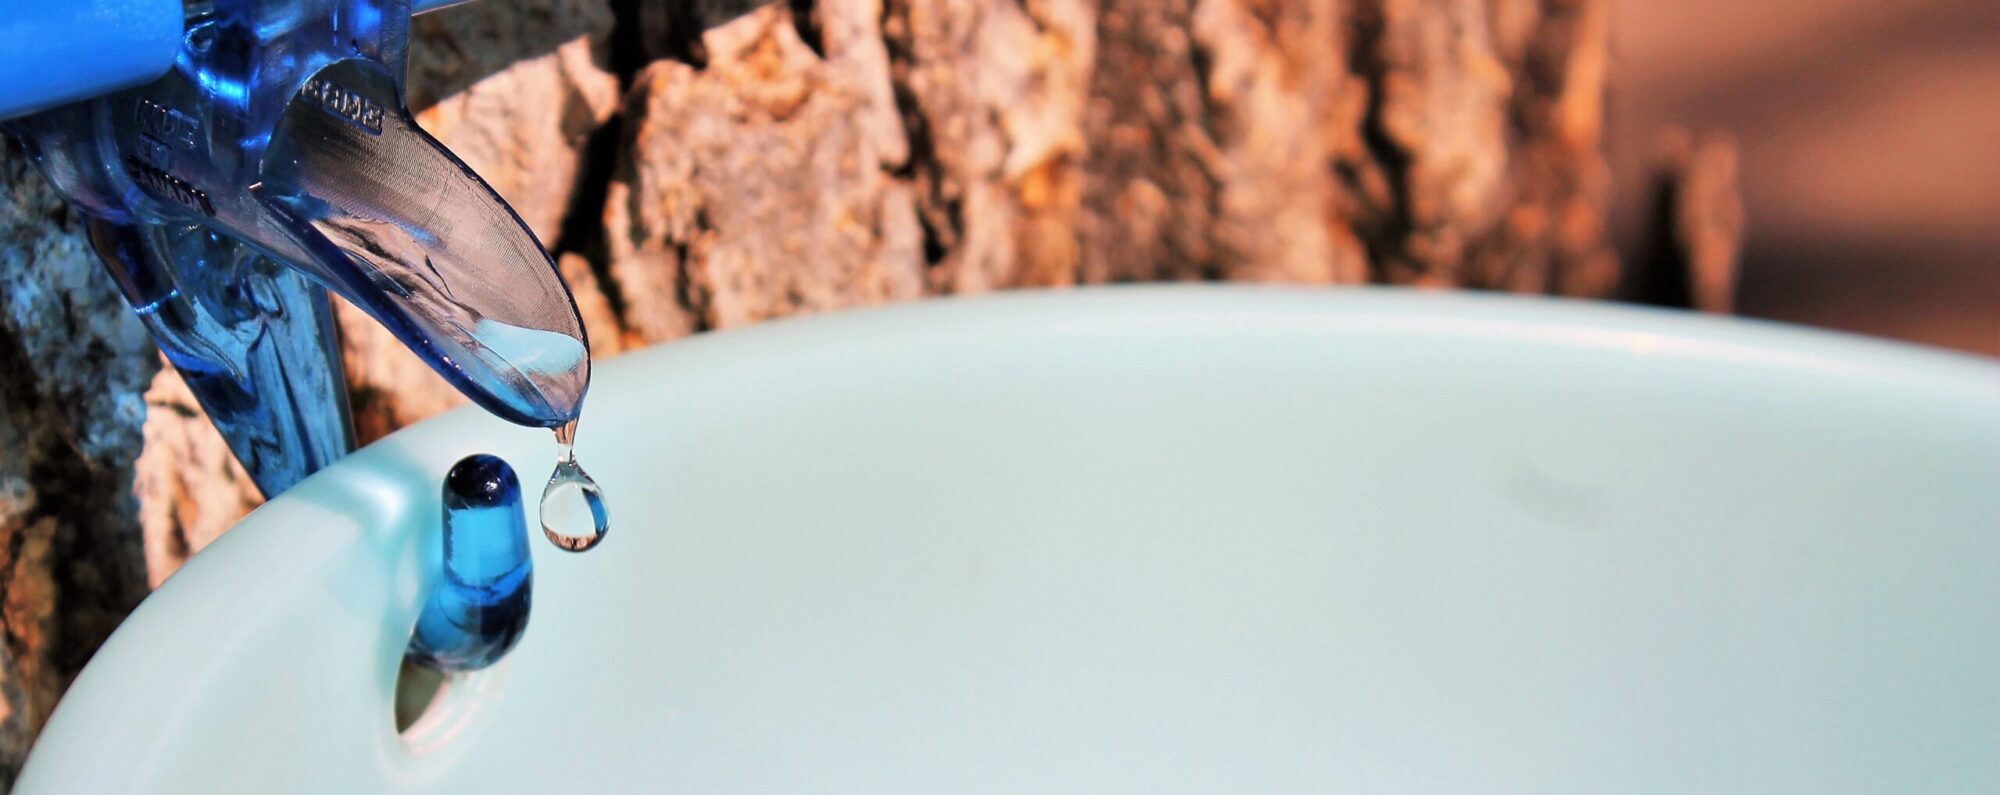
Standard spiles (to go in the tree)
Droplines – tubing that connects to the spiles and runs to the lateral lines
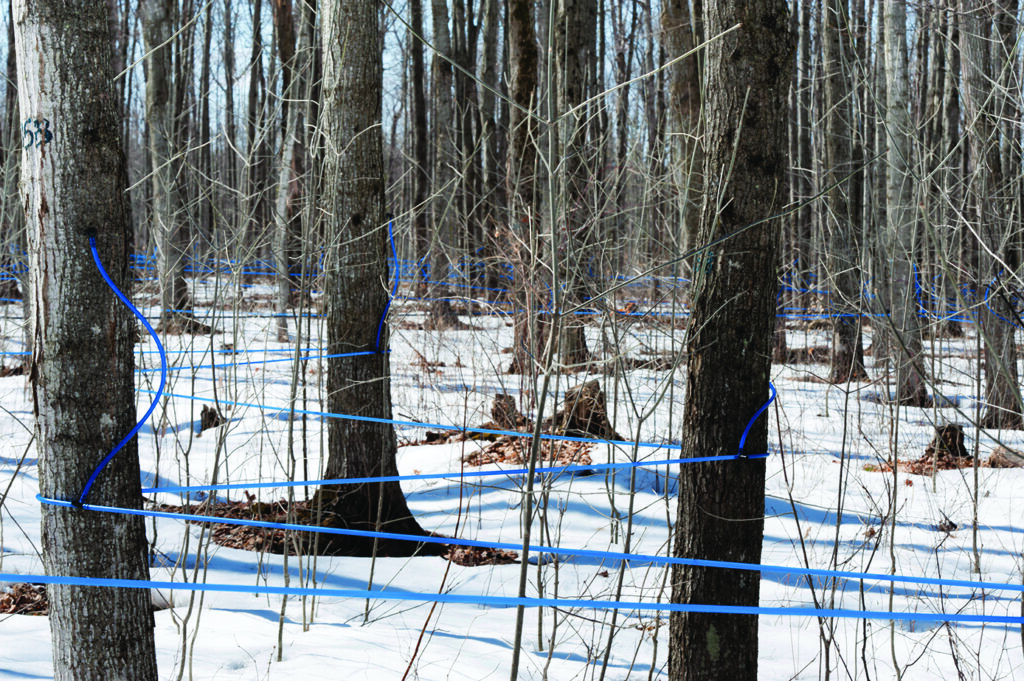
Laterals tubing – this part of the system connects multiple trees to the mainline (Penn State recommends no more than 10 trees per lateral). The laterals are stretched from tree to tree to create a tight structure and then connected to each dropline through a special tee connector.
Mainline (often called conduit) – typically larger than the tubing because it will carry sap from multiple trees. Laterals feed sap into the mainline which runs through the sugarbush to the storage tank.
Large storage tank – placed at the end of the mainlines to collect all the sap. Preferably this tank is near your sugar shack where it can be further run into your filtering and cooking areas.
Most Important Rule of Using a Multiple Line System: The overall flow of these systems must be downhill because you are creating a gravity system to pull the sap through long stretches of tubing. If parts of the tubing sag or dip, sap flow will decrease. Sags in the line also can cause bacterial growth if sap is left sitting in the tubing. Many large scale producers also incorporate a vacuum system to keep sap flowing.
After you’ve set up your system, don’t be afraid to tweak it. Maybe a line needs to be shortened a bit or maybe you need to set up a collection bucket midway through your planned route. As with all sugarmaking, trial and error creates the best product!
It’s also important to use food-grade tubing and containers at all points in collection. This ensures the taste and quality of your finished syrup. And, yes, you can freeze maple sap!
Because the syrup-making process relies so heavily on an accurate temperature reading, it’s best to calibrate your thermometer before each day’s boiling session. Readings can be affected by barometric pressure, by altitude, by mishandling of the thermometer (yes, we’ve all dropped ours!), or even if you’re using a brand new thermometer.
The purpose of calibrating it is to find the temperature at which water begins to boil — normally this is at 212°F for most maple tapping altitudes. (If you live at higher altitudes check online for your normal water boiling temperature.) Once you know your thermometer’s reading, you can then add 7° to determine your syrup’s finish point of 219°F. For instance, if your thermometer shows a temperature of 213°F when water boils, you’ll know it is off by +1°F, so you’ll know to boil the sap to 220°F (as shown on your thermometer). Don’t worry, you’ll figure it out!
How to calibrate a thermometer:
1. Place your thermometer in a pan of distilled water making sure to have 2-inches of room on all sides and up from the bottom of the pan. Make sure you start with enough water to keep your thermometer’s bulb or reading tip submerged for five minutes even as water evaporates.
2. Heat distilled water to a rolling boil. Leave thermometer in boiling water for five minutes, remove from water, and hold at eye level to read temperature.
3. Take note of temperature in relation to baseline: If it is +/- 212°F, add or subtract this range to your finish boil target temperature as described above.
If you get wildly different readings each time you calibrate your thermometer, you can safely assume this thermometer is no longer reliable you should buy a new one.
Our Ultimate Tapping Kit (order here) includes a thermometer like the one shown here — you can also use a digital one or a standard glass thermometer. Just make sure it has marking or readings to one-degrees.
If you’ve ever seen sediment, cloudiness, or even chunks of sugar in your pure maple syrup, you know what sugar sand (aka niter) is! This is a perfectly edible (and natural) component of syrup but it can easily be removed with filtering. Most sugarmakers filter sap and syrup three times and this article and video describes that quick and easy process. Be sure to use professional filters designed for syrup making (not coffee filters, cheesecloth, or dish towels).
Filters are inexpensive and reusable so it’s a one-time purchase as you get started. We use one-quart filters which are a more manageable size for the home sugarmaker. They fit perfectly into a standard sieve stand and have small slits in each side so you can thread a dowel through and easily balance on the sieve stand so you have both hands free for pouring hot syrup.
Filters are included with many of our kits but you can also buy them separately here.
Note: If you’re making black walnut syrup, don’t use the Orlon or a similarly thick filter. Walnut sap contains more pectin than maple sap so it’s too thick to run through this type of filter. Try cheesecloth or a thin strip of clean muslin.
This short video shows the entire process:
Filter #1: This step is done each day as you collect sap to remove debris that may have fallen into your sap bucket (one more reason to use a closed lid system!). Suspend the thinner prefilter over a clean bucket and slowly pour the sap through to seine out debris. When done, rinse this filter with plain hot water, air dry, and save for later. Refrigerate or freeze the sap until ready to boil.
Filter #2: This step occurs midway in the boiling process as sap reaches a temperature in the 215°F range. At this point, concentrated sap is moved from the larger pan or evaporator and poured through a thin prefilter into the finishing pot. This removes the majority of sugar sand which can make syrup cloudy.
Filter #3: The third and final filter is done after the sap has reached its finished temperature and is poured into bottles. For this filtering, put the thinner prefilter inside the thicker Orlon filter. Slowly pour the finished sap through these filters and into clean, hot bottles or jars. Syrup is now done!
Cleaning Filters. As mentioned earlier, these filters are reusable and should last for years if cared for properly. Never wash with detergent or dish soap as this can affect the flavor of finished syrup. After use, simply rinse well in hot water and hang to dry. Do not wring or twist the filters as this can tear them or alter their shape.
If you’d like to learn more about entire boiling process, click over to this helpful article, “How to Make Maple Syrup.”
Does your maple syrup have gritty sediment at the bottom of the jars or does it look cloudy? This is the result of sugar sand (also called niter) and every sugarmaker has dealt with it in their syrup-making career. While it’s not very appetizing and can sometimes affect taste, sugar sand is not a sign of spoilage or bad syrup. This article will explain what it is and how to avoid it.
What is sugar sand (or why is my syrup cloudy)?
The maple sap you started with is really the tree’s food and along with lots of water, it contains natural minerals. As you boil off the water, these minerals become concentrated and form into niter. Pouring hot sap and syrup through proper sugarmaking filters before bottling will keep sugar sand out of the syrup. The process is simple and quick but you have to use filters designed for syrup. Watch our quick filtering video here.
One issue we found when we first started making syrup was the big filters were difficult to manage on our own (especially when handling hot, sticky syrup!). But last year we added a smaller one-quart filter kit that also fits into traditional sieve stand holders. This makes for one-person handling and is super easy to fill the jars.
Don’t skip this step!
Syrup needs to be filtered three times: once right after you collect it to get out debris (use the thin pre-filter); again after the first boil and before you transfer it to the finish pan (also use the pre-filter); and finally at the finished 219-degree stage (this time use the prefilter nestled inside the thick filter). I usually just set everything up before I start boiling and keep it close to my bottling area. This keeps the temperature up while pouring and is a really seamless part of the process.
Just wash and reuse.
These filters are washable — just rinse in hot water (no soap or detergents, please) and then hang to dry for next use. Do not wring out or twist as that will damage the fibers. With proper care, these filters will last for many seasons.
Hydrometer and Pro Tips
Of course, cloudy syrup is not a big deal for the home hobbyist but if you’re selling syrup, it’s an absolute no-no. That’s why most large sugarmakers also use a hydrometer – not only does it guarantee the proper sugar content but allows for exact grading and eliminates sugar sand. Some maple syrup makers also let their syrup sit for awhile so the sugar sand sinks to the bottom. They then carefully pour off syrup from the top, reheat it, filter it, and bottle. The remaining bottom portion (with niter) is thrown out or also reheated, filtered, and bottled. This is somewhat wasteful and creates an additional step in the process.
Start your season out right with our professional one-quart sugarmaking filters! Designed for the home sugarmaker in mind, this quick step makes all the difference in clear syrup. Shop for filter kits here.
Pure maple syrup is one of nature’s sweetest treats and making it yourself is much simpler than you think! All you need is a maple tree, regular kitchen tools which you most likely already have, and some patience. The process is not complicated and you can easily learn everything you need to know in one season. This short article walks you through the boiling process but be sure to click over to How to Tap Trees to learn about that step (we promise, quick and easy with minimal tools!).
Step One: Sugar Shack Preparation
The boiling process can take many hours, lots of fuel, and everything around the pots will be covered in a sticky film. Even the steam coming off the sap has tiny bits of sugar! For this reason, most sugarmakers boil their sap outside and many create a separate “sugar shack” to house their cooking and bottling operations. As a hobbyist, it’s not essential to build an entire sugar shack but you will need a cooker, some kind of overhead shelter with lighting, an abundant source of fuel such a split firewood or a large propane tank, and a work surface for bottling. You can find pre-made hobbyist evaporator pans from large suppliers as well as many DIY “evaporator plans” if you’d like to build your own cooking stove. Our book, Guide to Maple Tapping, also includes much more information on the tools needed for a well-functioning sugar shack.
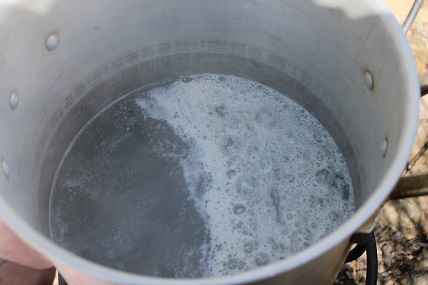
Step Two: First Filter
Sap is first filtered on the day it’s collected to remove debris or insects. Simply pour the sap through a piece of clean cotton cloth such as tee-shirt or a few layers of cheesecloth. Any materials used for filtering must not have been washed with detergent. The filtered sap is then either cooked immediately or chilled in a food-safe container until it’s time for boiling. Chilled sap will keep for up to five days but it’s best to cook it right away. Sap can also be frozen which might actually speed up the cooking process, click here for a short article on that.
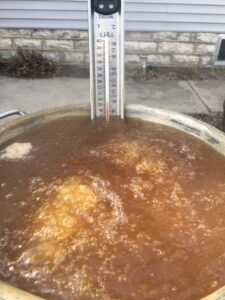
Step Three: Beginning Boil
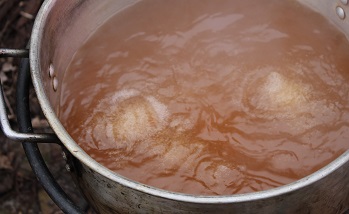
Filtered sap is poured into a shallow evaporator pan and cooked over high heat. Because sap will sometimes boil over, 3- to 6-inches of space must be left at the top of the pan. This means that all the day’s sap may not fit into the evaporator pan at once. In this instance, the additional sap is warmed separately and added to the main batch as it boils down. This process is continued until all the sap is boiling in one big batch. Sap is boiled as aggressively as possible until the temperature reaches approximately 216°F.
Step Four: Second Filter and Finish Boil
When sap reaches the 216°F range, remove it from the main heat source and filter through a thin prefilter designed for maple syrup making. This filtered sap is then boiled in a smaller pot on a cooker such as a regular kitchen stove or outside propane cooker. Watch carefully until the sap reaches 219°F (the temperature at which it becomes syrup).
Step Five: Final Filter and Bottling
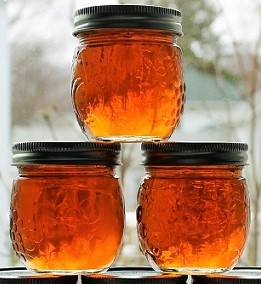
After it reaches 219°F, remove syrup from the heat and run through a two-layered filter to remove sugar sand or niter. The outside filter is a thick filter, the inside filter is the same type of thin filter used in step four. [If you’re using a hydrometer, now is the time to test your syrup — more on that below.] Suspend your filter over a large kettle (or into a clean coffee maker as shown here) and bottle syrup immediately. Try to avoid touching the rim but it’s also wise to wipe each rim with a hot, clean cloth before sealing. Seal bottles making sure to tip upside down so the hot liquid helps ensure a good seal (Make sure and use standard kitchen food safety guidelines.) Place jars sit on their sides for 24 hours, turning after the first 12 hours.
Using a hydrometer: most professional sugarmakers and those selling syrup use a hydrometer to test sugar content and grade the finished product. It is not an essential step but can improve the quality of your syrup.
Step Six: Storage
After the jars have cooled, they are wiped clean and stored away in a cool, dry place. Properly bottled and sealed pure maple syrup will keep for up to one year. Maple syrup can also be frozen indefinitely – it will not harden, though, due to the high sugar content. Once opened, syrup should be stored in the refrigerator and used within six months of opening. If you notice any mold or discoloration, discard the contents as it may not be safe to eat. Also, do not store your syrup in plastic containers as the syrup may absorb odd flavors or odors from the plastic.
A Few Common Questions
Why is my syrup cloudy or crystallized?
This sugar sand, or niter, is sometimes left if your syrup was not filtered enough. It can also be created by boiling the sap too far past the finishing point. In either case, it does not affect the quality of your syrup and will usually sink to the bottom during storage. You can reheat your syrup and put it through another filtering to remove the sugar sand.
What makes sap into syrup?
Sap becomes syrup as the water is removed through evaporation and the sugars become concentrated. The flavor of your finished syrup is created by the caramelization of the sugars during the boiling process – the longer the sap is boiled in the pan, the darker and stronger the flavors become. Flavor can also be affected by the tree’s qualities and genetics; by the time of year and method through which sap is collected; and by the cleanliness of the boiling room and storage containers.
How long does it take to boil down the sap?
The rate at which your water will evaporate depends on numerous factors such as: pan size and construction; type of heat source; and even the temperature of sap being added to the evaporator. If using a shallow, rectangular pan with lots of surface area, it takes between 9 and 18 hours to produce one gallon of syrup. With a deep, circular pan, it can take as little as 28 hours and as long as 56 hours.
Can I use maple syrup instead of sugar in my cooking?
It is a good substitute but will impart a maple flavor to your dish. Generally, one cup of pure maple syrup equals one cup of sugar and can be swapped out in most recipes. For cookies and cakes that also use liquid ingredients, just reduce the liquids by three tablespoons for each cup of maple syrup used.
What kind of trees can I tap?
Hard maples, also called sugar maple, black maple, or rock maple, have the highest sugar content and produce the best tasting syrup. You can also tap the red or silver maple but the sugar content is lower so you’ll have lower syrup yields and longer boil times. Folks also tap the box elder tree and the finished product has a heavy, sorghum-like flavor. Refer to an illustrated tree guide for identification tips or look in our book, Guide to Maple Tapping, for more information.
What parts of the country produce maple sap?
Because the sap “run” is triggered by the freeze-thaw cycle, maple syrup is only produced in the Upper Midwest, the Northeastern U.S., and Canada.
When should I tap trees?
The tapping season varies from region to region but generally starts in early March and lasts until mid-April. When the sap starts and stops running depends greatly on day and nighttime temperature fluctuations. Watch the weather forecast – sap starts flowing when the temperatures are below freezing at night but climb to the 40°F and above range during the day. If this freeze/thaw pattern is predicted, get out and tap your trees! Remove your taps when you have enough sap or when the tree buds out as that can lead to an off or “buddy” flavor in the finished syrup.
How much sap or syrup will I get from each taphole?
The amount of sap each taphole yields varies greatly depending on the tree, the time of year, environmental conditions such as the weather and soil conditions, and even at what point you are in the tapping season. In a normal season, a single taphole produces approximately 10- to 12-gallons of sap. Your finished yield of syrup will depend on the sugar content of your sap. Generally, assume a 40-to-1 conversion – so 12 gallons of sap will boil down to 1 quart of syrup. With this ratio in mind, you’d need four tapholes to produce one gallon of syrup for the season.
Does tapping hurt the tree?
If the tree is healthy when tapped and proper tapping procedures are followed, the taphole will start healing within weeks of the spile’s removal. Many maple tree farms have been tapping the same trees for over 100 years. Each taphole, however, must be placed in a different spot on the tree from the previous year. One thing to note: the bottom 4- to 6-foot “tapping zone” will result in trees that are less valuable if cut down for lumber.