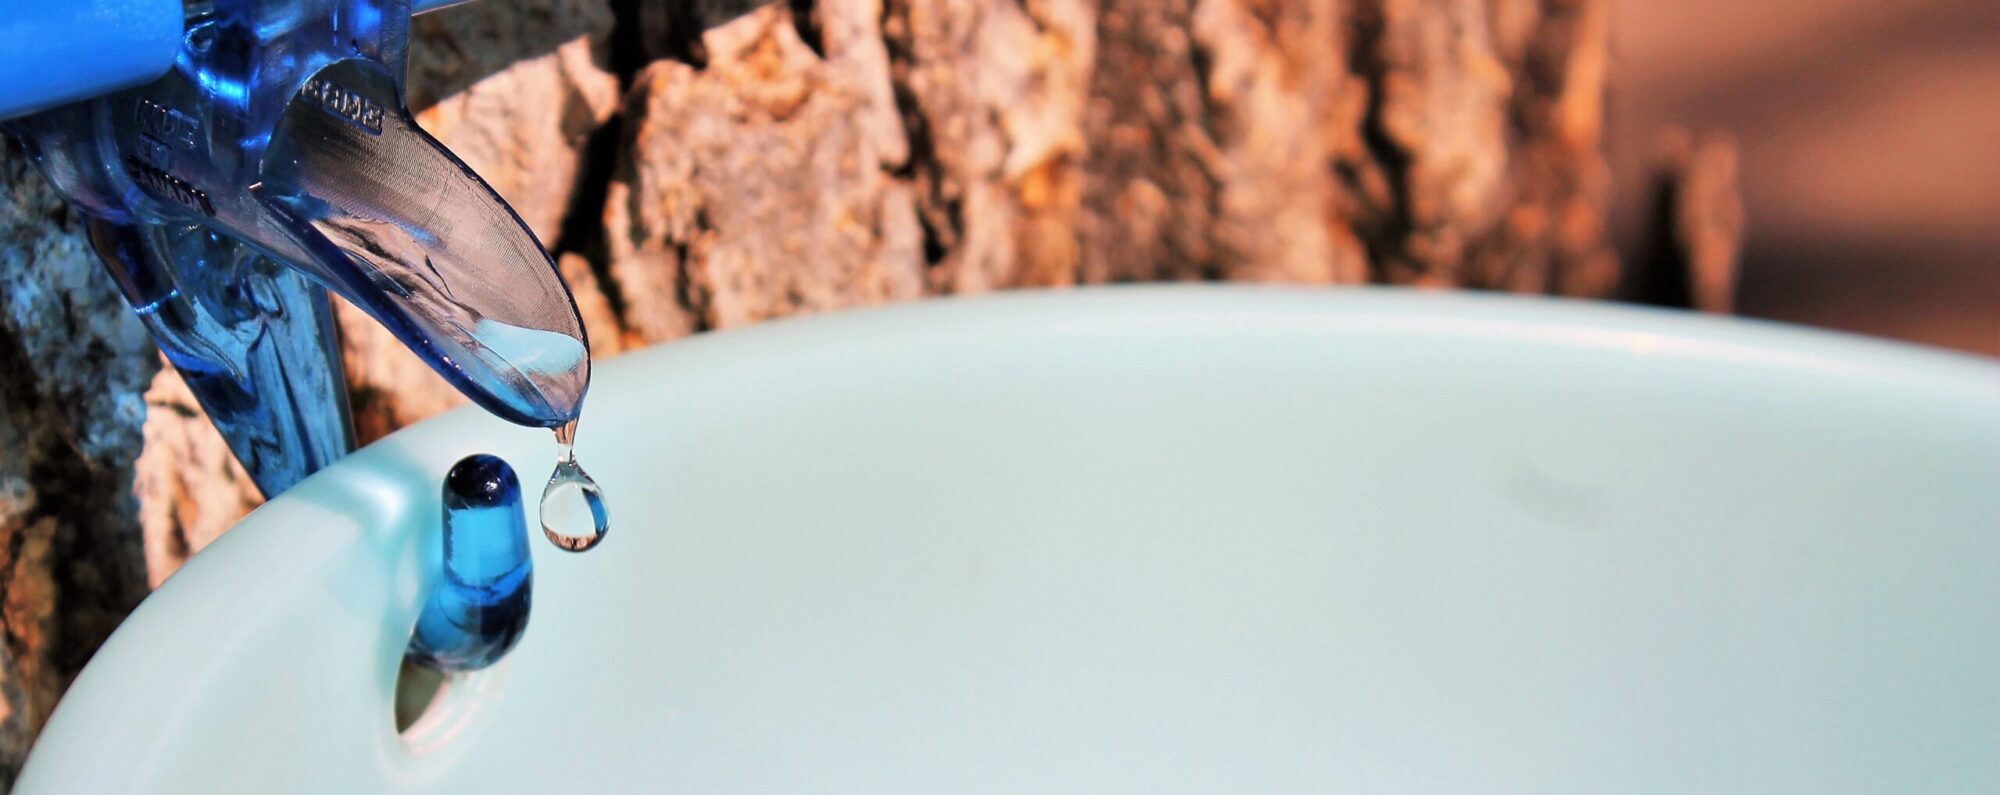
The maple sugaring season varies by region but generally starts in late January and can last until mid-April. When the tree sap starts and stops running, though, depends greatly on day and nighttime temperature fluctuations: if temperatures fall below freezing at night but climb to the 40°F+ range during the day, the sap will begin to flow and it’s time to get out there and tap your maple trees! Watch the weather forecast for this upcoming freeze/thaw pattern but don’t tap your trees too early as it can cause the spiles to freeze in the taphole which may damage the tree. Remove your spiles when you have enough sap or when the tree buds out as that can lead to an off or “buddy” flavor in the finished syrup.
If you’re adventurous and trying other tree varieties, their seasons are slightly different from sugar maple.The freeze/thaw cycle does affect how well sap flows but in more temperate regions such as the Western United States, trees can be tapped all winter as long as they’re dormant. In all cases, sap will not produce good-tasting syrup if the tree is in bud or growing leaves. Here’s a quick rundown of the most popular non-maple trees that folks tap for syrup:
Birch: The sap run usually begins later in the year in late March or early April, often at the end of the maple sugaring season. Daytime temperatures need to get into high 40°s and low 50°s with cold nights to get the sap flowing. Because of this late-season harvest and warmer weather, the sap spoils more quickly if left sitting all day in the buckets so birch sugarmakers often must collect sap twice per day. The season, too, is shorter and typically lasts for only two to three weeks.
Black Walnut or Butternut: As with sugar maple,the sap flow depends on the same freeze/thaw cycle and the season begins at the same time. The length of the season, though, is sometimes a bit longer as these trees are often the last to bud out. You will notice that the color of the sap will darken over the season and the darker it gets, the more robust the finished syrup will taste.
Sycamore: The tapping season and sugarmaking process are identical to maple trees and the sap-to-syrup ratio is similar. The flavor, though, is not the greatest and many considered this a “syrup of last resort” due to its almost-scorched taste. It can, though, be blended with other saps and will add a bit of butterscotch flavor when mixed with maple or other syrups.
Now that you know when totap, click here to learn more about how to tap, look here for how to make it into maple syrup. Of course, all this info (and more!) is in our book included with every kit!
Don’t forget, during the tapping season we put out a weekly newsletter with lots of great info. Sign up here if you’d like to get the Tapping Times and you’ll also get a FREE Quick Guide to Maple Tapping ebook.
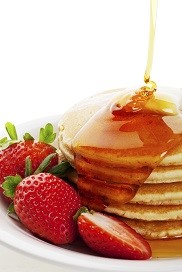
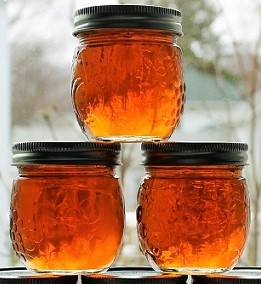
Golden syrup drizzling down over hot buttered pancakes with a strawberry garnish.
Of course, your first meal of homemade maple syrup just has to be a big stack of pancakes! This is what you worked for all season and it tastes so good. After you’ve had your fill of flapjacks – and still have a pantry full of pure maple syrup – you’ll want to venture past the breakfast table.
Pure maple syrup can easily be used as a replacement for sugar but obviously it will impart a maple flavor to your dish. Generally, one cup of pure maple syrup equals one cup of sugar and can be swapped out in most recipes. For cookies and cakes that also use liquid ingredients, just reduce the liquids by three tablespoons for each cup of maple syrup used.
We’ll add a couple recipes each week during the season and send out a link in our newsletter. If you’d like to get these yummy recipes (and our really helpful newsletter!), click here.
Because sugar was scarce but sugar maple trees abundant in pioneer days, many of their sweet treats were made from maple syrup – and those recipes are still good today. Try some of these this year, you can use already-bottled syrup or make them during your initial boiling phase. Be sure, though, to calibrate your thermometer each time you boil syrup (click herefor how to do that).
Granulated Maple Sugar. On a non-humid day, heat syrup to 252°F to 257°F (or 40°F to 45°F above the boiling point) and transfer immediately to a flat pan. Stir within this pan until it becomes granulated and all the moisture is gone. Sieve through a coarse screen (1/8-inch hardware screen) to create uniform granules. Use as a one-to-one white sugar replacement.
Hard Molded Sugar. Follow the same steps for granulated sugar but do not put through a screen. Instead pack into candy molds – be sure to follow the manufacturer’s directions on prepping and cleaning the molds.
Molded Soft Sugar Candy. Heat syrup to 245°F (or 33°F above the boiling point,) pour into a flat pan, and allow to cool undisturbed to 200°F but no lower than 160°F. Once it drops to this temperature, stir until the syrup is soft and pliable and pour or pack into molds. When cool, poured candies will have a glazed surface.
Hard Maple Sugar Candy. Boil the syrup to 240°F to 242°F (or 28°F to 30°F above the boiling point.) Keep at least 1½-inches of liquid in the pan to avoid scorching. Allow to cool to 150°F and pour or pack into molds.
Jack Wax or Maple-on-Snow.Kids will love this one! Start out by filling a pan with clean snow or shaved ice and keep frozen. The boiling range is wide for this treat: at the low end of 230°F (or 18°F above the boiling point) you’ll get a taffy-like candy while at the high end of 252°F (or 40°F above the boiling point) you’ll have a glass-like candy. Consistency changes within this temperature range. Once your syrup has reached your preferred temperature, immediately pour it in ribbons on the snow or ice. It will be done instantly and is typically eaten right away, as it does not keep well.
There are three simple ways to tell when the oh-so-short maple tapping season is done.
Sign #1: You Have Enough Maple Syrup!
We sincerely hope you reach your personal goal of maple syrup production before the season officially ends. This is usually indicated when your shelves are overflowing with maple syrup and your family is begging you to stop boiling sap and go get some groceries already because they are tired of pancakes!
But we all know you really can never have enough pure maple syrup so most of us rely on the next signs to know when to stop.
Sign #2: Weather Warms Up and Sap Slows Down
The forecast says it all . . . as nighttime temperatures warm up past freezing (and stay there), sap runs to the top branches which causes the tree to bloom or bud out. Also, the warmer the weather, the more energy the tree has to heal the taphole you’ve drilled which cuts off the sap flow from that spile (this is sometimes referred to as “drying out” but it really is just sealed over). Anyway, once you see buds, you’ve moved onto Sign #3.
Sign #3: Buds Open Up
As the warm weather and Spring Fever grips us with dreams of gardening, it also encourages the tree to open up its little buds and start growing leaves. But once those buds open up, the sap takes on an off-flavor and makes for odd-tasting syrup and the sugaring season has come to its end.
When You’re Done: Pulling the Taps
Once you’ve decided to stop collecting sap, gently pry your spiles from the trees. Just leave the taphole as is and it will naturally heal over the summer. Thoroughly rinse your equipment in hot water but do not use dish soap. Some folks use a mild bleach and water solution (especially for tubing) but you must thoroughly rinse all equipment so no traces of bleach remain. After everything is dried, pack it away for next year.
If you’re really adventurous, you can find a way to extend your season by tapping other varieties of trees such as birch or black walnut. Their seasons last a bit longer than sugar maples, read more on our blog here . . .
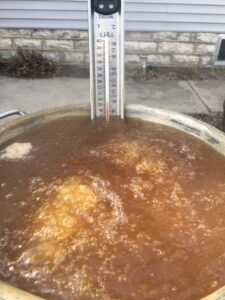
Because the syrup-making process relies so heavily on an accurate temperature reading, it’s best to calibrate your thermometer before each day’s boiling session. Readings can be affected by barometric pressure, by altitude, by mishandling of the thermometer (yes, we’ve all dropped ours!), or even if you’re using a brand new thermometer.
The purpose of calibrating it is to find the temperature at which water begins to boil — normally this is at 212°F for most maple tapping altitudes. (If you live at higher altitudes check online for your normal water boiling temperature.) Once you know your thermometer’s reading, you can then add 7° to determine your syrup’s finish point of 219°F. For instance, if your thermometer shows a temperature of 213°F when water boils, you’ll know it is off by +1°F, so you’ll know to boil the sap to 220°F (as shown on your thermometer). Don’t worry, you’ll figure it out!
How to calibrate a thermometer:
1. Place your thermometer in a pan of distilled water making sure to have 2-inches of room on all sides and up from the bottom of the pan. Make sure you start with enough water to keep your thermometer’s bulb or reading tip submerged for five minutes even as water evaporates.
2. Heat distilled water to a rolling boil. Leave thermometer in boiling water for five minutes, remove from water, and hold at eye level to read temperature.
3. Take note of temperature in relation to baseline: If it is +/- 212°F, add or subtract this range to your finish boil target temperature as described above.
If you get wildly different readings each time you calibrate your thermometer, you can safely assume this thermometer is no longer reliable you should buy a new one.
Our Ultimate Tapping Kit (order here) includes a thermometer like the one shown here — you can also use a digital one or a standard glass thermometer. Just make sure it has marking or readings to one-degrees.
Pure maple syrup is one of nature’s sweetest treats and making it yourself is much simpler than you think! All you need is a maple tree, regular kitchen tools which you most likely already have, and some patience. The process is not complicated and you can easily learn everything you need to know in one season. This short article walks you through the boiling process but be sure to click over to How to Tap Trees to learn about that step (we promise, quick and easy with minimal tools!).
Step One: Sugar Shack Preparation
The boiling process can take many hours, lots of fuel, and everything around the pots will be covered in a sticky film. Even the steam coming off the sap has tiny bits of sugar! For this reason, most sugarmakers boil their sap outside and many create a separate “sugar shack” to house their cooking and bottling operations. As a hobbyist, it’s not essential to build an entire sugar shack but you will need a cooker, some kind of overhead shelter with lighting, an abundant source of fuel such a split firewood or a large propane tank, and a work surface for bottling. You can find pre-made hobbyist evaporator pans from large suppliers as well as many DIY “evaporator plans” if you’d like to build your own cooking stove. Our book, Guide to Maple Tapping, also includes much more information on the tools needed for a well-functioning sugar shack.
Step Two: First Filter
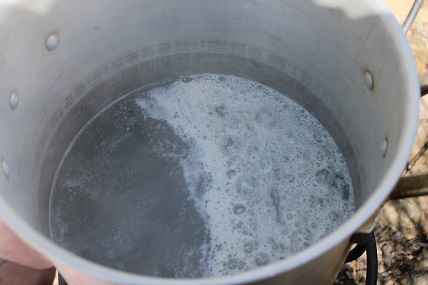
Sap is first filtered on the day it’s collected to remove debris or insects. Simply pour the sap through a piece of clean cotton cloth such as tee-shirt or a few layers of cheesecloth. Any materials used for filtering must not have been washed with detergent. The filtered sap is then either cooked immediately or chilled in a food-safe container until it’s time for boiling. Chilled sap will keep for up to five days but it’s best to cook it right away. Sap can also be frozen which might actually speed up the cooking process, click here for a short article on that.
Step Three: Beginning Boil
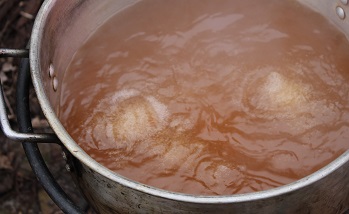
Filtered sap is poured into a shallow evaporator pan and cooked over high heat. Because sap will sometimes boil over, 3- to 6-inches of space must be left at the top of the pan. This means that all the day’s sap may not fit into the evaporator pan at once. In this instance, the additional sap is warmed separately and added to the main batch as it boils down. This process is continued until all the sap is boiling in one big batch. Sap is boiled as aggressively as possible until the temperature reaches approximately 216°F.
Step Four: Second Filter and Finish Boil
When sap reaches the 216°F range, remove it from the main heat source and filter through a thin prefilter designed for maple syrup making. This filtered sap is then boiled in a smaller pot on a cooker such as a regular kitchen stove or outside propane cooker. Watch carefully until the sap reaches 219°F (the temperature at which it becomes syrup).
Step Five: Final Filter and Bottling
After it reaches 219°F, remove syrup from the heat and run through a two-layered filter to remove sugar sand or niter. The outside filter is a thick filter, the inside filter is the same type of thin filter used in step four. [If you’re using a hydrometer, now is the time to test your syrup — more on that below.] Suspend your filter over a large kettle (or into a clean coffee maker as shown here) and bottle syrup immediately. Try to avoid touching the rim but it’s also wise to wipe each rim with a hot, clean cloth before sealing. Seal bottles making sure to tip upside down so the hot liquid helps ensure a good seal (Make sure and use standard kitchen food safety guidelines.) Place jars sit on their sides for 24 hours, turning after the first 12 hours.
Using a hydrometer: most professional sugarmakers and those selling syrup use a hydrometer to test sugar content and grade the finished product. It is not an essential step but can improve the quality of your syrup.
Step Six: Storage
After the jars have cooled, they are wiped clean and stored away in a cool, dry place. Properly bottled and sealed pure maple syrup will keep for up to one year. Maple syrup can also be frozen indefinitely – it will not harden, though, due to the high sugar content. Once opened, syrup should be stored in the refrigerator and used within six months of opening. If you notice any mold or discoloration, discard the contents as it may not be safe to eat. Also, do not store your syrup in plastic containers as the syrup may absorb odd flavors or odors from the plastic.
A Few Common Questions
Why is my syrup cloudy or crystallized?
This sugar sand, or niter, is sometimes left if your syrup was not filtered enough. It can also be created by boiling the sap too far past the finishing point. In either case, it does not affect the quality of your syrup and will usually sink to the bottom during storage. You can reheat your syrup and put it through another filtering to remove the sugar sand.
What makes sap into syrup?
Sap becomes syrup as the water is removed through evaporation and the sugars become concentrated. The flavor of your finished syrup is created by the caramelization of the sugars during the boiling process – the longer the sap is boiled in the pan, the darker and stronger the flavors become. Flavor can also be affected by the tree’s qualities and genetics; by the time of year and method through which sap is collected; and by the cleanliness of the boiling room and storage containers.
How long does it take to boil down the sap?
The rate at which your water will evaporate depends on numerous factors such as: pan size and construction; type of heat source; and even the temperature of sap being added to the evaporator. If using a shallow, rectangular pan with lots of surface area, it takes between 9 and 18 hours to produce one gallon of syrup. With a deep, circular pan, it can take as little as 28 hours and as long as 56 hours.
Can I use maple syrup instead of sugar in my cooking?
It is a good substitute but will impart a maple flavor to your dish. Generally, one cup of pure maple syrup equals one cup of sugar and can be swapped out in most recipes. For cookies and cakes that also use liquid ingredients, just reduce the liquids by three tablespoons for each cup of maple syrup used.
What kind of trees can I tap?
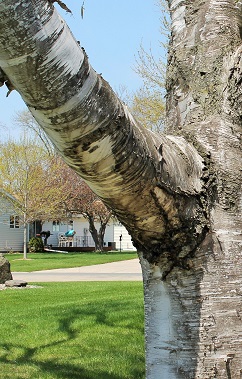
Hard maples, also called sugar maple, black maple, or rock maple, have the highest sugar content and produce the best tasting syrup. You can also tap the red or silver maple but the sugar content is lower so you’ll have lower syrup yields and longer boil times. Folks also tap the box elder tree and the finished product has a heavy, sorghum-like flavor. Refer to an illustrated tree guide for identification tips or look in our book, Guide to Maple Tapping, for more information.
What parts of the country produce maple sap?
Because the sap “run” is triggered by the freeze-thaw cycle, maple syrup is only produced in the Upper Midwest, the Northeastern U.S., and Canada.
When should I tap trees?
The tapping season varies from region to region but generally starts in early March and lasts until mid-April. When the sap starts and stops running depends greatly on day and nighttime temperature fluctuations. Watch the weather forecast – sap starts flowing when the temperatures are below freezing at night but climb to the 40°F and above range during the day. If this freeze/thaw pattern is predicted, get out and tap your trees! Remove your taps when you have enough sap or when the tree buds out as that can lead to an off or “buddy” flavor in the finished syrup.
How much sap or syrup will I get from each taphole?
The amount of sap each taphole yields varies greatly depending on the tree, the time of year, environmental conditions such as the weather and soil conditions, and even at what point you are in the tapping season. In a normal season, a single taphole produces approximately 10- to 12-gallons of sap. Your finished yield of syrup will depend on the sugar content of your sap. Generally, assume a 40-to-1 conversion – so 12 gallons of sap will boil down to 1 quart of syrup. With this ratio in mind, you’d need four tapholes to produce one gallon of syrup for the season.
Does tapping hurt the tree?
If the tree is healthy when tapped and proper tapping procedures are followed, the taphole will start healing within weeks of the spile’s removal. Many maple tree farms have been tapping the same trees for over 100 years. Each taphole, however, must be placed in a different spot on the tree from the previous year. One thing to note: the bottom 4- to 6-foot “tapping zone” will result in trees that are less valuable if cut down for lumber.