Maple Tapping 101

Would you like to learn one of the simplest skills that fills your shelves with pure maple syrup? We promise your family will enjoy this winter hobby! If you can run a drill, boil water, and read a candy thermometer, you have the knowledge to get started. And after a few weeks, you’ll have a year’s supply of syrup and the skills you need to do this every year.

And with all the great resources here at Maple Tapper, you’ll always have support! We’re tapping, too, and we’re on call during the whole season plus we’ve shared all that we know in this blog, in our books (included in most kits), and in our new video course (here).

Are you ready to do this? Here’s three simple preseason steps you can do right now:

Step #1 (time required: approximately 15 minutes): Assemble your tools (most of which you probably have in the garage and kitchen already). Here’s what you’ll need:

  • Well-charged cordless drill (or manual hand brace) with a 5/16” wood-boring drill bit marked at 1 ½” (with marker or masking tape) from the tip
  • A small hammer
  • Spiles (the technical term for tap!) and either tubing or an all-in-one bucket system. The tubes are nice because they store flat but it’s totally your choice. (Shop gear here)
  • Collection containers such as buckets or gallon jugs with lids. Avoid containers that have held milk, pickle juice, or oily substances and do not wash with dish soap – these all can impart weird flavors to your sap.
  • Syrup making filters – try our one-quart, DIY filters (here)
  • Kitchen utensils; pots for cooking; a way to boil your sap (more on that at this article: “Maple Sap DIY Cooking Methods”; and jars with sealable lids (Mason jars with lids/rings work well)..

Step #2 (time required 5 minutes or less): Find a tree or two. The best choice for the sweetest syrup is to tap a sugar (or hard) maple tree but you can also try silver maple, box elder, or even birch (much more info on that in our book.). The best way to identify a sugar maple is to go out in the fall and a) look at the leaf color – sugar maples typically have the most colorful red, orange, or yellow leaves or b) look for the seeds (those little “helicopter” seeds we played with as kids). Hard maples drop seeds in the late summer or early fall and soft maples drop seeds in spring and early summer.

Over the entire season, you can expect approximately 10- to 12-gallons of sap per taphole which will boil down to about one quart of syrup. Trees can handle more than one tap but make sure you can handle more than 10 gallons! You do not have to own a plot of land in the country to find maple trees. Town syrup is just as sweet as country syrup – in fact, recent research has shown that “boulevard” grown trees actually produce more sap than forest-grown trees because they have more space to grow. The one note here: don’t tap trees that live in areas treated with chemicals such as pesticides or herbicides used on lawns.

Step #3 (time required 30 seconds per day): Watch the weather. Now comes the waiting and watching portion of this hobby (we know, this is kind of like other parts of winter.) What you’re looking for is a forecast that includes a pattern of cold nights but warming days. Sap starts to run when nighttime temps fall below freezing but daytime temps get into the 40°Fs. This usually happens around January or February and once you see this pattern forecasted for the next week or so, it’s time to get out there and tap your trees. Don’t try to get a head start by tapping before this weather pattern emerges – that could cause your spile to freeze inside the taphole which could damage the tree. Tapping is so quick you don’t need to do it ahead of time!

Step #4 (a few weeks, hopefully): Once the sap runs, you’ll go out every day and collect it at the tree. Depending on how you’re cooking, you’ll spend a few hours boiling (this is literally just boiling water so all you need to do is keep an eye on it and keep the heat on). The full boiling, filtering, and bottling process is covered in this article: “How to Make Maple Syrup”.

How to Measure Sugar Content in Pure Maple Syrup.

Pure maple syrup should be between 66 and 68 Brix when tested with a refractometer or hydrometer . . . whoa, is that too many technical terms for you? Don’t worry, this article will explain it all and show you how easy it is to use these tools and produce the best quality syrup you’ve ever had. Most professional sugarmakers (and many home hobbyists) use two tools to measure sugar content — hydrometers and refractometers. Keep reading for more info on each.

Hydrometers

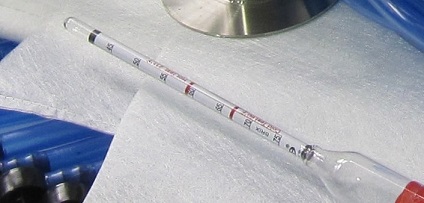
The more dense the liquid, the more sugar it contains — the hydrometer measures this relative density. Most hydrometers use a common scale of degrees Brix (shown as °Bx) which shows the sugar percentage of the liquid. One °Bx equals 1% sugar content. For pure maple syrup, the target density range is between 66% and 68% sugar content (shown on the hydrometer as 66° Brix or 35.6° Baume). Many states have a required Brix scale for folks selling maple syrup so if you’re going to market you must test your syrup.

This tool is fairly inexpensive and consists of a tall metal cup and the marked hydrometer tool which looks sort of like an old fashioned thermometer but much bigger. Be sure you buy the type of hydrometer calibrated for syrup making as they’re also sold for beer and wine. It’s also another one of those tools that will last for many seasons if you take good care of it. Typically these hydrometers are calibrated to measure cold syrup (at 60°F) or hot syrup (at least 211°F) and will be marked with a cold test and hot test line.

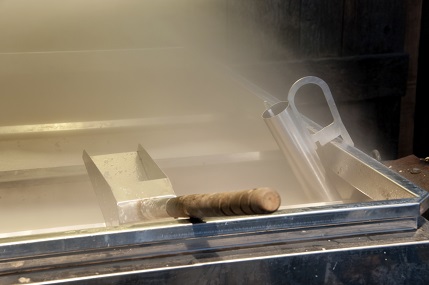
metal hydrometer tube hanging on the side of a steaming maple syrup evaporator pan
A hydrometer hangs on the side of a maple syrup evaporator as steam rises from the evaporator. The operator uses the hydrometer to test whether the syrup is done.

To use the hydrometer, first place the cup in a level pan with a lip as syrup will splash over the sides (or hang over the side of evaporator pan as shown here). Fill the cup with syrup to within ½” or so of the rim. Immerse your thermometer and make sure it reads at least 211°F if testing hot. Then carefully lower in the hydrometer – do not drop it in! It will float and the red line should be even with the surface which indicates the Brix reading. If in the proper range, return this syrup to the pan and continue with filtering and bottling.

hydrometer measurement

If you find the red line floats below the surface, syrup must be boiled longer and tested again. If the red line floats above the surface, syrup is “heavy” and too sugary or dense and you’ll need to add partially-boiled sap, cook a bit longer, and retest. While extra-sugary syrup sounds yummy, it will be more like maple sugar once it cools. After you’re done testing, be sure to rinse the hydrometer in hot water so no syrup accumulates on the device. Be careful, it is fragile!

Refractometers

Simpler to use but quite a bit more expensive, a refractometer (either manual or digital) determines sugar concentrations by measuring how light is refracted through a sugary solution. Typically a drop of sap or syrup is placed in a little cup at the end of the device and it’s held up to light (or with digital devices, just push a button). As light passes through the syrup, it’s refracted and the tool is designed to pick this up and measure it on the Brix scale. Refractometers, though, come with different scales – a low scale to measure sap and a higher scale to measure syrup.

See it in action

You know how much we love the folks at our country’s Extension offices! They provide such an incredible wealth of knowledge for all things outside and are generally pretty nice people who love to help. And they did not disappoint us here – we found this great video from the University of Maine Extension services that shows each of these tools in action and does a great job explaining how they all work.

If you’d like to learn more about other steps of the sugarmaking process, click here to look through our library of How To articles.

Maple Syrup Filtering FAQ

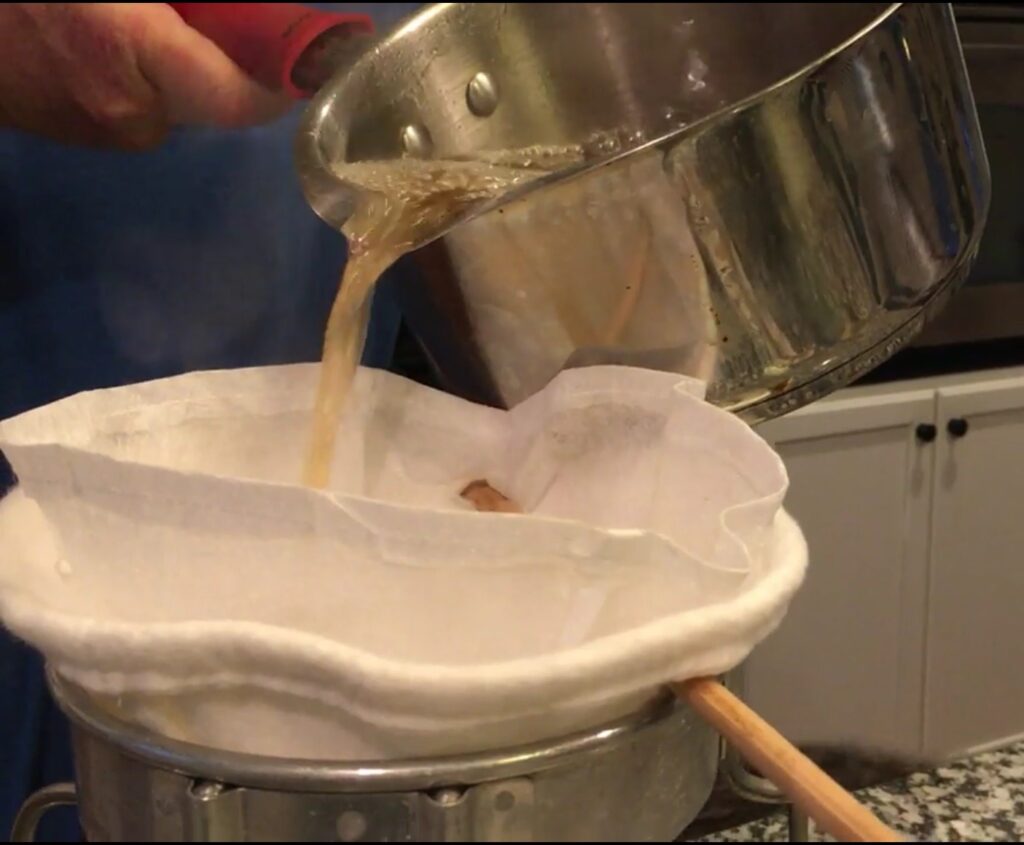
pouring hot maple syrup through two one-quart white filters to remove sugar sand or niter.

Why does my filter seem clogged or slow? This can have two answers:

1. The filter is full of sugar sand! Our one-quart filters are designed for small batches (2 to 3 quarts) and after that much syrup, they will start to clog up with sugar sand. To solve this problem, have a second filter set up to use to finish your batch.

2. Alternately, the syrup could be cooling down too much in the filter which makes it flow slower. This is an easy fix: pour only enough to fill one jar at a time. Just set the pan aside, cover it with a lid to keep the heat in, and keep refilling the filter as the syrup level gets down to about ½”. Note: be sure when lifting the lid off your pan, you tip it away from the pan so the moisture does not fall back into the syrup.

Why is the syrup dripping out the upper sides of the filter?

Our filters are made from filter material all the way up so syrup will go through all of it. If you fill it up to the top, the upper part of the filter will get saturated and syrup will start to drip through. Keep the syrup level low (as described in #1) and only as wide as the jar you’re filling.

How do I clean the thick filter?

Your filters should dry out between uses and could grow bacteria is allowed to remain wet. After syrup making, rinse the filter with hot water until all the sugar sand is removed. Filters may remain slightly darker after use and that is okay. Once through rinsed, hang upside down and open so it can drip dry. We usually balance it on a dowel (pointy end up) and prop it in a jar. Do not wring or twist the filter as that can break down the fibers and distort the shape.

Why is my filter brownish?

It is normal for the filter to take on a little brown color after use. Just make sure you’re thoroughly cleaning the filter after each boil with hot water. The spray setting on your sink nozzle works best to rinse away the sugar sand.

Can I reuse filters next year?

Yes! These filters last for a long time as long as they are properly cared for. Don’t wring or twist and always thoroughly dry before putting away. At the end of the season store in a sealed bag in a dry area.

How to Tap Maple Trees

Making maple syrup is an age-old activity, the sugarmaking process is not complicated, and you can easily learn everything you need to know in one season. Once you have the tools assembled, it really takes less than 5 minutes to tap a tree. This section will first give you step-by-step tapping instructions and then answer a few common questions people have about sugarmaking. Much more detailed information can be found in our book, Guide to Maple Tapping, which is included in every kit and also available electronically. Additionally, our video and article library includes how-to videos and instructions on selecting a tree, drilling the hole, and using each of our systems. Please check back often as we’re updating all of these resources with new material.

Step One: Identify and Mark Your Trees

Hard maples, also called sugar maple, black maple, or rock maple, have the highest sugar content and produce the best tasting syrup. You can also tap the red or silver maple but the sugar content is lower so you’ll have lower syrup yields and longer boil times. Folks also tap the box elder tree and the finished product has a heavy, sorghum-like flavor.  

The best time to identify a maple tree is in the summer or fall when it is in full leaf. Maple trees all have the same characteristics with slight and subtle variations between each subspecies of tree. Consult an illustrated tree reference guide for more details. Common but distinctive features of maple trees include:

  • Helicopter seeds (technically called samaras) with two v-shaped wings that flutter down and away from the tree. Hard maples drop seeds in the late summer or early fall and soft maples drop seeds in spring and early summer.
  • Separately lobed leaves – typically five lobes prominent valley between each lobe. Hard maples typically have a “U” shaped valley and soft maples have a more “V” shaped valley.
  • Hard maples have darker green leaves with smoother points and the most vivid orange, red, and yellow fall colors. Soft maples have a lighter yellow-green color, much pointier leaves, a white or silver underside, and mostly yellow fall colors.
  • Hard maples have light to dark gray bark with narrow, deep furrows while soft maples have a more layered, flaky bark.
  • Hard maples are most prevalent in southern Canada, the Upper Midwest, the Northeastern states, and down the eastern seaboard of the United States. Sugar maples can be grown outside these areas but require climates with a freeze/thaw cycle to produce tasty sap.

Once you’ve identified the tree, choose a tree at least 12” in diameter with a full canopy of strong healthy branches. Tie weather-resistant marking tape around your tree so you can easily find it in the spring.

Step Two: When to Tap

The tapping season varies from region to region but generally starts in early March and lasts until mid-April. When the sap starts and stops running depends greatly on day and nighttime temperature fluctuations. Watch the weather forecast – sap starts flowing when the temperatures are below freezing at night but climb to the 40°F and above range during the day. If this freeze/thaw pattern is predicted, get out and tap your trees! Don’t be tempted to do it early, though, as this could cause the sap to freeze in your spiles which could damage your equipment and the tree. Remove your taps when you have enough sap or when the tree buds out as that can lead to an off or “buddy” flavor in the finished syrup.

Step Three: Drilling the Taphole

No matter what system you choose, the drilling procedure is the same. The only variation is the size of drill bit needed – most of our kits use a 5/16” spile so that is the size drill bit you’d need. Select a wood-boring drill bit and mark it with tape or a marker at 1½” from the end. This mark will show you where to stop drilling so you only go into the sapwood. Pick a spot on the tree trunk approximately four-feet off the ground below a large branch or above a large root. If using a bucket or jug that will sit on the ground, be sure your tubing will reach the bucket even after the snow melts underneath it.

Drill at a slightly upwards angle into the tree and do not go deeper than 1 ½”. Shavings that come out of the hole should be creamy or light yellow and sap will most likely start running immediately.

Step Four: Inserting the Spile

Once the hole is drilled, you simply insert the spile, gently tap it in with a hammer until it feels snug, and attach your bucket, jug, or bag to collect sap. This tap will stay in the tree for the entire season.

Step Five: Collecting Sap

Each day, you will come back to the woods to collect your sap. Sap left sitting in buckets can grow bacteria – this is not harmful as the sap will be boiled but the bacteria will eat away at your sugars which will affect the syrup’s taste. If you can’t boil your sap every day, it can be chilled for a few days until you’ve collected enough to cook. Normally, a single taphole produces between one quart to one gallon of sap per flow-period (which can last a few hours or more than a day.) Please refer to the section “How to Make Maple Syrup” for more information on filtering and boiling down your sap.

Step 6: End of Season Chores

Once you’ve collected enough sap or the trees bud out, simply pry the spiles from the tree with a small claw hammer. The taphole will heal over the summer and the same tree can be tapped year-to-year, although you cannot reuse the same taphole. Thoroughly rinse all of your equipment – do not use detergents – let air dry and store away for next season.

A Few Common Questions

Do I need special tools for tapping?

Yes: you will need spiles or taps, something to collect your sap in, and a method of attaching it to the spile. Two of the kits we have available are all-in-one systems where the spile, hook, and bag or bucket all fit together right on the tree. We also sell a tubing kit which comes with the taps inserted into the lengths of tubing which you then can direct into a bucket or use as droplines connected to a common line that leads into a bucket. 

You will also need to take a few extra tools with you to the sugarbush – most of which you probably already own. A few necessities include: a drill with a wood-boring drill bit (5/16” or 7/16” depending on the spile you’re using); a marker; a small hammer; and a few five-gallon, food-grade buckets to transfer your collected sap. Depending on which type of kit you buy, you might also need jugs or buckets for collecting at each tree. Our deluxe kits include many of these extra tools.

What’s the difference between a 7/16” and a 5/16” spile?

Previous generations of sugarmakers used a 7/16” spile but research in the last decade has shown that a 5/16” spile (sometimes called the “health spile” or “tree saver spile”) causes less damage to the tree, allows for faster taphole healing, and does not reduce the sap yield when used with gravity systems such as tubing or buckets. Whenever possible, Maple Tapper uses the 5/16” spile in our kits.

How much sap or syrup will I get from each taphole?

The amount of sap each taphole yields varies greatly depending on the tree, the time of year, environmental conditions such as the weather and soil conditions, and even at what point you are in the tapping season. In a normal season, a single taphole produces approximately 10- to 12-gallons of sap. Your finished yield of syrup will depend on the sugar content of your sap. Generally, assume a 40-to-1 conversion – so 12 gallons of sap will boil down to 1 quart of syrup. With this ratio in mind, you’d need four tapholes to produce one gallon of syrup for the season. 

What parts of the country produce maple sap?

Because the sap “run” is triggered by the freeze-thaw cycle, maple syrup is only produced in the Upper Midwest, the Northeastern U.S., and Canada.

Does tapping hurt the tree?

If the tree is healthy when tapped and proper tapping procedures are followed, the taphole will start healing within weeks of the spile’s removal. Many maple tree farms have been tapping the same trees for over 100 years. Each taphole, however, must be placed in a different spot on the tree from the previous year. One thing to note: the bottom 4- to 6-foot “tapping zone” will result in trees that are less valuable if cut down for lumber.

What makes sap into syrup?

Sap becomes syrup as the water is removed through evaporation and the sugars become concentrated. The flavor of your finished syrup is created by the caramelization of the sugars during the boiling process – the longer the sap is boiled in the pan, the darker and stronger the flavors become. Flavor can also be affected by the tree’s qualities and genetics; by the time of year and method through which sap is collected; and by the cleanliness of the boiling room and storage containers. Please refer to the section “How to Make Maple Syrup” for more details on the syrup making process.

Do I need special tools for boiling?

You will need an outside method of boiling down your sap. Most people use a shallow evaporator pan over a wood fire for the first stage of boiling and then a stainless steel pot on a propane burner or outside stove for the finishing stage. You will also need a candy-type thermometer with a readable, one-degree scale; food-grade, syrup-specific filters; glass jars with sealable lids; and general kitchen tools such as funnels, towels, and wooden spoons. The boiling process is covered in full detail in our book, Guide to Maple Tapping.

How long does it take to boil down the sap?

The rate at which your water will evaporate depends on numerous factors such as: pan size and construction; type of heat source; and even the temperature of sap being added to the evaporator. If using a shallow, rectangular pan with lots of surface area, it takes between 9 and 18 hours to produce one gallon of syrup. With a deep, circular pan, it can take as little as 28 hours and as long as 56 hours.

Can I use maple syrup instead of sugar in my cooking?

It is a good substitute but will impart a maple flavor to your dish. Generally, one cup of pure maple syrup equals one cup of sugar and can be swapped out in most recipes. For cookies and cakes that also use liquid ingredients, just reduce the liquids by three tablespoons for each cup of maple syrup used.

How should I store my finished syrup?

Properly bottled and sealed pure maple syrup should be stored in a cool, dry, dark place and will keep for up to one year. Maple syrup can also be frozen indefinitely – it will not harden, though, due to the high sugar content. Once opened, syrup should be stored in the refrigerator and used within six months of opening. If you notice any mold or discoloration, discard the contents as it may not be safe to eat. Also, do not store your syrup in plastic containers as the syrup may absorb odd flavors or odors from the plastic.
When to Tap Maple Trees

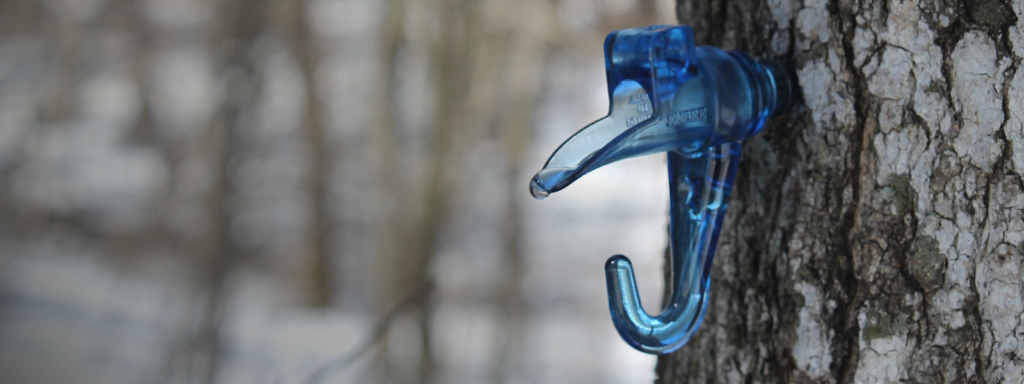
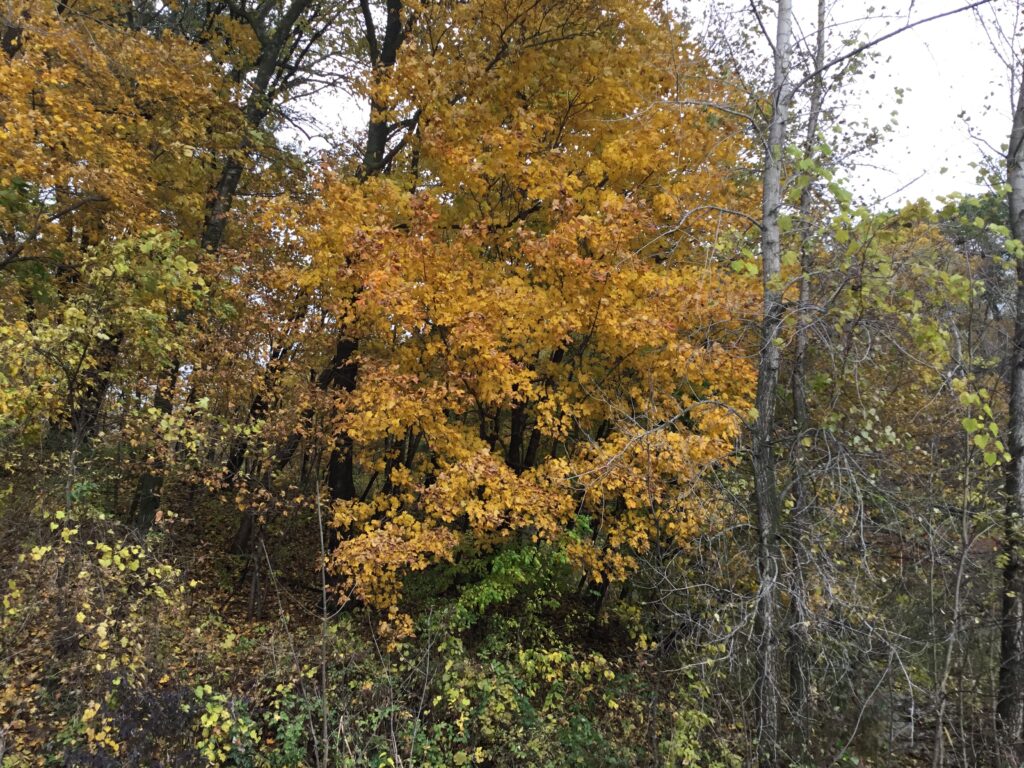
The maple sugaring season varies by region but generally starts in late January and can last until mid-April. When the tree sap starts and stops running, though, depends greatly on day and nighttime temperature fluctuations: if temperatures fall below freezing at night but climb to the 40°F+ range during the day, the sap will begin to flow and it’s time to get out there and tap your maple trees! Watch the weather forecast for this upcoming freeze/thaw pattern but don’t tap your trees too early as it can cause the spiles to freeze in the taphole which may damage the tree. Remove your spiles when you have enough sap or when the tree buds out as that can lead to an off or “buddy” flavor in the finished syrup.

If you’re adventurous and trying other tree varieties, their seasons are slightly different from sugar maple.The freeze/thaw cycle does affect how well sap flows but in more temperate regions such as the Western United States, trees can be tapped all winter as long as they’re dormant. In all cases, sap will not produce good-tasting syrup if the tree is in bud or growing leaves. Here’s a quick rundown of the most popular non-maple trees that folks tap for syrup:

Birch: The sap run usually begins later in the year in late March or early April, often at the end of the maple sugaring season. Daytime temperatures need to get into high 40°s and low 50°s with cold nights to get the sap flowing. Because of this late-season harvest and warmer weather, the sap spoils more quickly if left sitting all day in the buckets so birch sugarmakers often must collect sap twice per day. The season, too, is shorter and typically lasts for only two to three weeks.

Black Walnut or Butternut: As with sugar maple,the sap flow depends on the same freeze/thaw cycle and the season begins at the same time. The length of the season, though, is sometimes a bit longer as these trees are often the last to bud out. You will notice that the color of the sap will darken over the season and the darker it gets, the more robust the finished syrup will taste.

Sycamore: The tapping season and sugarmaking process are identical to maple trees and the sap-to-syrup ratio is similar. The flavor, though, is not the greatest and many considered this a “syrup of last resort” due to its almost-scorched taste. It can, though, be blended with other saps and will add a bit of butterscotch flavor when mixed with maple or other syrups.

Now that you know when to tap, click here to learn more about how to taplook here for how to make it into maple syrup. Of course, all this info (and more!) is in our book included with every kit!

Don’t forget, during the tapping season we put out a weekly newsletter with lots of great info. Sign up here if you’d like to get the Tapping Times and you’ll also get a FREE Quick Guide to Maple Tapping ebook.

Maple Syrup Recipes

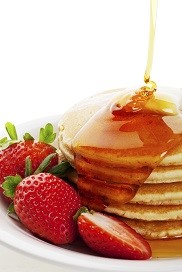
pancakes and strawberries with maple syrup pouring over them
Golden syrup drizzling down over hot buttered pancakes with a strawberry garnish.

Of course, your first meal of homemade maple syrup just has to be a big stack of pancakes! This is what you worked for all season and it tastes so good. After you’ve had your fill of flapjacks – and still have a pantry full of pure maple syrup – you’ll want to venture past the breakfast table.

Pure maple syrup can easily be used as a replacement for sugar but obviously it will impart a maple flavor to your dish. Generally, one cup of pure maple syrup equals one cup of sugar and can be swapped out in most recipes. For cookies and cakes that also use liquid ingredients, just reduce the liquids by three tablespoons for each cup of maple syrup used.

We’ll add a couple recipes each week during the season and send out a link in our newsletter. If you’d like to get these yummy recipes (and our really helpful newsletter!), click here.

Because sugar was scarce but sugar maple trees abundant in pioneer days, many of their sweet treats were made from maple syrup – and those recipes are still good today. Try some of these this year, you can use already-bottled syrup or make them during your initial boiling phase. Be sure, though, to calibrate your thermometer each time you boil syrup (click here for how to do that).

Granulated Maple Sugar. On a non-humid day, heat syrup to 252°F to 257°F (or 40°F to 45°F above the boiling point) and transfer immediately to a flat pan. Stir within this pan until it becomes granulated and all the moisture is gone. Sieve through a coarse screen (1/8-inch hardware screen) to create uniform granules. Use as a one-to-one white sugar replacement.

Hard Molded Sugar. Follow the same steps for granulated sugar but do not put through a screen. Instead pack into candy molds – be sure to follow the manufacturer’s directions on prepping and cleaning the molds.

Molded Soft Sugar Candy. Heat syrup to 245°F (or 33°F above the boiling point,) pour into a flat pan, and allow to cool undisturbed to 200°F but no lower than 160°F. Once it drops to this temperature, stir until the syrup is soft and pliable and pour or pack into molds. When cool, poured candies will have a glazed surface.

Hard Maple Sugar Candy. Boil the syrup to 240°F to 242°F (or 28°F to 30°F above the boiling point.) Keep at least 1½-inches of liquid in the pan to avoid scorching. Allow to cool to 150°F and pour or pack into molds.

Jack Wax or Maple-on-Snow. Kids will love this one! Start out by filling a pan with clean snow or shaved ice and keep frozen. The boiling range is wide for this treat: at the low end of 230°F (or 18°F above the boiling point) you’ll get a taffy-like candy while at the high end of 252°F (or 40°F above the boiling point) you’ll have a glass-like candy. Consistency changes within this temperature range. Once your syrup has reached your preferred temperature, immediately pour it in ribbons on the snow or ice. It will be done instantly and is typically eaten right away, as it does not keep well.

Has Your Maple Sap Stopped Running?

A few years ago many areas of the United States saw a very early sap run so some folks started collecting sap in mid-January, At first they had a good run but eventually saw decreased output and some tapholes dried up completely.

It was unusual and so many sugarmakers we’re asking us, we went to the experts at our favorite extension services. Many thanks to University of Vermont, Ohio State University, University of Minnesota, and Cornell University for patiently answering our questions and offering some helpful suggestions. Here’s what they think happened and what you can do to keep on tapping after your lines seem to clog up.

For starters, this all assumes the tree has not budded out – if that’s the case, the season is done because the syrup will taste bad.

Two reasons for an early shutdown of your taps:

No. 1: Your area has stayed above freezing for too long. Without the freeze/thaw cycle, the sap flow stops or is greatly decreased. Freezing is required to produce the negative stem pressure needed to draw more ground moisture into the stem and crown of the tree. If below freezing nights and above freezing days return to your sugarbush, the sap may resume its flow so leave your spiles in and see what happens.

Author’s Note: My own experience bears this out. During that 2017 season in Minnesota we tapped on 2/18 when the 10-day forecast looked sappy. Right away, we had a good sap run but by 2/20 the temperatures were staying in the high 50s and even into the 60s. That’s right, Minnesota in February! I left the spiles in but we had no sap during these warm days. Then more normal weather moved in and about a day afterwards, sap started flowing again. It wasn’t back to the previous amount but it was steady.

No. 2: Your area got really warm (in the 60s or higher) and the sap hole is probably plugged (some call it “dried up” which is not technically accurate). When the temperature is this warm, bacteria grows and thrives in a sugary substance like sap. It will travel into your spile (especially if you’re using a bucket for tapping) get into the tree and plug the xylem vessels. (Imagine large straws extending up and down the tree – this is what you tap into to extract the sap). Don’t worry, this is the natural mechanism through which trees heal themselves. Great for the tree but not so good for the sugarmaker. Once this happens, that taphole is done.

Redrilling it or reaming it out would only further damage the tree so that is not recommended and it would not remove the “plug” that’s above and below the taphole. If you suspect this is the case, leave your spiles in until another freeze/thaw cycle and see if the sap will run. If not, remove them and hope for better weather next season.

One Extension Office pointed out that having snow pack around your tree will help keep the temperature down a bit which will inhibit bacteria growth. They also mentioned that using a closed tapping system such as taps and tubes, shop here gives bacteria less opportunity to enter the system.

Tapping More Holes?

So, if you’ve determined your taphole is a goner, can you drill another hole? This is a maybe and it depends on how many tapholes you already have in that tree (see the chart below) and if you can find a new spot at least 6” away from the existing tapholes. If you can meet the necessary criteria, you can try drilling another taphole but make sure the weather forecast is favorable.

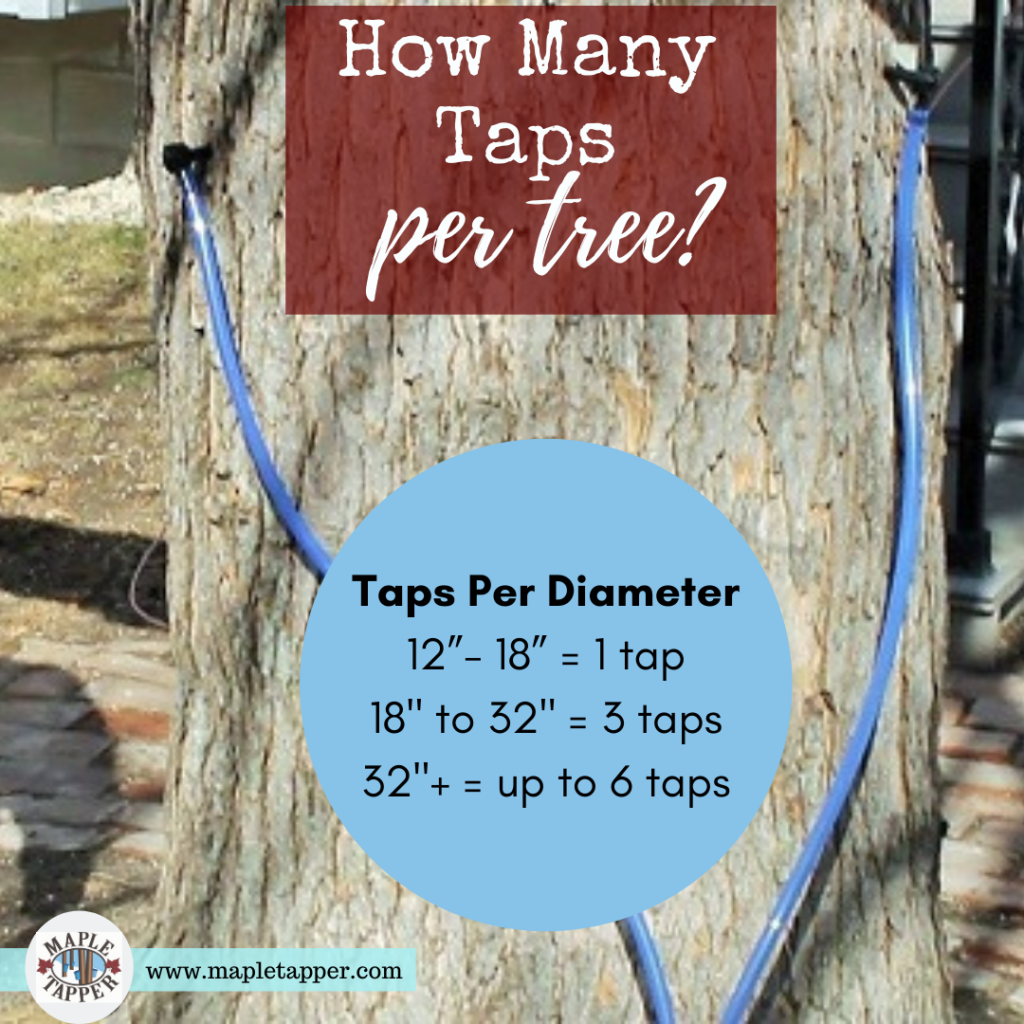
Taps per Diameter Guide
12”- 18” diameter = 1 tap
18” – 32” diameter = up to 3 taps
32” or more diameter = up to 6 taps

One interesting suggestion I heard was to tap your trees in sequence to account for weird weather patterns. For instance, if you normally tap 20 trees, tap ten during the first warm spell and tap the remainder during the normal tapping season in March (depending, of course, on the temperature forecast and before the tree has bloomed). This does add more work to the cooking but we have seen that it’s possible to freeze sap without much loss.

How To Increase Your Syrup Production

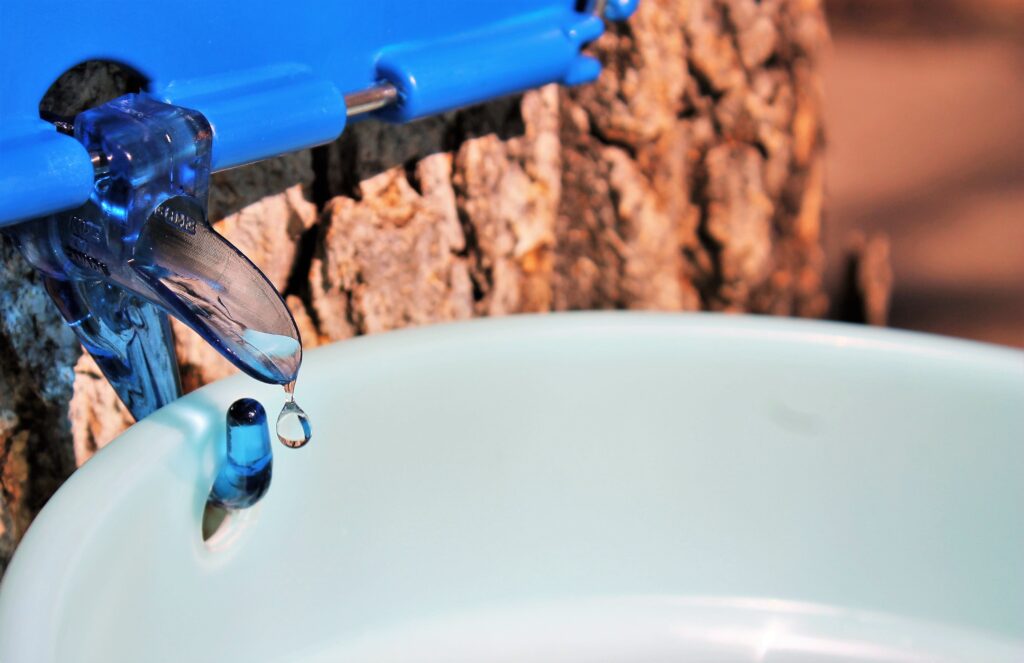
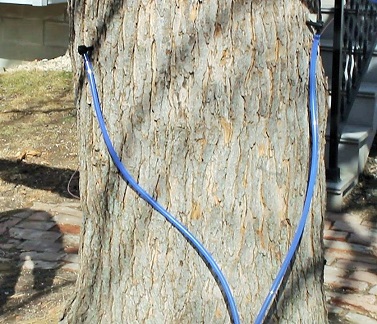
Two blue dropline tubes attached to spiles in maple tree for collecting maple sap.
Multiple maple sap taps on a large silver maple tree.

For those of you who’ve made it through one season, the natural second season question is: how can I get more syrup? Well, as you’ve probably already guessed, you can only get more syrup by collecting more sap. So, now what? Before you run out and buy 40 acres, here’s a few suggestions that you might be able to put into use this year:

#1. Put more taps in each tree. Most mature trees can handle more than one tap – see the chart below for size needs – measure the diameter at about 4 ½’ above ground level to determine how many taps to use but never use more than 6 taps per tree. Using tubing is a great time saver as you can thread more than one tube into each bucket. (Our Deluxe Kit comes with 20 taps and tubes which should help out with this step! Order here, shipping is free!)

guide to amount of taps per tree by diameter

#2. Try other non-sugar maple trees. Every tree has some “sugar” in its sap but not all of this sap is as delicious or as high in sugar content as maple sap. Favorites include birch, black walnut, sycamore, and other maple family trees such as box elder, silver maple, or red maple. Because the sugar content is lower, it takes a lot more sap to make equivalent syrup amounts (for instance, with birch you can expect a nearly 100 to 1 sap-to-syrup yield).

Non-sugar maple syrup can be an acquired taste with descriptions ranging from wild-tasting to bitter to earthy, expect something different if you decide to try making syrup from one of these trees. Of course if it tastes good to you and you’re willing to put in the time, then it’s a worthwhile endeavor! Each variety will have a different flavor, color, and sweetness; the seasons are generally the same; and the process of tapping, collecting, filtering, and syrup making is similar to maple tapping. Our book included with every kit thoroughly explains the intricacies of each tree (or you can order the book separately through our website).

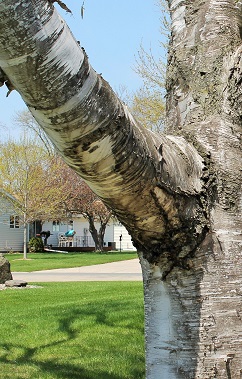
birch tree

#3 Pool your efforts with other sugarmakers. This may not net you a lot more syrup but we firmly believe that many hands make light work especially when it comes to boiling sap. Maybe you have a great evaporator set up with lots of fuel but not as many trees as you’d like and your neighbor has tons of trees but no cooker. If you pool your resources you’ll save time cooking and probably end up with a little more syrup than if you worked alone. Plus it’s just fun to have a partner in crime!

Can You Freeze Maple Sap?

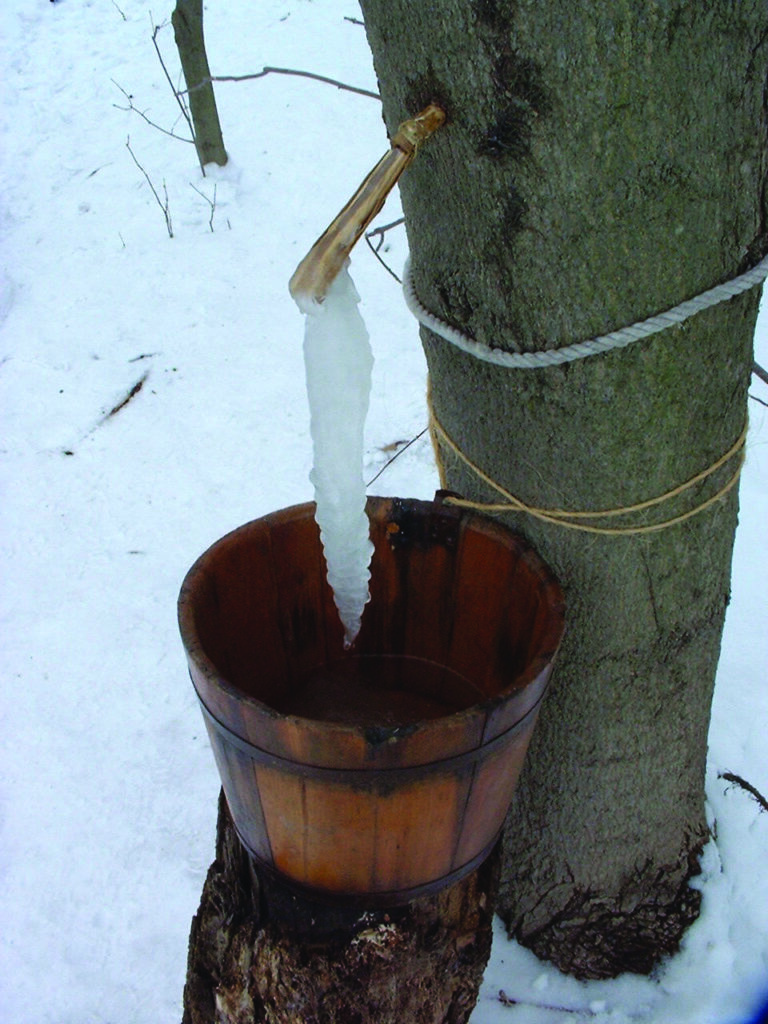
Frozen sap running into maple bucket
Frozen sap out of maple spile into bucket

Have you been wondering if it would be faster to freeze the water in your sap instead of boiling it down? We’ve all found our sap buckets with chunks of ice after a really cold night and we know that ice is mostly water, so why not just toss it out and save time evaporating it during boiling? Early sugarmakers did just that mostly because they didn’t have access to heavy-duty tools that would stand up to high heat. Large modern day sugarmakers are using freeze concentration in their operations to save time. If you’d like to try it out this season, this article will highlight the hows and whys of freezing sap and we’ll begin with this author’s unscientific freeze experiment.

 Because necessity is the mother of invention . . .

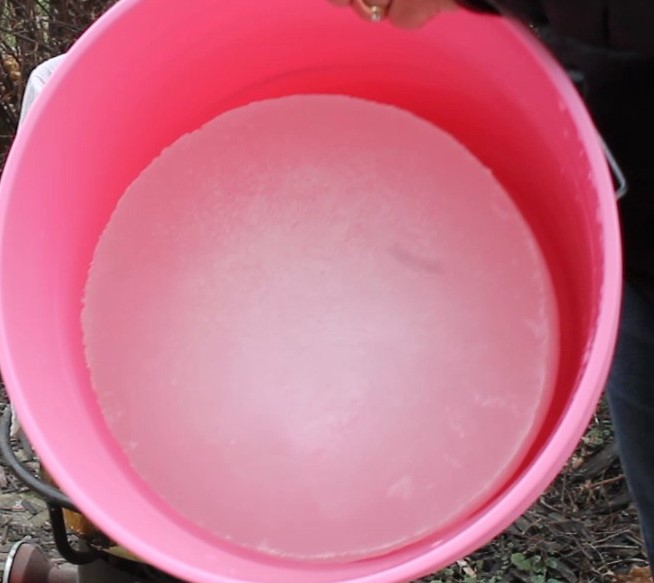
I tried my very own freeze experiment in 2015 mostly because it was an abysmal sap year and I wanted to boil all my sap at once at the end of the season. I only gathered about 20 gallons of sap in 2015 so as I collected it, I filtered it, and froze it in five-gallon-buckets. It was cold enough outside that we just put the buckets in the shade and banked them with snow. Sure enough a big block of ice formed in each bucket. When I was ready to cook, I let the buckets thaw a bit and poured the liquid into my pot. As you can see from these pictures this left a lot of ice in the bucket. I boiled my syrup as usual and ended up with the standard yield of about 40-to-1.

pink bucket with frozen chunk of water and maple sap

But while I was boiling my first batch of sap, those big chunks of ice melted. I just couldn’t help myself so I boiled these former ice chunks down and do you know what? I ended up with more syrup but it was probably closer to a 50-to-1 yield. So in my unscientific judgment, freezing did work somewhat to concentrate the sap but if I would have thrown out that ice, I would have lost about a half-quart of syrup!

Now I’m not saying it doesn’t have merit and if you can freeze your sap outside, you would use zero energy for at least part of your concentrating steps. One way to try this would be to use a multi-stage freeze/thaw method where you let the ice chunks melt, then pour off the liquid to boil, and then start the freeze/thaw/cook method over again.

One thing everyone agrees on, though, is you still must boil your sap to achieve the caramelized color and flavor we all love. Besides it has to be heated up for bottling anyway and there’s no way around that!

A more proven freeze method.

  Beyond this backyard trial and error, the professionals have been working out a way to freeze the water in sap as it flows through the lines into the sugar shack. The upfront cost and set up of these systems is not really feasible for the hobbyist but it’s interesting to take a look at the method. Typically at the end of the mainline but before the storage tank, the sap is run through a refrigerated pipe. The water freezes, concentrating the sap which continues to flow through into the storage tank for boiling. The ice is melted and drained off.

When Does Tapping Season End?

There are three simple ways to tell when the oh-so-short maple tapping season is done.

Sign #1: You Have Enough Maple Syrup!

We sincerely hope you reach your personal goal of maple syrup production before the season officially ends. This is usually indicated when your shelves are overflowing with maple syrup and your family is begging you to stop boiling sap and go get some groceries already because they are tired of pancakes!

But we all know you really can never have enough pure maple syrup so most of us rely on the next signs to know when to stop.

Sign #2: Weather Warms Up and Sap Slows Down

The forecast says it all . . . as nighttime temperatures warm up past freezing (and stay there), sap runs to the top branches which causes the tree to bloom or bud out. Also, the warmer the weather, the more energy the tree has to heal the taphole you’ve drilled which cuts off the sap flow from that spile (this is sometimes referred to as “drying out” but it really is just sealed over). Anyway, once you see buds, you’ve moved onto Sign #3.

Sign #3: Buds Open Up

As the warm weather and Spring Fever grips us with dreams of gardening, it also encourages the tree to open up its little buds and start growing leaves. But once those buds open up, the sap takes on an off-flavor and makes for odd-tasting syrup and the sugaring season has come to its end.

When You’re Done: Pulling the Taps

Once you’ve decided to stop collecting sap, gently pry your spiles from the trees. Just leave the taphole as is and it will naturally heal over the summer. Thoroughly rinse your equipment in hot water but do not use dish soap. Some folks use a mild bleach and water solution (especially for tubing) but you must thoroughly rinse all equipment so no traces of bleach remain. After everything is dried, pack it away for next year.

If you’re really adventurous, you can find a way to extend your season by tapping other varieties of trees such as birch or black walnut. Their seasons last a bit longer than sugar maples, read more on our blog here . . .